The Albuquerque Museum of Art & History

Old Town Albuquerque Entrance

Not all museums are created equal and, although small, the Albuquerque Museum of Art & History was a very nice place to visit.

The museum is right next to the historic old downtown.  Parking is free ~ you just need to give your parking spot number at the admissions desk.  We were also able to gain free admission to the museum since we arrived on a Sunday morning and there is free admission from 9 a.m. til 1 p.m.  Free, free and free.  We were really liking that everything was free and later went on a 1 hour free guided tour of the old downtown that was given by a volunteer.

Albuquerque Museum of Art & History
Albuquerque Museum of Art & History, Outdoor Sculpture

I was allowed to take pictures inside the Museum with my iPhone as long as I did not use the flash.  So ~ I took pictures of some of the artwork that I felt drawn to.  I find that art is very much personal preference and sometimes I’m not sure why I’m drawn to certain pieces.

From afar, this first piece of art doesn’t look like much outside of some brilliant colors …

Artwork, Albuquerque Museum of Art & History

But up close there is a lot of detail work that was done.  I wish I had been able to ask how long it took the artist to do this because it’s quite amazing.  I have trouble working on my quilts on a small scale.  This artist had to visualize a larger picture which is something that my brain has not mastered.

Artwork, Albuquerque Museum of Art & History

This was woven together and is really quite masterfully done.

Artwork, Albuquerque Museum of Art & History

I had to take my glasses off and stand very close to see all the detail.  Wow! and Wow! again.

Artwork, Albuquerque Museum of Art & History

For all the time I spent looking at this piece, I totally forgot to look to see who the artist was.  I’m disappointed in myself.  Sigh.

The next piece of artwork that intrigued me is by Jorge Lizarazo from Columbia.  It was a tribute/interpretation of the work by Venezuelan geometric artist Carlos Cruz-Diez.  It simply stood out boldly from the other pieces of art around it.

Artwork, Jorge Lizarazo, Colombia

This next piece of art was made using PET bottles by artist Alvaro Catalan De Ocon who “recruited the indigenous Guambiano and Esperara-Siapidara communities in Colombia to recreate lamps by applying traditional weaving techniques to vertical strips of plastic PET bottles.”

PET Lamp, PET Bottles, Paja Tetera
PET Lamp, PET Bottles, Alvaro Catalan De Ocon

The Cactus Light below was made from pine cutoffs, bottle bulbs, RGBW LED strip lights, brass fittings and fabric cable.  I’m not sure why it caught my attention except that it looked very weird.  (laughing)

Cactus Light
Cactus Light

The art displays in the first room were from Latin America and had mostly items that were “repurposed.”

This next piece of artwork is really cool.  You have to pay close attention to the details.

It’s a guitar ~

Guitarra, Artist Pedro Reyes, Mexico

But look what it’s made of ~

Guitarra, Artist Pedro Reyes, Mexico

Cool, right?  The artist, Pedro Reyes, collaborates with the police department in Mexico City and refashions confiscated guns and makes them into musical instruments.

This next piece of art by artist Elmer Schooley looks abstract from afar …

Hot Country by Artist Elmer Schooley

But look at this Hot Country close up ~ “the artist exaggerates the heat of the dry earth and contrasts the bright salmon warmth of the soil with the cool green and sage colors of the mounded shrubs.”  I couldn’t have said that better.

Hot Country by Artist Elmer Schooley

This next piece of art evokes emotion ~ anger? frustration?  It’s called Woe Man I by Judy Chicago who lives in Belen, New Mexico. Woe Man I is a cast paper sculpture that “combines the angst of modern life with outrage at the denigration of fundamental principles of equality, creativity and emotional sensitivity.”  I have to say, I didn’t get all of that from this sculpture.  I saw pain and a sense of anticipation of when it will cease.

Woe Man I by Artist Judy Chicago

The next two pictures I mainly photographed because I liked the colors and am considering them for quilts.  I didn’t jot down the artists’ names ~

Painting at the The Albuquerque Museum of Art & History

Really ~ they are nice colors for quilts, aren’t they?

Painting at the The Albuquerque Museum of Art & History

I really enjoyed this museum even though our visit was cut short because an announcement over the speakers stated that they were giving a one hour free guided tour of old downtown Albuquerque so we hurried out for that.

So much history here.

Santa Fe, New Mexico

Cactus, New Mexico
Cactus, New Mexico

A recent trip to Albuquerque led us onward to Santa Fe even though we’d heard so many negative things about it, i.e. it’s expensive, the people are snooty, you’ll get sick from the altitude, etc.

Santa Fe is about an hour from Albuquerque via car.  We made sure we had plenty of water to keep us hydrated as that’s one of the reasons we’ve read that people get sick when heading to higher altitudes.

Our destination in Santa Fe was the street called Canyon Road which has many local artists and shops.  We arrived early and parked in the public parking lot although the parking pay station didn’t want to take our Chase Sapphire Visa Card because it was too thick. Weird, huh?  We wound up having to use one of our other credit cards.

We arrived just as the stores were opening so the streets were almost bare.  Although there were a few clouds, it was a beautiful day for strolling.

Canyon Road, Santa Fe, New Mexico

The absolute best store I walked into was Luca Decor Contemporary Art.  I immediately fell in love with the handmade wooden spinners.  Each one is made to order so you can pick your colors.  They are just a tad pricy though ~ okay, the truth is, they are more than a tad pricy, they are pricy.  They come in different sizes but at $900 and up … well, I’ll have to wait to see if one is gifted to me.  Yeah, right.

Luca Decor Contemporary Art, Santa Fe
Wood Spinners, Luca Decor Contemporary Art, Santa Fe

We saw a statue of a huge horse head.  It didn’t seem interesting to me until I thought about how long it took the artist to make it.  Then it had a WOW factor.

Canyon Road, Santa Fe, New Mexico
Large Horse Head, Canyon Road, Santa Fe, New Mexico
Canyon Road, Santa Fe, New Mexico

We bumped into a local artist who was quite chatty and did his best to sell us one of his paintings. His smooth “how much would you pay for it if you were going to buy it?” made us smile.

Canyon Road Local Artist, Santa Fe, New Mexico

The one thing I found really interesting about Canyon Road is that there are no public restrooms.  One shop owner had a sign that said “Restroom” and when I asked to use it I was told it wasn’t for the public.  Uh, okay.

So, we went into a cafe in town called the Teahouse, sat down and had a scrumptious breakfast ~ just so we could use the restroom.  To top off the strangeness of Canyon Road having only one restroom, the Teahouse had ONE restroom for both men and women.  It’s quite a disappointment to only have one restroom in this famous area.

Having said that, I was glad we stopped in because I had a very unique “oatmeal.” It was gluten- free oats, buckwheat groats & forbidden rice, served with maple cream & whipped cream.  I had asked the waitress to forgo the whipped cream but she assured me I wanted it and had it served on the side.  It was the best whipped cream I’ve ever had ~ very light with just a hint of sweetness.

Teahouse Oatmeal, Santa Fe

After we finished our “snack,” a gentleman came to our table and asked us how we liked our breakfast.  We told him it was great and then found out that he was the owner of the Teahouse.  He was really really nice and this gesture added sweetness to the visit here.  (We found no snooty people here …)

As the afternoon drew near, it started to get chilly so we headed downtown to a glass shop called Liquid Light Glass where we learned how they make glass chilis.


Making A Glass Chili In New Mexico

Canyon Road, Santa Fe, New Mexico

On a recent trip to New Mexico, we were quite pleased to be able to stop in to a place called the Liquid Light Glass which holds classes for people to learn how to make different glass sculptures/items.

This business has a 5 star rating on TripAdvisor and we thought it was well earned.

When we arrived, we headed into the store which has many beautiful glass items that are made by the instructors and ready for purchase.

We were encouraged to go into the classroom via a door and sit in on a class that was being held ~ no charge.

The instructors were busy instructing a person on what to do so we did not get much interaction with them.  But none was really necessary as we were quite enthralled with what we were watching.

There were three people in this class and each had to make their project individually.  A gentleman who had moved to Santa Fe from California has been taking classes here for 3 years.  His goal this time was to make glass chilis so he could make a Christmas tree.  What a unique idea!

The kiln that was used for this particular project heats up to 1200° Fahrenheit.  A tad hot, no?

Liquid Light Glass Kiln

After the glass is in the kiln, it is taken out and immediately “shaped” into the object you’d like ~ in this case, a chili.  One has to move quickly though so the glass doesn’t cool down too quickly.

Making A Glass Chili

Notice how the student is using an instrument that looks like pliers to shape her chili.

Making A Glass Chili

She makes sure the tip is pulled to the length she wants her chili to be along with twisting it to the right shape.

Making A Glass Chili

When she pulls her instrument away she looks to make sure it’s what she wants.  If a mistake is made, the glass goes back into the kiln.  This one looked pretty good.

Making A Glass Chili

Wait … just a little more shaping …

Making A Glass Chili

While the chili is being shaped, someone else is prepping the glass for the stem.

Making A Glass Chili

Next it’s taken over to the place where the glass chili has been inserted so they can add the stem to it.

Making A Glass Chili

And then the stem is carefully shaped.

Making A Glass Chili

Next the chili is put into a ‘refrigerator” to cool overnight.

Unfortunately, I have no pictures of the finished product but the process itself was fascinating to me and the glass pieces they sell are absolutely beautiful.

If you’re ever in the Santa Fe area, this is one place you should visit.

A New Mexico Vacation

New Mexico is a very nice place to visit in the spring although we’d heard that it could be quite windy.  Well, it was a little windy but that didn’t stop us from galavanting around and visiting lots of new places.  We had such a great time and this trip was extra special because we were celebrating our 35th wedding anniversary.

We stayed at the Holiday Inn near old downtown Albuquerque.  From the minute we arrived to when we left, the hotel did everything right.  Has that ever happened to you?

Upon checking in, we, being IHG members, were upgraded to a king suite which gave us lots of room for the 5 days that we would be there.  The front desk clerk also gave us two bottles of water and 500 bonus points. I’d heard that they normally ask you which you would prefer, i.e. water or points, but we were given everything.
Our room was clean, quiet and the afternoon warm chocolate chip cookies made the day even better.

Old Downtown Albuquerque has lots of shopping (approximately 150 stores) and history (the nearby museum gives an hour walking tour). It is definitely a great place to walk around.

Plaza Don Luis, Old Downtown Albuquerque

One of the restaurants where we had breakfast was the Church Street Cafe.  We arrived just when the restaurant opened and a waiter seated us and brought us coffee and water.  We had an interesting exchange with the waiter when we placed our order.

Church Street Cafe
Church Street Cafe, Albuquerque

I requested the Huevos Rancheros which normally isn’t a problem but in New Mexico everything seems to have chiles ~ and they aren’t mild even if they tell you they are.

When I requested my meal with no sauce the waiter looked at me strange but didn’t say anything.  Then my husband requested no sauce and the waiter wrote the order down, looked at us weird and said “Where are you from?”  To which we replied “Minnesota.”

The waiter then laughed and said “Okay, now I understand.”  We all laughed and explained to him that the chile sauces seem to be quite hot here and he agreed.

We received our food quickly since we were the only ones there.  The food was quite good, even with no chile sauce, and we left happy.
Walking around old downtown Albuquerque is quite relaxing.  Although there are a lot of “old” buildings, some of them have been re-built.  One way to tell (we were told) was by how thick the entrances to the buildings are.  If they are 2-3 feet thick then they are the oldest.
There are many courtyards in the old downtown which make it easy to walk from store to store.

Old Downtown Albuquerque Courtyard

As the story goes, this was the building that housed the first church.
Old Downtown Albuquerque 1st Church Building

The San Felipe de Neri Parish church’s location has moved across the street and a new building was built which is much bigger and has both a convent and a rectory.

San Felipe de Neri Parish, Albuquerque

The rectory has a “widow’s walk” which is not common in Albuquerque.  The “widow’s walk” is a railed rooftop platform from which women would watch for the ships/boats that were coming into port to see if their husbands were coming home.  They were mainly used in the coastal eastern towns so it’s unique to see it in New Mexico.

San Felipe de Neri Parish Rectory, Albuquerque
San Felipe de Neri Parish Rectory with Widow’s Walk, Albuquerque

The tree below has a statue of the Virgin of Guadalupe (or Madonna) carved inside of it.

Albuquerque Statue of Virgin de Guadalupe in Tree

There were so many interesting things we explored in New Mexico.  It was definitely a place I’d want to go back and visit.

Paleo Baked Lamb Chops with Cauliflower

One of my favorite meats ~ lamb ~ is the main ingredient for this recipe besides the cauliflower.

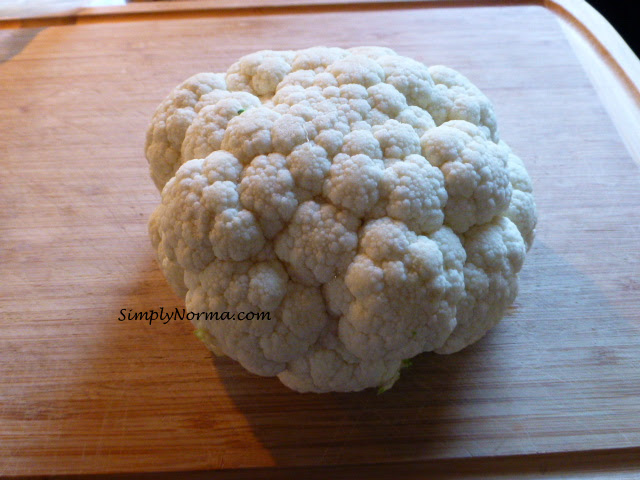
Cauliflower
Cauliflower

Most people aren’t fans of cauliflower but I say the vegetable has just gotten some bad press.  It’s really a good vegetable when combined with the right foods.

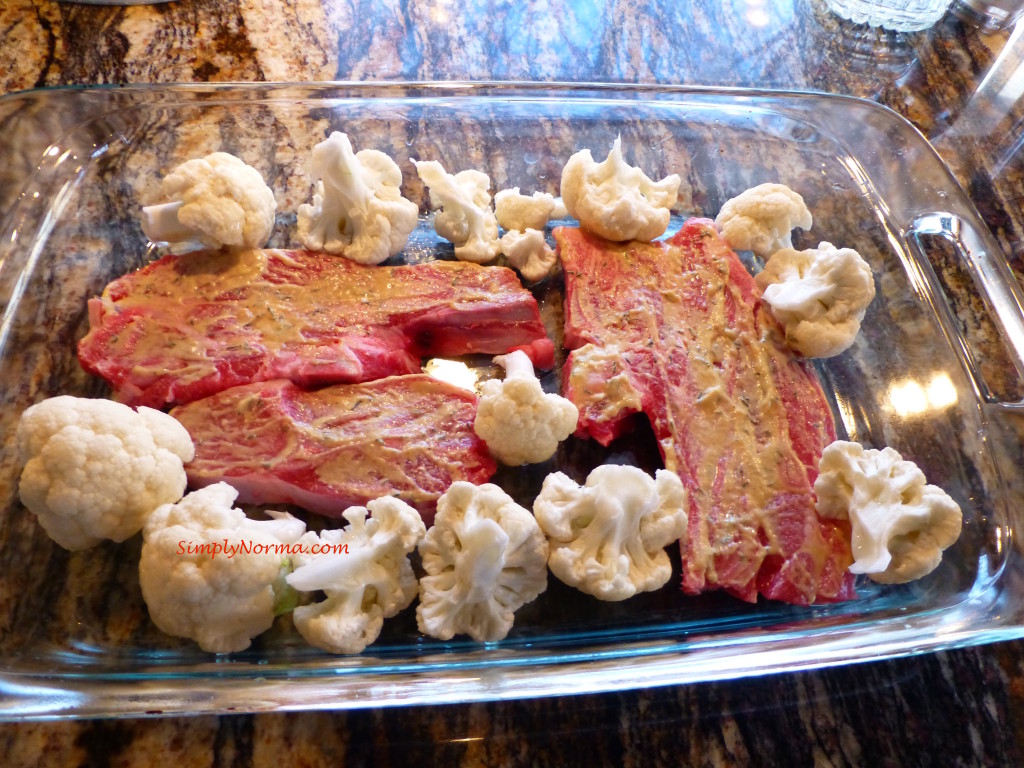
Lamb and cauliflower ~ like birds of a feather who flock together ~ go really well together.

Because this dish is baked, the cauliflower comes out nice and soft.

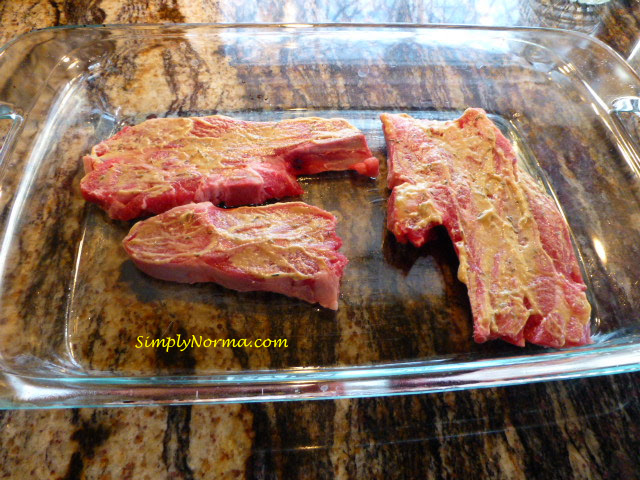
The other surprise in this recipe is the mustard. Have you ever had mustard with lamb? I never had but this mixture is not too strong and tastes quite good.

Lamb with Mustard
Lamb with Mustard

I will grant you the dish looks a little odd paired together but, hey, there’s a lot of other pairings out there that look odd but taste great.

Lamb with Cauliflower

So, go ahead and give this paleo Baked Lamb Chops with Cauliflower a shot.  I really don’t believe you’ll regret it.

[amd-zlrecipe-recipe:5]

For additional paleo recipes, click here.

Paleo Braised Chicken with Rosemary & Carrots

A few years back, I decided to go on a carrot “binge” and ate gobs and gobs of carrots. Then an interesting thing happened …

My skin started turning orange~ish.  It’s true.  I didn’t believe all the stories out there about this happening to people until it happened to me.

Okay … that’s my side story and I’m going to stick to it.  (laughing)

We always have carrots in our refrigerator as it’s one of the vegetables my husband takes with him for lunch.

So I thought I’d sneak a few to use with this chicken recipe ~ no fear of turning orange here (haha).

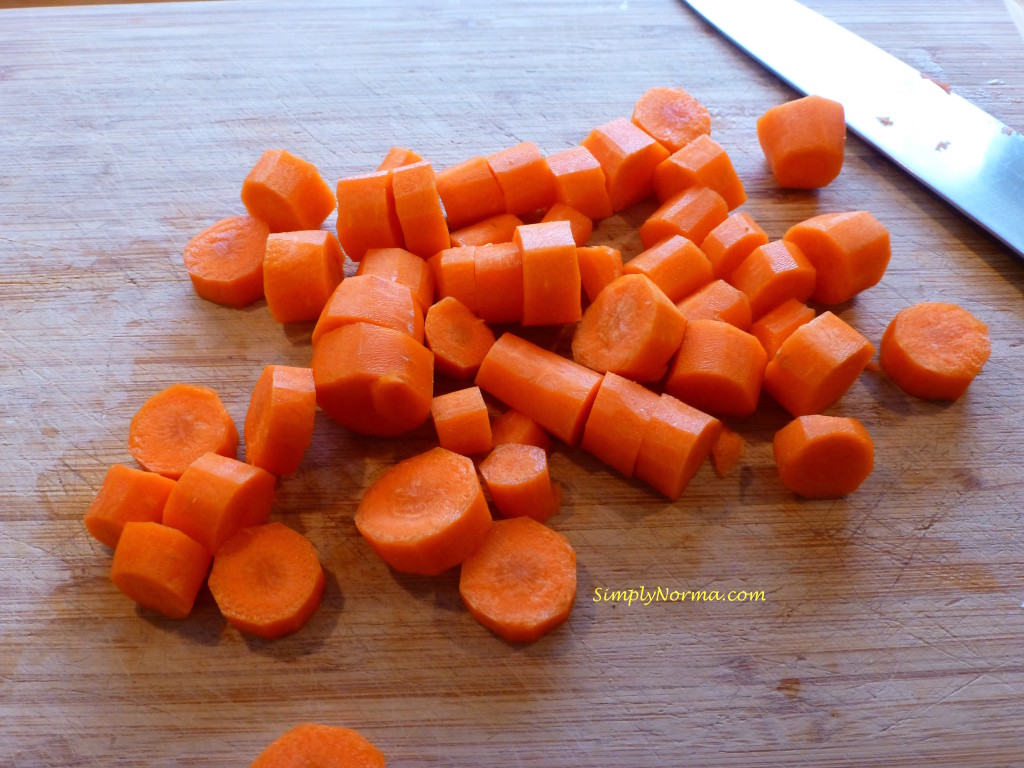
The recipe is quite simple and the major players are … carrots ~

Sliced Carrots
Sliced Carrots

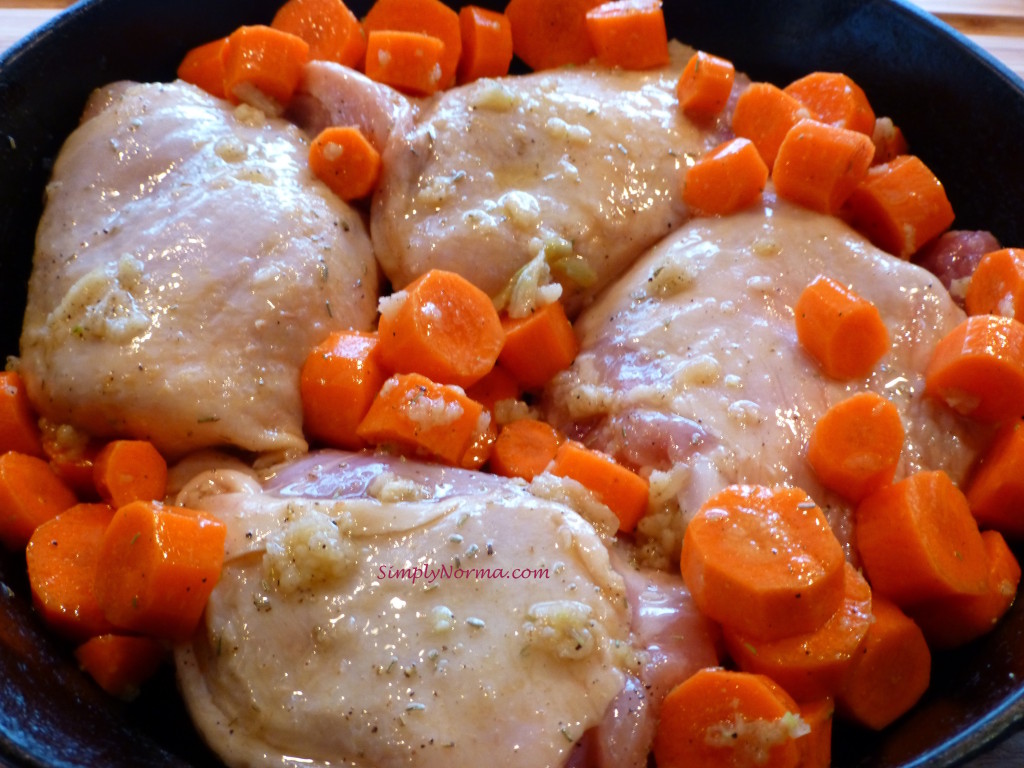
Skin on ~ bone in chicken  that is combined with the carrots and a rosemary mixture …

Skin On ~ Bone In Chicken

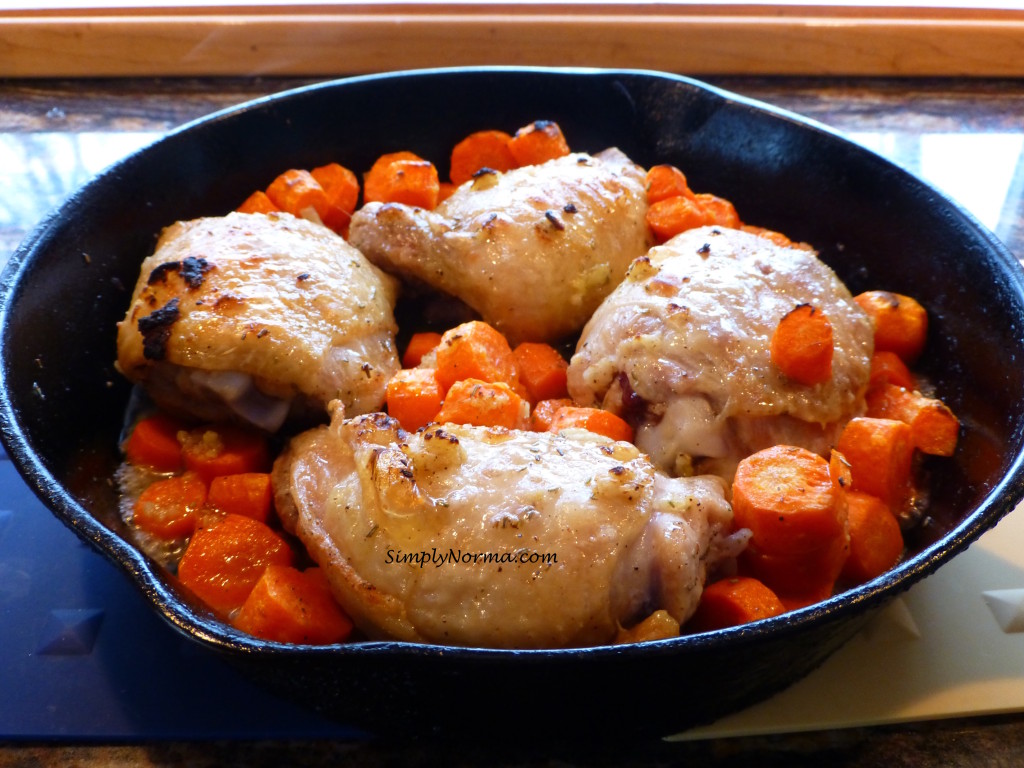
This will be put in a cast iron skillet and baked for 30 minutes then broiled for another 5-10 minutes (be careful you don’t burn it).

It will come out looking beautifully like this ~

Braised Chicken with Rosemary & Carrots
Paleo Braised Chicken with Rosemary & Carrots

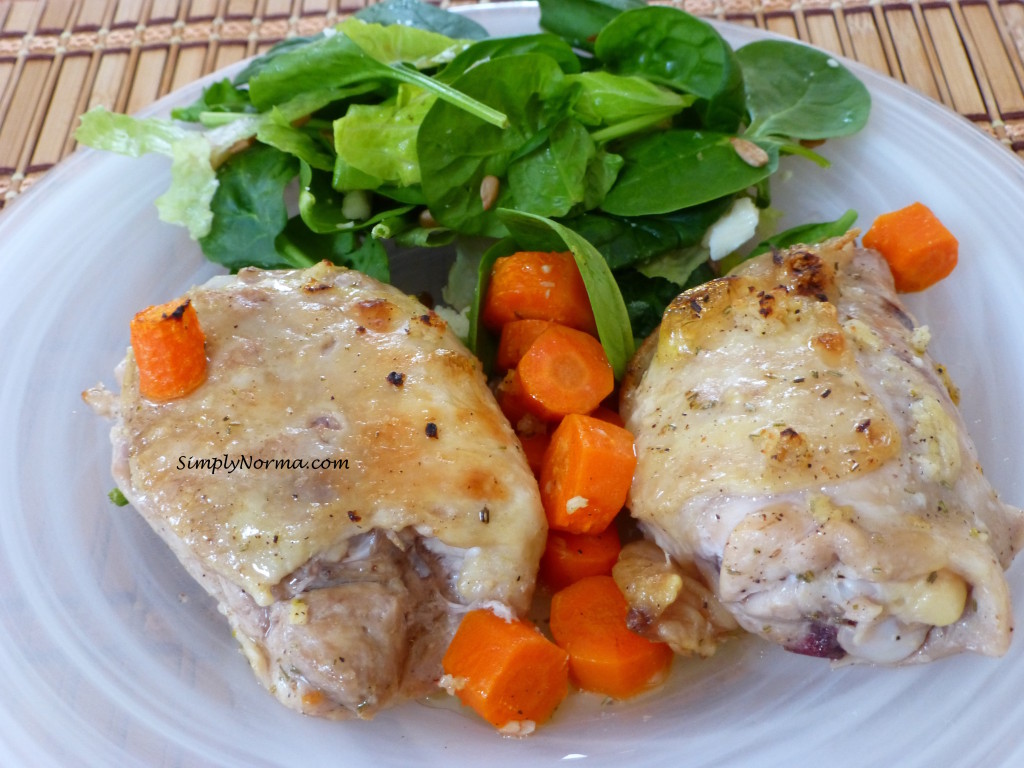
Pretty good looking, no? I served this paleo Braised Chicken with Rosemary and Carrots with a side salad.  It’s really a complete meal all by itself though.

Braised Chicken with Rosemary & Carrots
Paleo Braised Chicken with Rosemary & Carrots

Okay so ~ here’s the recipe for you to look at and print if you so choose.

Enjoy!

[amd-zlrecipe-recipe:4]

For additional paleo recipes, click here.

Baked Chicken With Cherry Tomatoes and Garlic

Baked Chicken with Cherry Tomatoes and Garlic

Well now, here’s another paleo chicken recipe.  I have to confess that I like chicken.  If I had to choose only one meat to eat though, I’d choose lamb although chicken would come a close second.

When I’m looking for recipes to to try and possibly adapt for the paleo diet, I go to all of my resources including books that I haven’t looked at in years.  Sometimes the perfect recipe is right there.

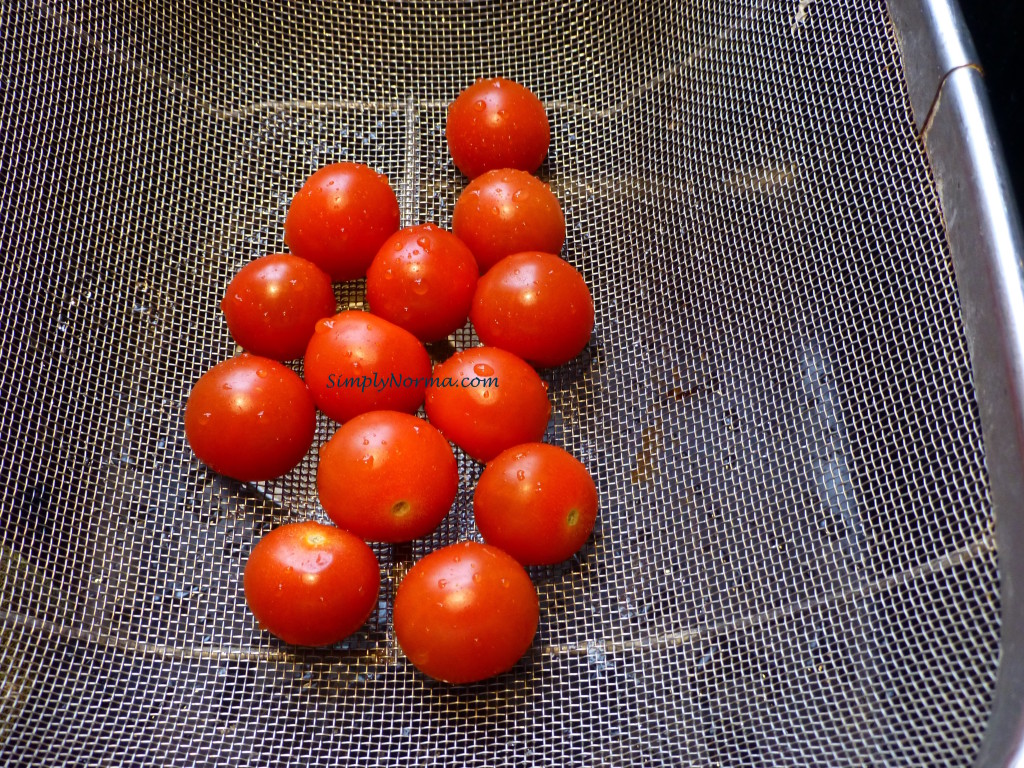
This recipe came into play because it seems that every time I go to the market I see containers with the cherry tomatoes and I always wind up getting one.  Then I get home and wonder what to do with all of them.  This Baked Chicken with Cherry Tomatoes and Garlic is perfect for just this occasion.

Cherry Tomatoes
Cherry Tomatoes

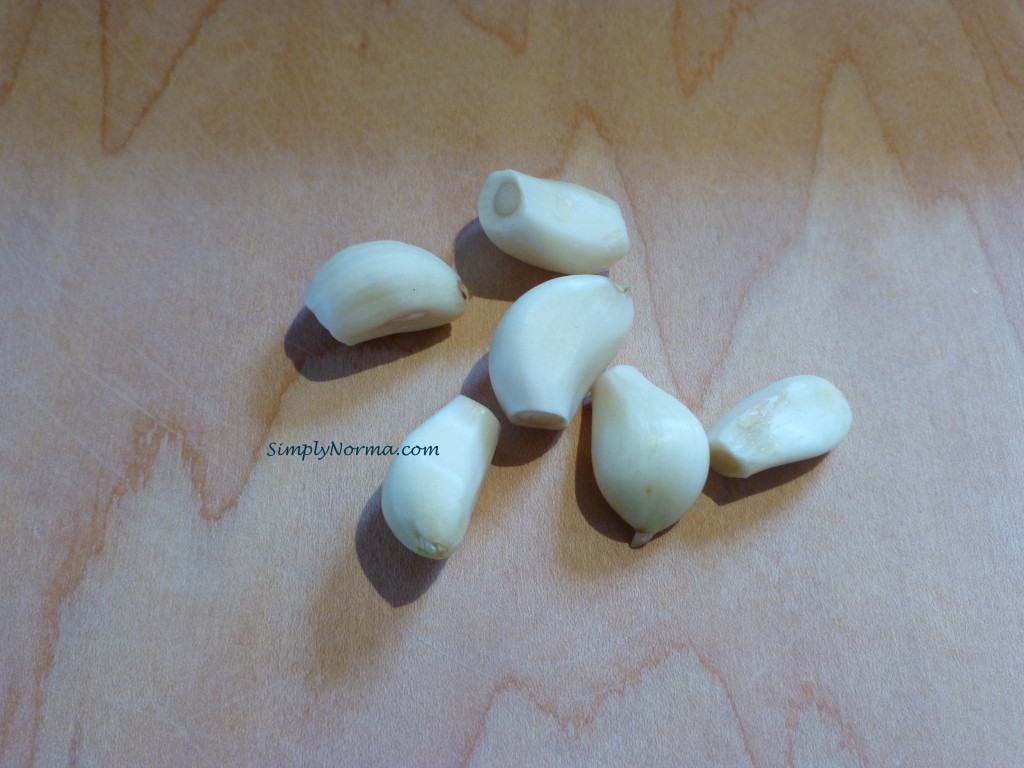
And I had to add garlic to this recipe … of course!

Garlic
Garlic

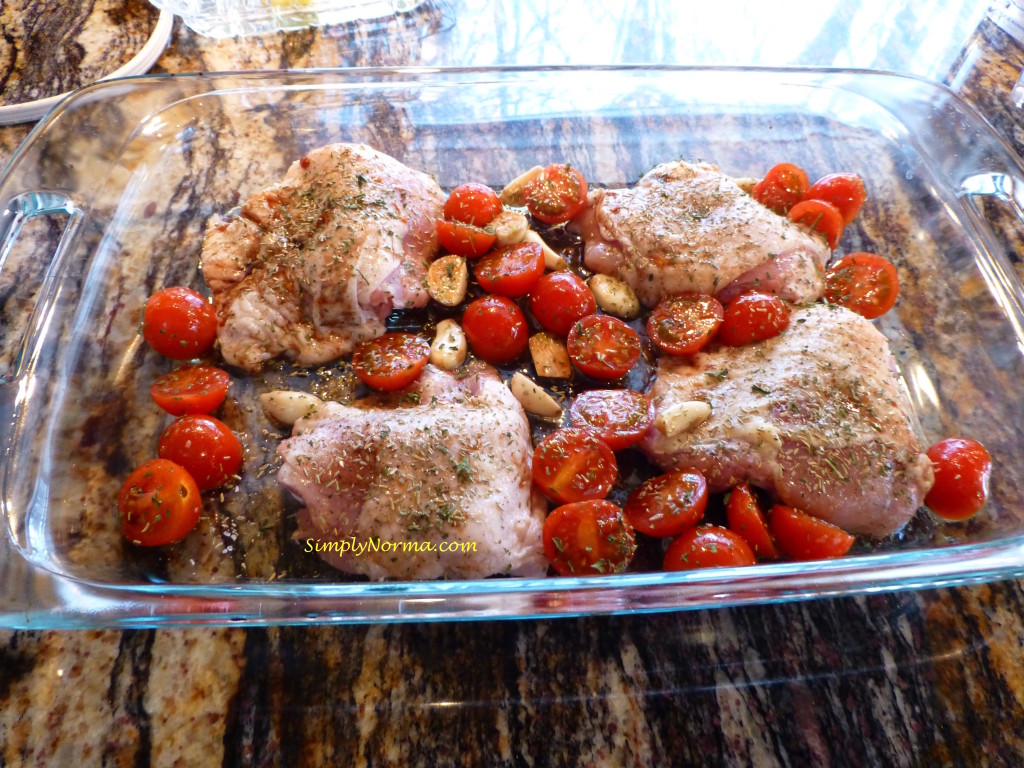
All of the mixed ingredients will be added to a greased glass casserole dish.

Mix Ingredients for the Baked Chicken with Cherry Tomatoes and Garlic

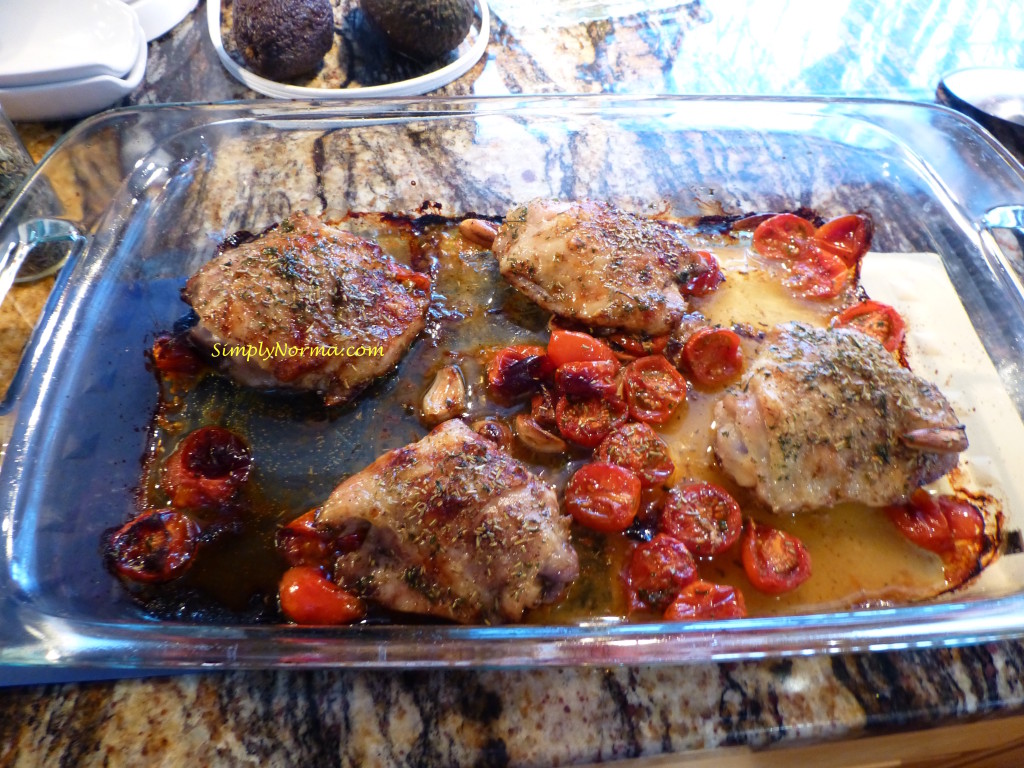
The garlic will roast quite well and the cherry tomatoes will shrivel a bit.

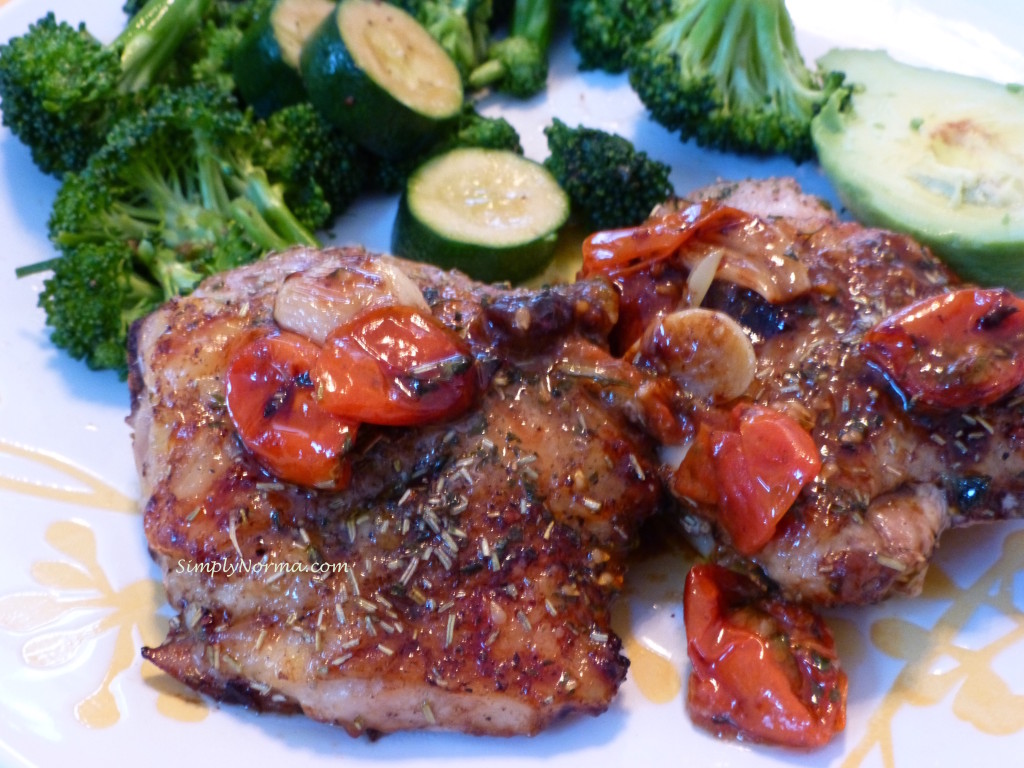
Baked Chicken with Cherry Tomatoes and Garlic

And the result will be awesome!

I served this entree with a broccoli/zucchini stir fry and a half an avocado.

Hope you enjoy it as much as we did!

[amd-zlrecipe-recipe:3]

[amd-zlrecipe-recipe:3]

For additional paleo recipes, click here.

The February 2016 Republican Debate


IMG_4375

I’m trying really hard to focus on the Republican Debate this evening.  I really am …

But all the back and forth bickering is a little too much for me.  They talk over each other and then we can’t really hear what they’re saying.

The belittling they do of each other is so sad. Don’t they realize that the words they use on each other will later be used on the one candidate of their party that stands against  the Democratic nominee later this year?

I watch as Governor Kasich and Retired Surgeon Ben Carson stand at each end of the stage and watch the other three bicker, bicker and bicker some more. And I wonder why they aren’t further up in the polls. Ethically and morally I would rather have one of them come to the forefront ~ at least they hang on to their integrity and don’t get into the bullying matches.

I’m not a Republican.  I’m not a Democrat. I try to choose who I believe the best candidate will be irregardless of their party.  It’s going to be really hard this year.

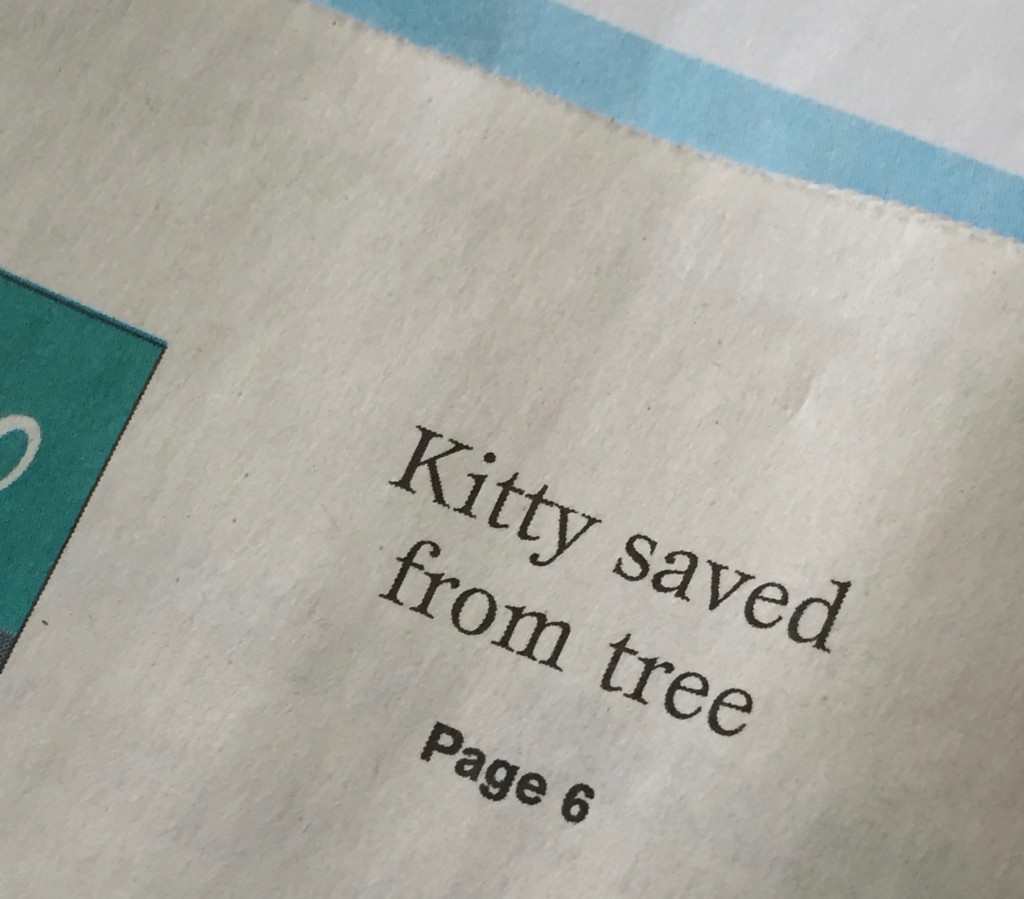
Life would be much simpler if the only decision we had to make was how to rescue a kitten from a tree …


An Eclectic Full/Queen Quilt

About a year ago, after teaching myself to sew on Craftsy and Youtube, I made a king size quilt for my older sister. Shortly after that, I made the mistake of telling people that I needed more practice so now I have a list of 5 more people who would like quilts made.  Unfortunately, they all want full or queen size quilts. Yikes!  What did I get myself into?

So ~ I told everyone I would do them on a first come first serve basis and right now I have 5 people on a list. A volunteer quilt maker.   (Shaking my head …)

And so it was that my 2nd to the oldest sister came to visit me in Minnesota last June and we picked out the fabric for her full/queen quilt.  Everyone has been told that I work on my sewing projects “as I have time” so I didn’t start hers until August after the summer projects were over.

The design? Well, I seem to lean towards contemporary/modern style quilts although since they have to be densely quilted, it’s quite a challenge on my small sewing machine.

Yet, I showed a design to my sister that I found in a book called Quilts Made Modern by Weeks Ringle & Bill Kerr.  I had taken one of her classes on the Craftsy platform which is where I learned about the design of contemporary quilts. My sister liked the design called Big Dots and I agreed to make it.

I really really really should have looked at the directions for this quilt design before my sister fell in love with it. I have to keep telling myself “I am a beginner, I am a beginner …” Alas, the design requires 75 circles that need to be cut then appliqued onto the main fabric.  At this point in my sewing “career” (I say that tongue in cheek), I could neither pronounce the word nor applique.

But … I guess that’s what learning is all about.  At least no one can accuse me of not exercising my brain cells …

So, between Joann’s Fabric store and online shopping, I was able to get the fabric fairly cheap. Yay for me!

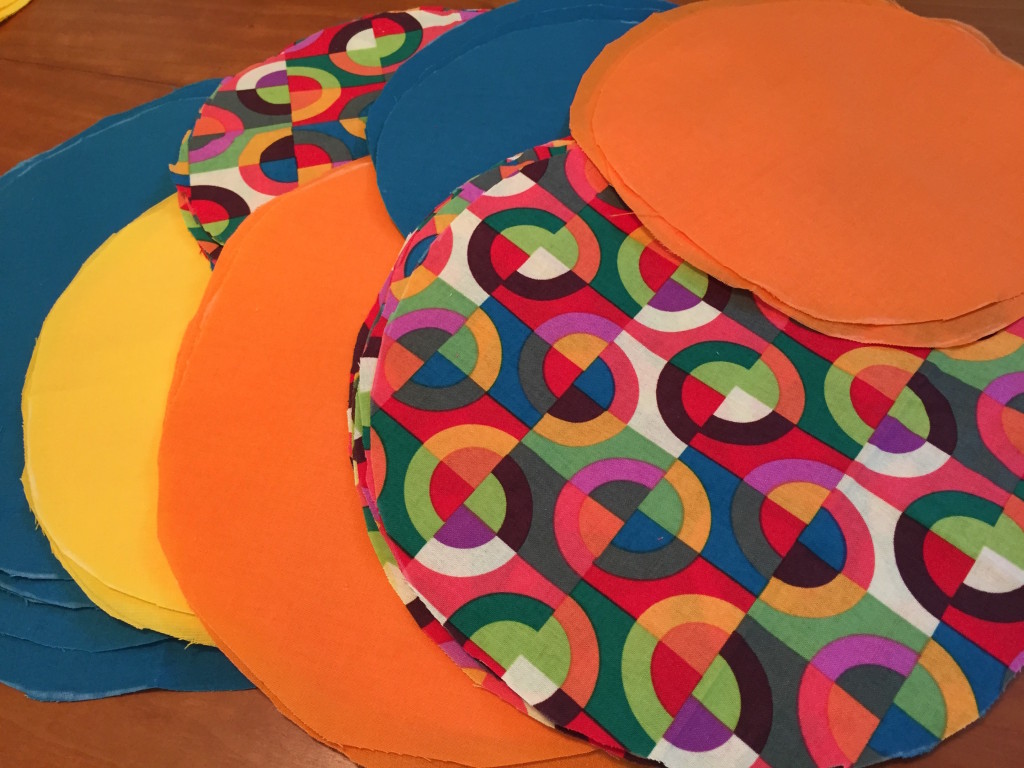
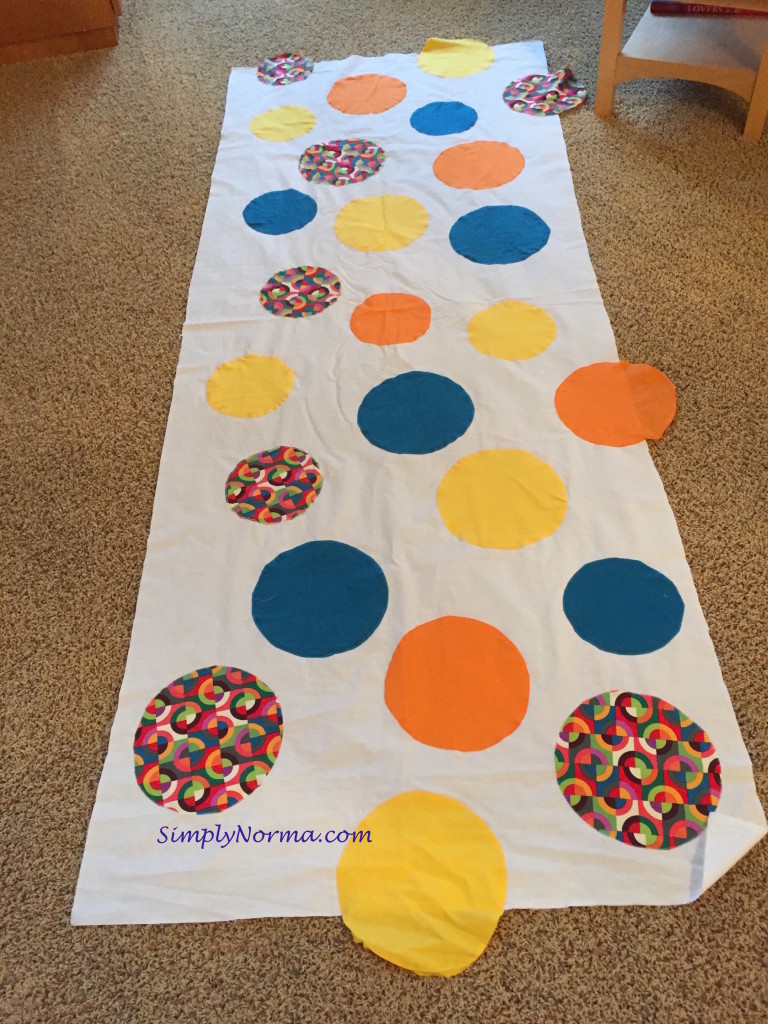
Here is the fabric my sister picked out …

Quilt Fabric
Quilt Fabric

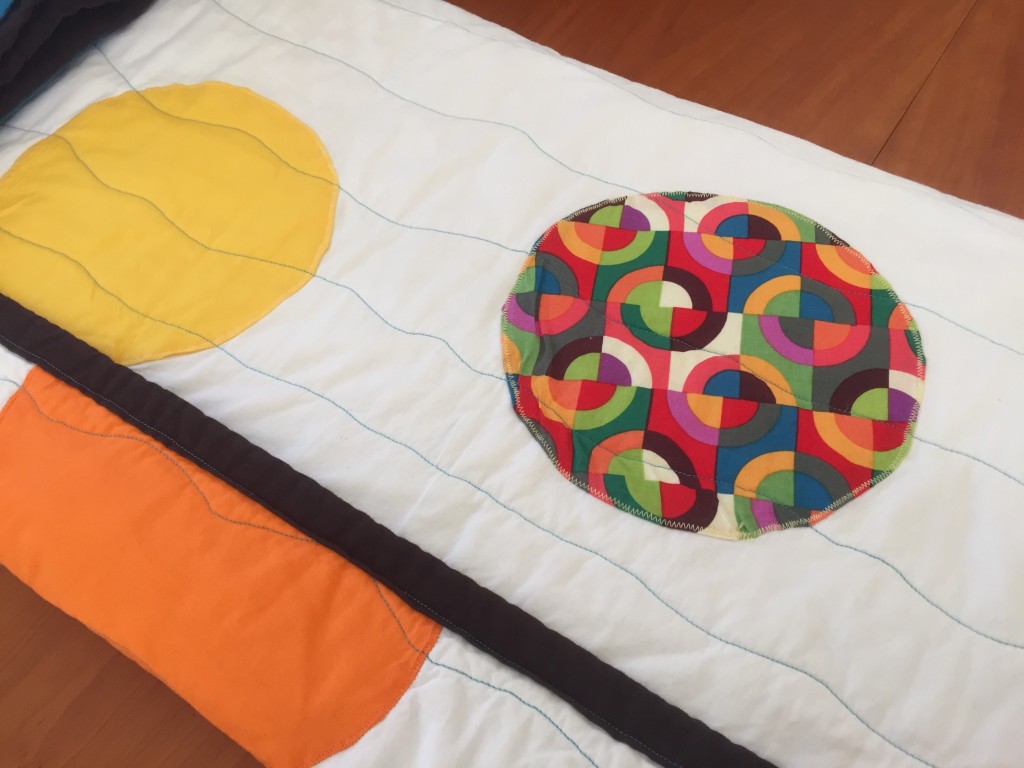
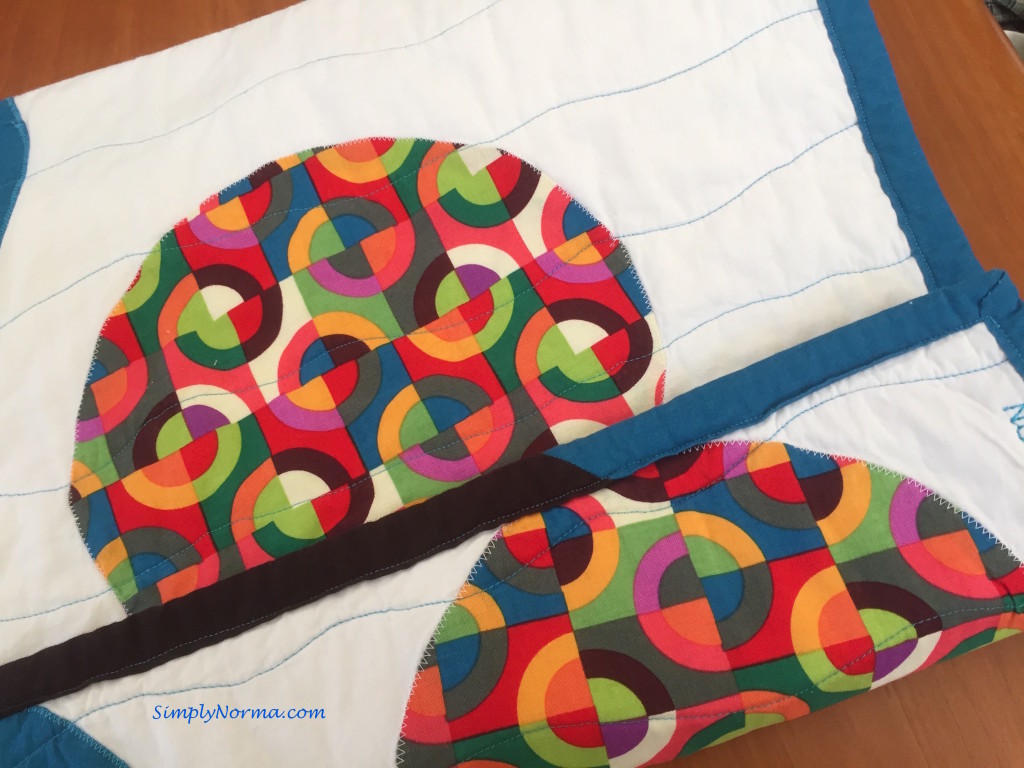
I liked the bold colors.  The circles were cut using a template that was in the book.  They aren’t perfect but since they were going to be sewn under, who cared?

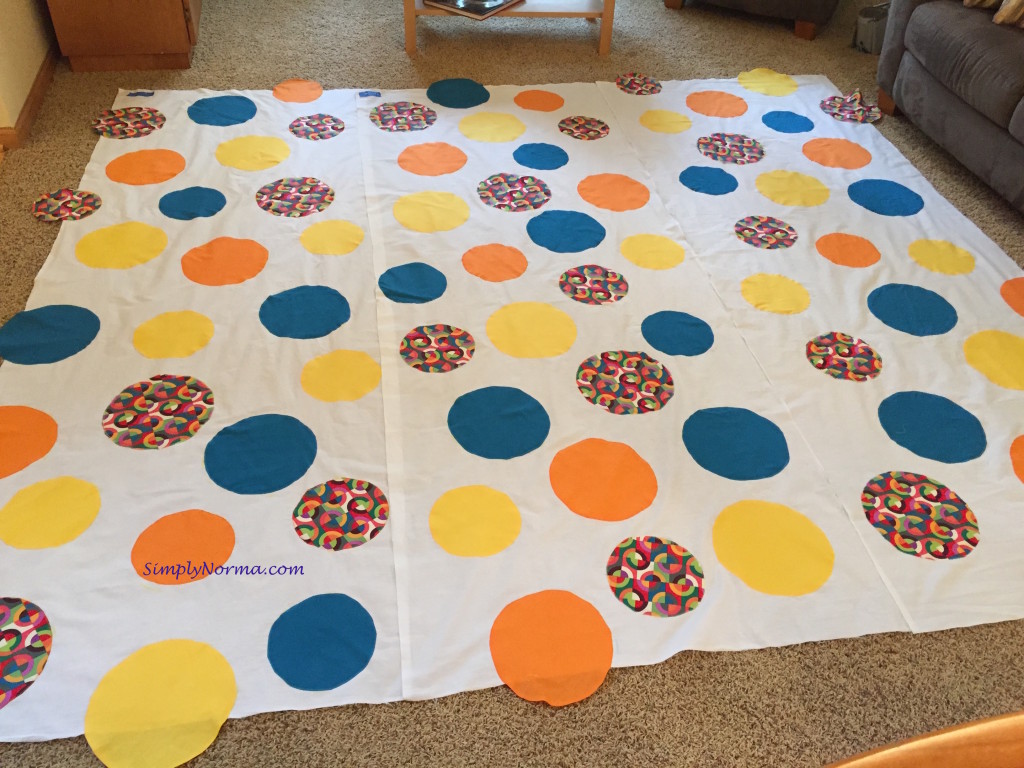
After I finished cutting the circles, I had to turn them under on the edges, iron them, then measure the main off white fabric that they would be appliqued on and lay the circles down on it making sure they were randomly placed.  Next I pinned each circle in place.

Notice that the “field” fabric (that’s the off white one) is in 3 sections.  This would also be the first time I make a quilt in 3 parts and bring it all together.  (Shaking my head … I’m nuts!)  But I felt a little confident because I took a class, again on Craftsy, using this method.

Making A Quilt With Circles

Here’s one section that’s appliqued (see below).  Oh ~ you must be wondering why some of my circles are not on the field fabric but hanging off the sides.  The outer sides of the end sections will have binding on it so the excess will be cut off and it will look like the circle is continuing outside the quilt.  (No, that wasn’t my idea ~ it was in the book.)

After the three sections were appliqued, I then added the batting and backing to each section. In the “Quilting Big Projects On A Small Machine” class, I learned that the middle section is the only one that can be quilted edge to edge.  The sections that will be attaching to the middle part have to have 3 inches on the ends so they can be sewn together.

Making A Quilt With Circles

Things were going along fairly well.  I decided to spray baste the top, batting and backing instead of pinning it together. This worked surprisingly well as the three pieces of fabric stayed together. But, because of my inexperience, I pinned the quilt in a few places after it was spray basted ~ “just in case.”

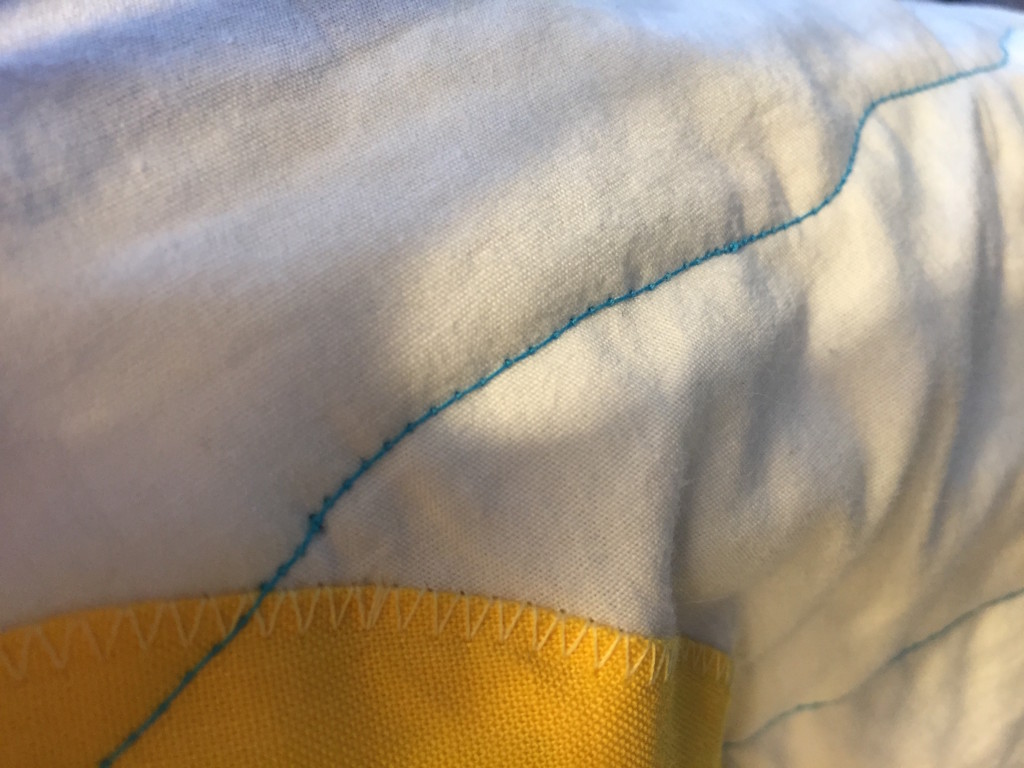
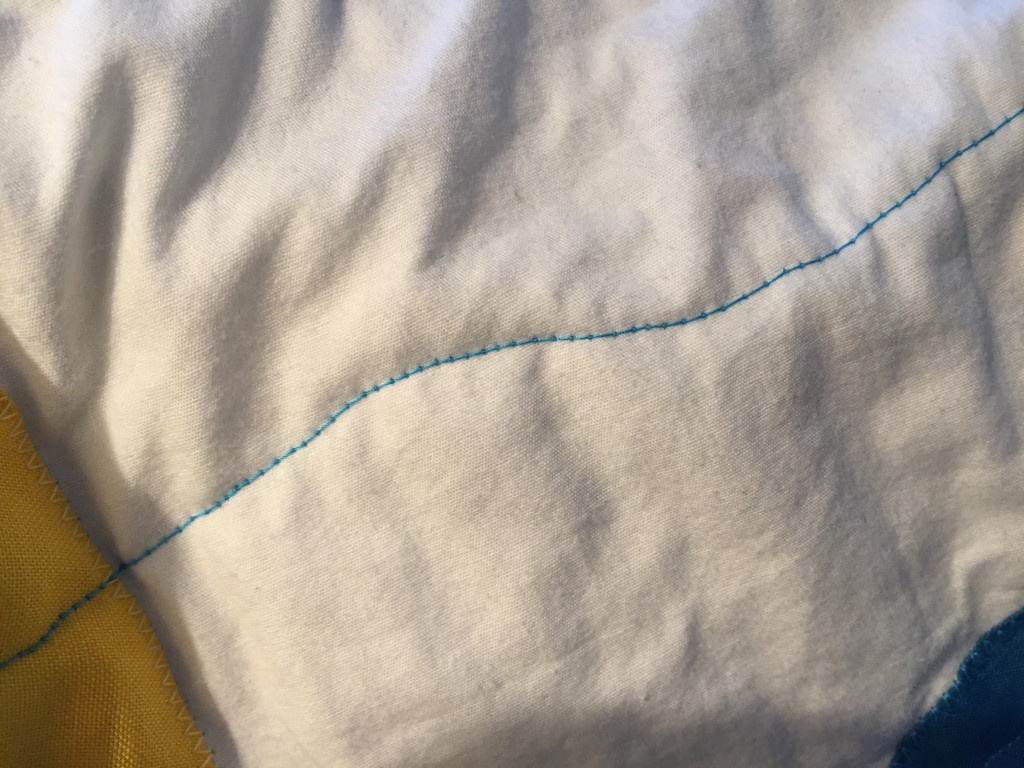
As I sewed the middle piece I was feeling a little proud of myself. And then, IT happened.  The sewing machine was making weird stitches. No! No! No!  I couldn’t figure out what was happening.

Sewing Stitch Problems

I called my cousin whose a sewing guru and she told me it was the tension.  Well, I had already tried fiddling with that and nothing worked. I called another friend who has been sewing awhile, and she suggested adjusting the tension on the machine also but I knew that wasn’t it.  I read the sewing machine manual. Tension, it said.  Everything pointed to the tension and unfortunately the adjustments I was making weren’t working.

Then, I had an idea.  I must’ve gotten this idea because of all the brain learning I had been doing working on this quilt. Oh ~ I guess I should share the idea, eh? (Laughing.)

I took out the bobbin and with a slightly damp q-tip, I cleaned out the bobbin area.  Sure enough, all kinds of fabric fuzzies were coming out. Once I finished cleaning the machine and putting all the pieces back, everything was back to normal. Whew!

And so I finished quilting the middle section, hand sewed one of the outside pieces to the middle (another first!!!!! ~ are you hooping and hollering for me???) and then hand sewed the third piece to the middle section.

“Almost” everything went fine so I took my pride and joy, put it in the washing machine in cold water and prayed that it would not come apart.  (That’s always been one of my fears which is totally unwarranted …)

Once the quilt came out of the machine, I tossed it in the dryer on the delicate cycle for 32 minutes.  Then I took it out of the dryer and hung it on the shower rod to dry the rest of the way.

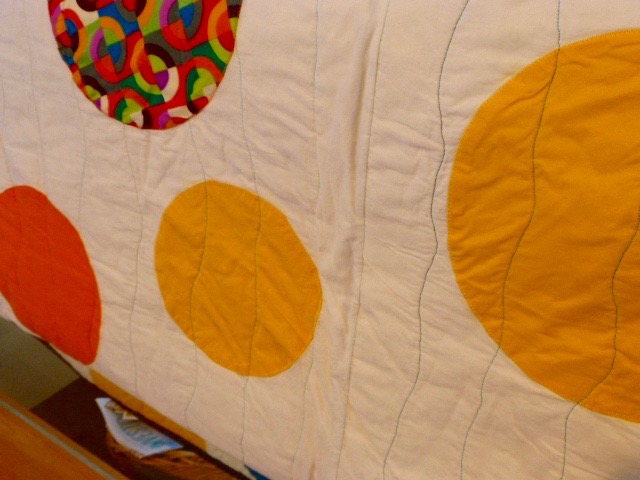
But, I said “almost” everything went fine.  The quilt stayed together quite well but I noticed a little puffiness between the middle and third sections that I had hand sewn.  Can you see it below?

Hand Quilt Problem
Hand Quilt Problem

I figured what had happened, since it only happened on one side, was that I did not cut enough of the back off before I sewed the two pieces together.   Oh well, I decided to leave it “as is” as it will hardly be noticed spread out on a bed.

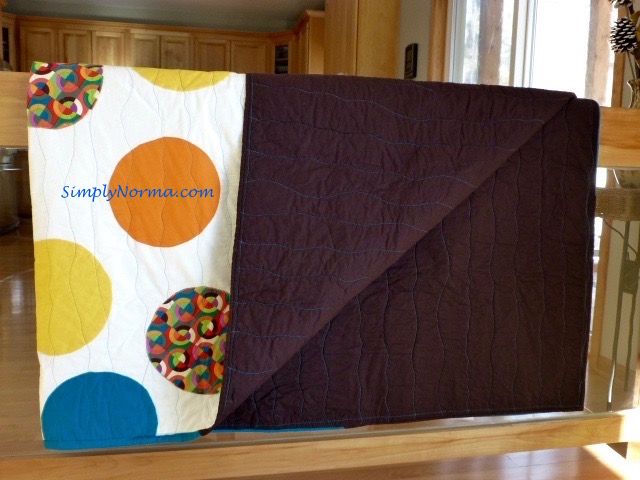
So ~ big drum roll for me, ready to see the final result?

Big Dot Circle Quilt

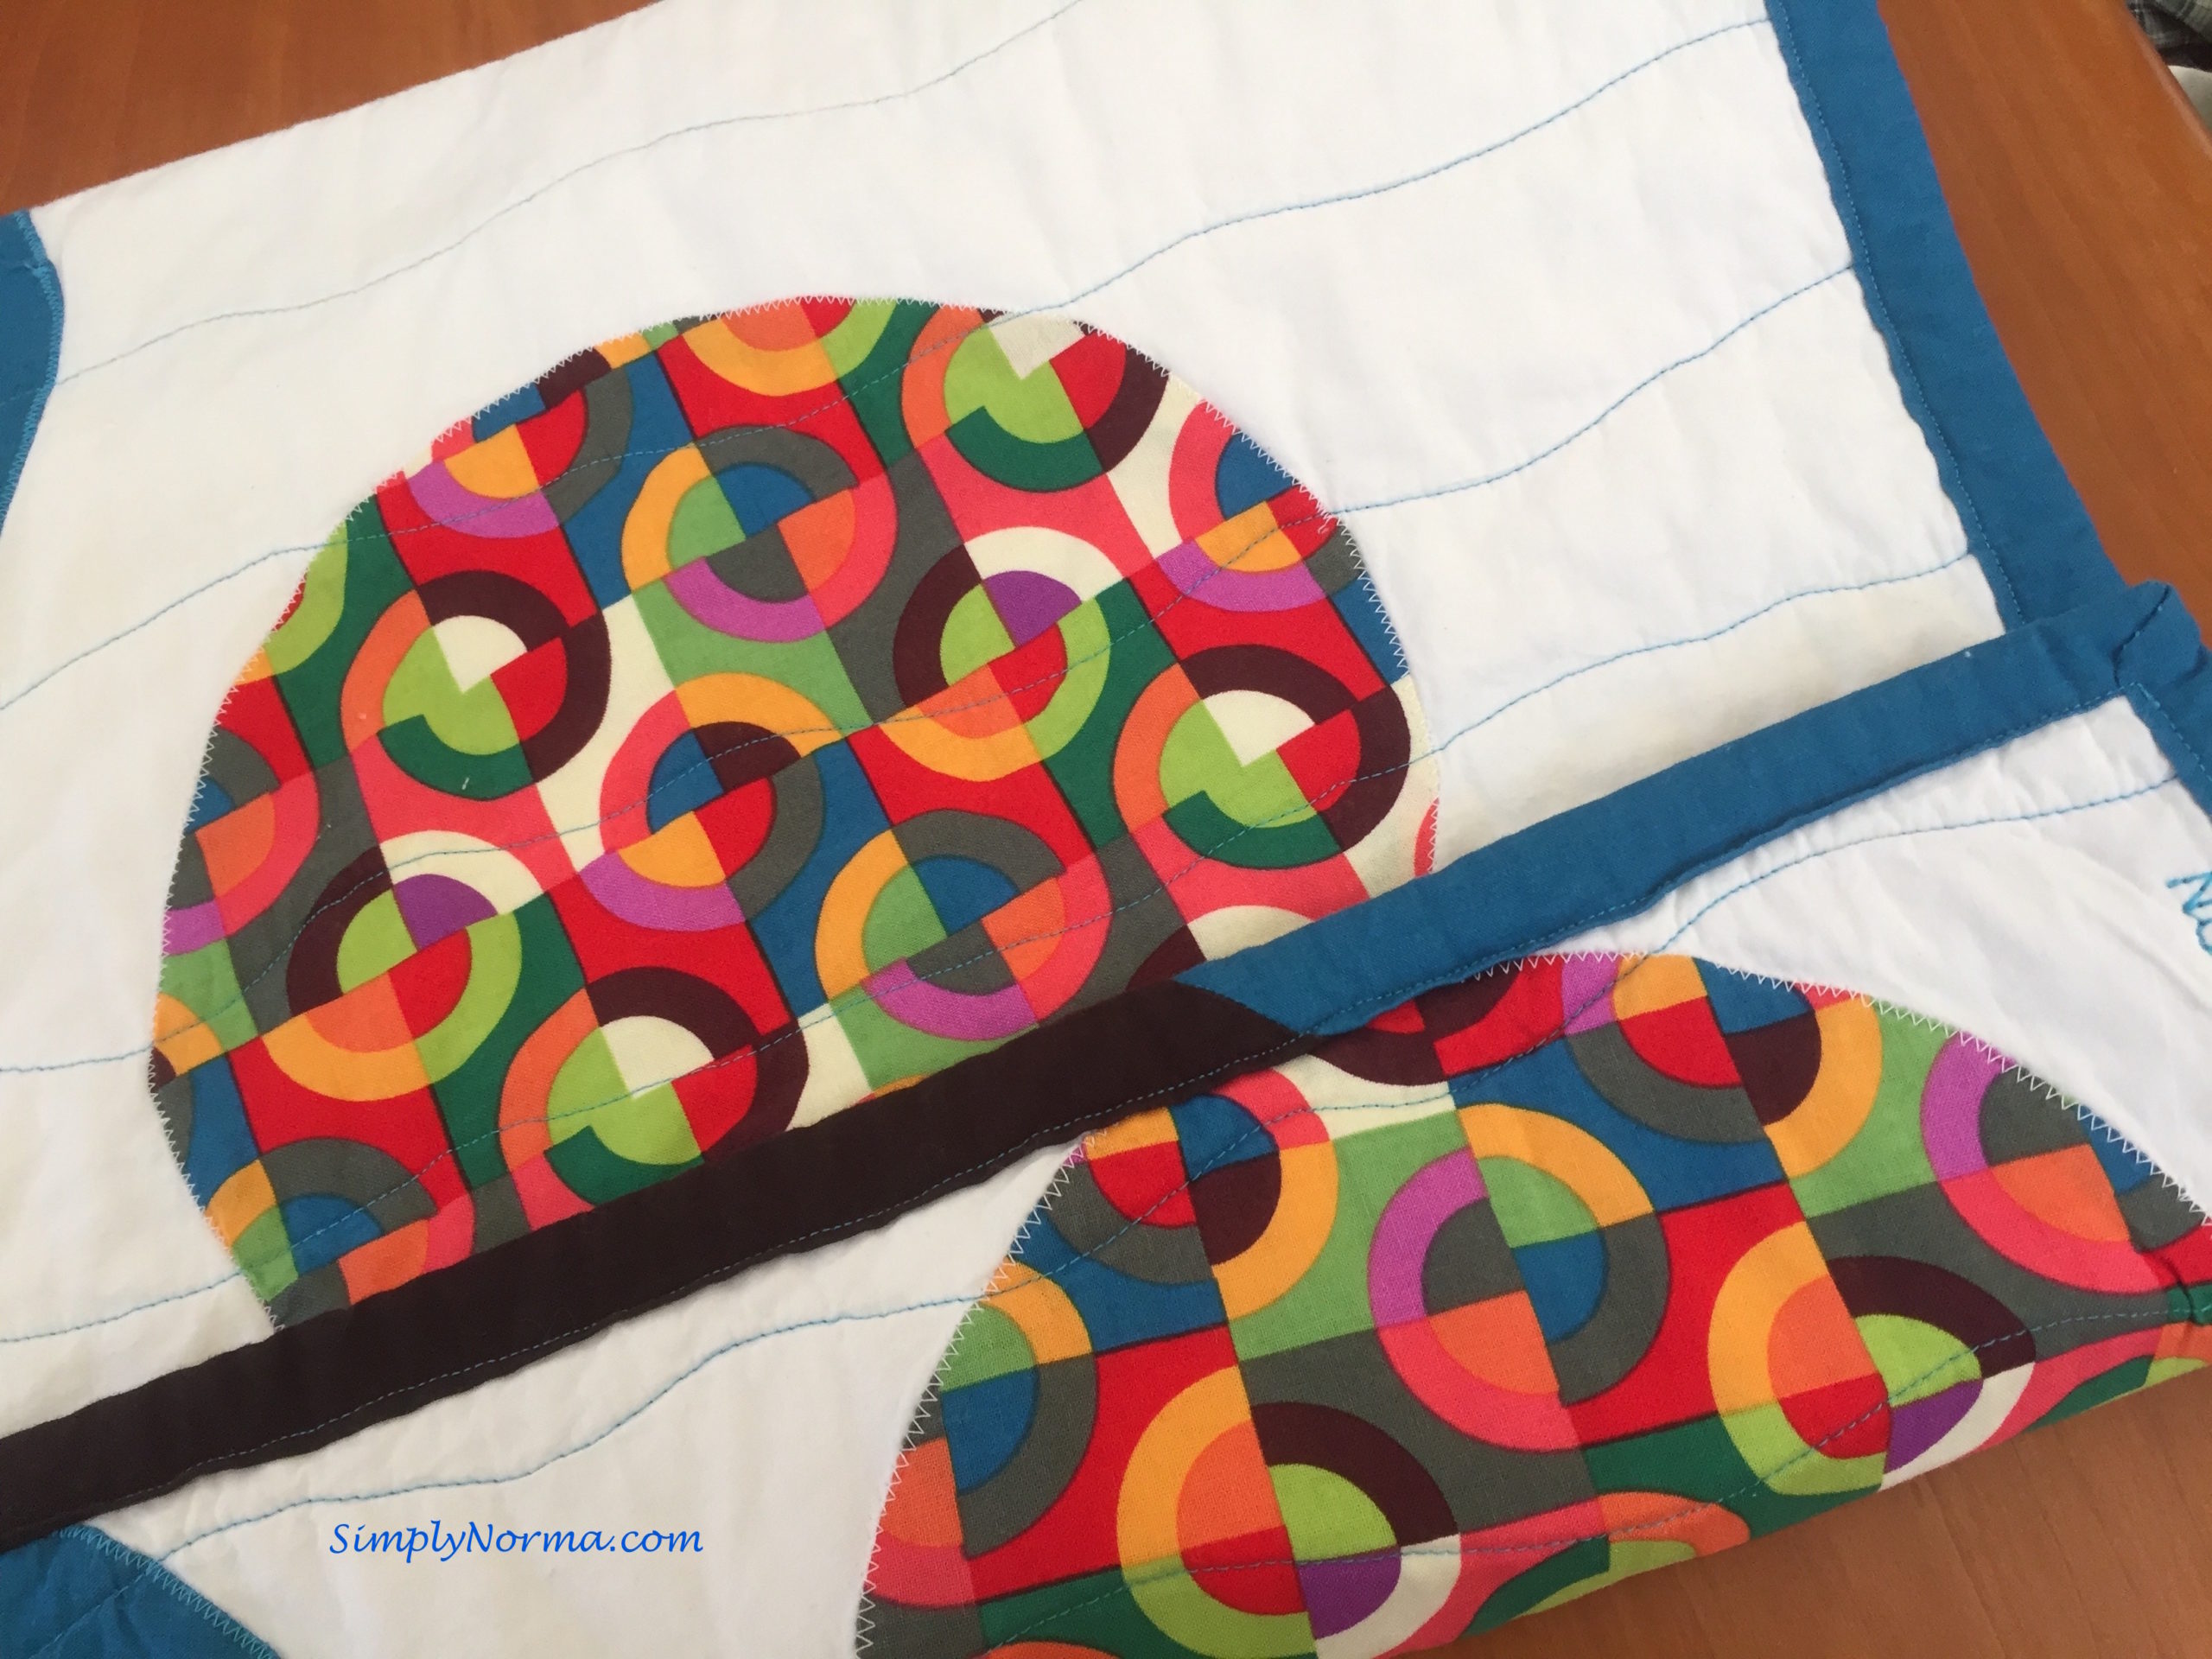
I used blue and brown fabric for the binding.

Big Dot Circle Quilt
Big Dot Circle Full/Queen Quilt

Not too shabby for a beginner.

Of Mama and Puerto Rican Pasteles

I admire my mother ~ immensely.  From when I was 5 years old, she raised six children all on her own. I don’t know how she managed it but I’m amazed whenever I think about it.

I had two boys to raise, a full time job, responsibilities at church and the normal every day tasks. With all of that, I regret not spending more time with my boys so I can only imagine what my mother felt like.

Mama never worked outside the home (at least not until the youngest had graduated from high school).  She always said this was her way of putting her children first. So, with a monthly welfare check, help from Catholic Charities and even more help from her sisters who lived nearby, we always had clothes to wear and food to eat ~ even if the food was oatmeal for breakfast and dinner ~ something which is still a treat for me to this day.

But Mama was not idle. One of the things she did to help our family was go door to door selling Puerto Rican pasteles that she made from scratch.  She would spend hours grating the plantains to make the “masa” (dough).  By making pasteles, she was able to supplement her welfare check and get us a few extra niceties like cookies.

When most people see pasteles for the first time, they mistake them for tamales.  They are quite different though ~ made from green plantains and filled with your choice of meat, sliced olives, onions, spices and whatever else you want to put in them.

Nowadays, people make the masa for the pasteles in a food processor so it’s easier and less time consuming.

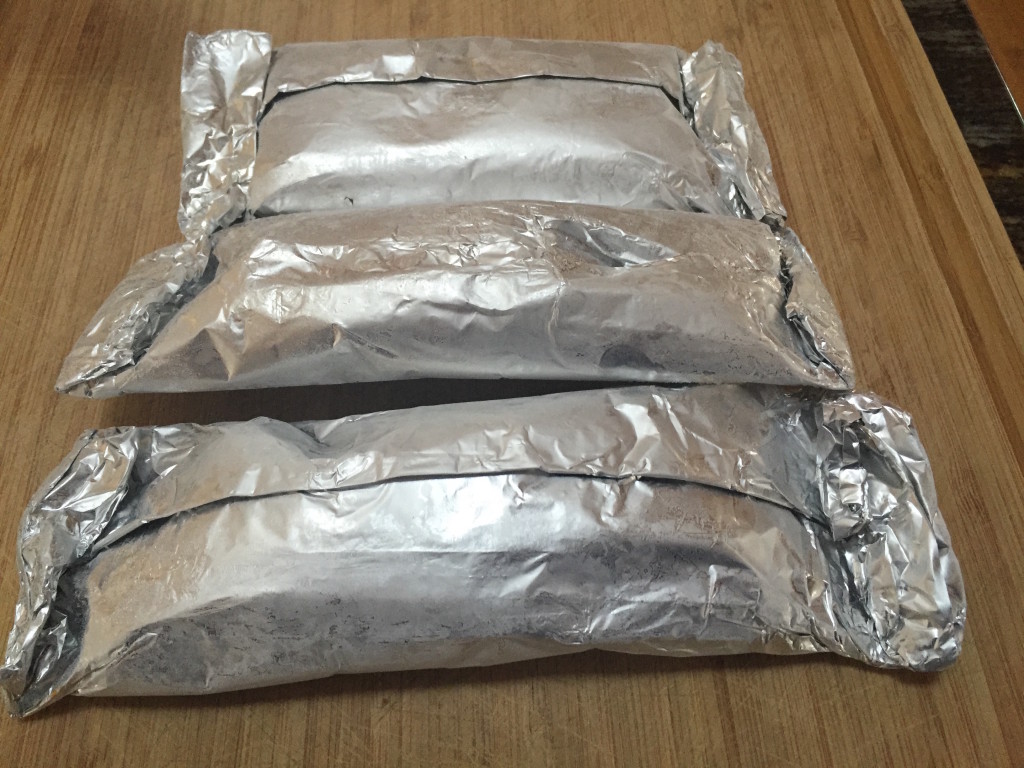
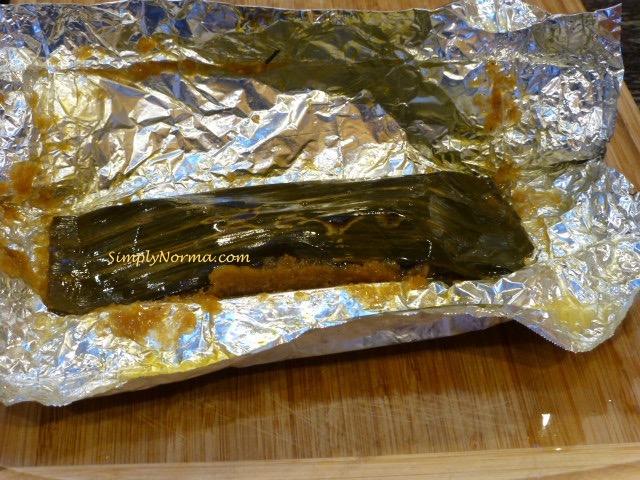
Once they are made, the pasteles are wrapped in banana leaves then wrapped in aluminum foil.  They are then cooked right away or frozen until you’re ready to eat them.

Puerto Rican Pasteles

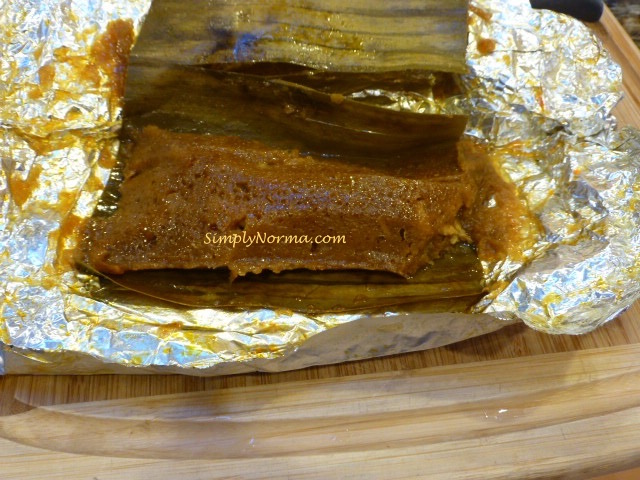
Recently, I found out that a woman in my mother’s neighborhood makes them so I ordered two dozen.  I’m not sure if they are paleo ~ only because I don’t know what kind of oil she uses.  But the plantains and all the other ingredients are paleo.

Puerto Rican Pasteles

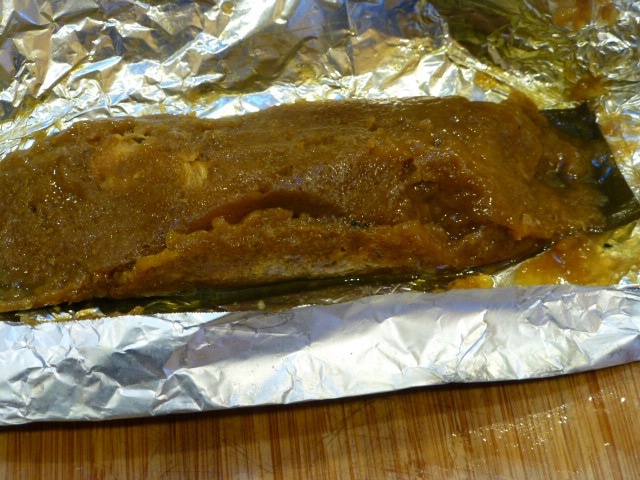
Here’s a closer look ~ they don’t look appetizing but they are scrumptious.

Puerto Rican Pastel
Puerto Rican Pastel

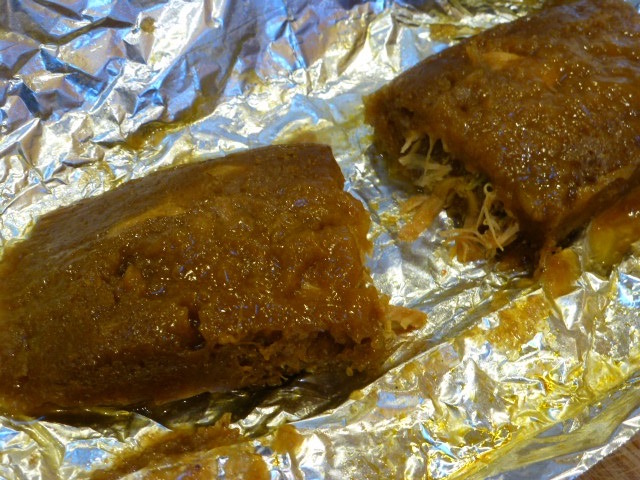
The ones I ordered had shredded chicken and green olives along with different spices the cook used.

Puerto Rican Pasteles

My mother is not the most sophisticated woman on earth.  She doesn’t speak fluent English, couldn’t set a table with the silverware in its proper place, nor can she balance her checkbook.

But those things were, and still are, irrelevant to a little girl who just needed to feel safe and loved.

Mission accomplished Mama!