Back in May, yes, yes, I know … I’m a tad bit behind. I try to get out in the yard as much as I can in between the Minnesota rains. One would think we were living in Seattle. Â Oh well …
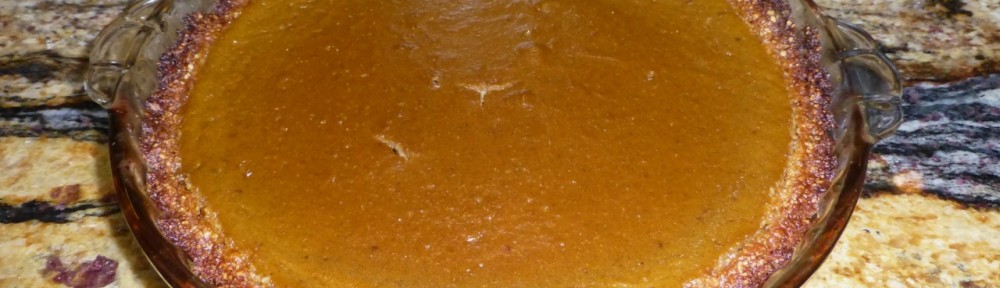
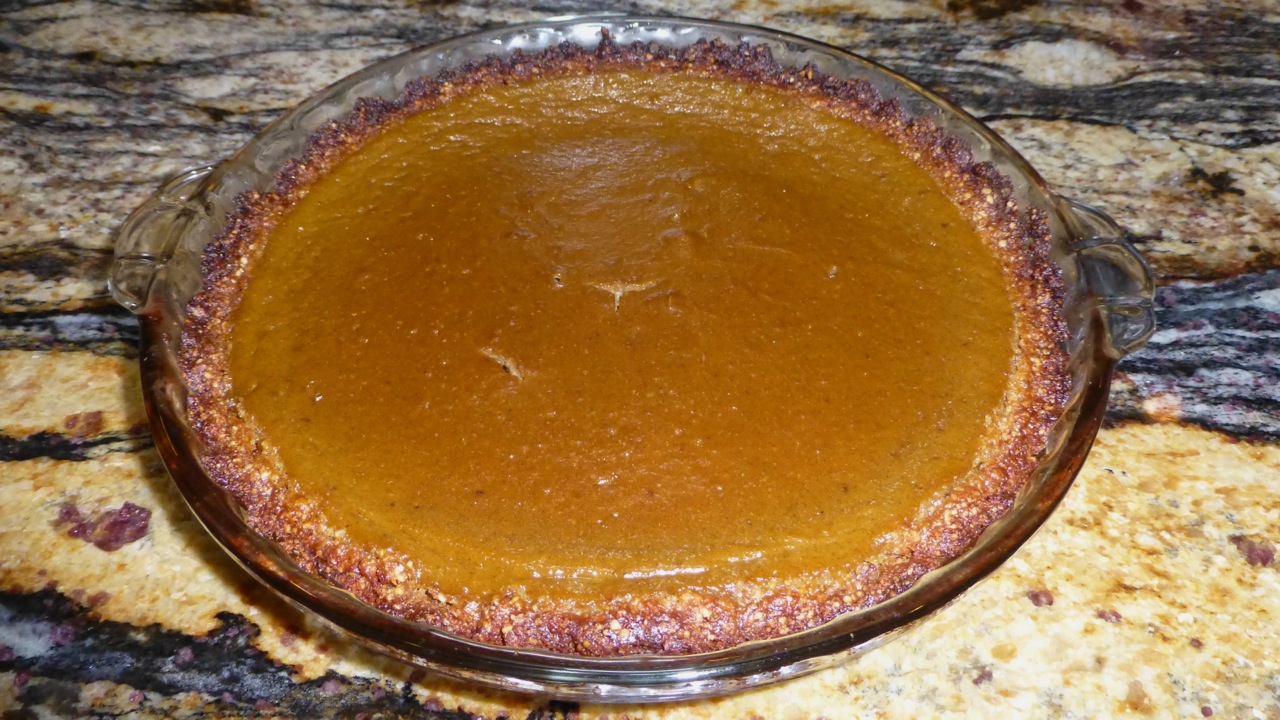
Anyway, back in May, my son made a Paleo Pumpkin Pie which turned out to be quite scrumptious.
It had just the right amount of coconut taste as the recipe uses coconut milk and coconut oil. This is a great substitution for “regular” pumpkin pie and will be made again once Thanksgiving rolls around.
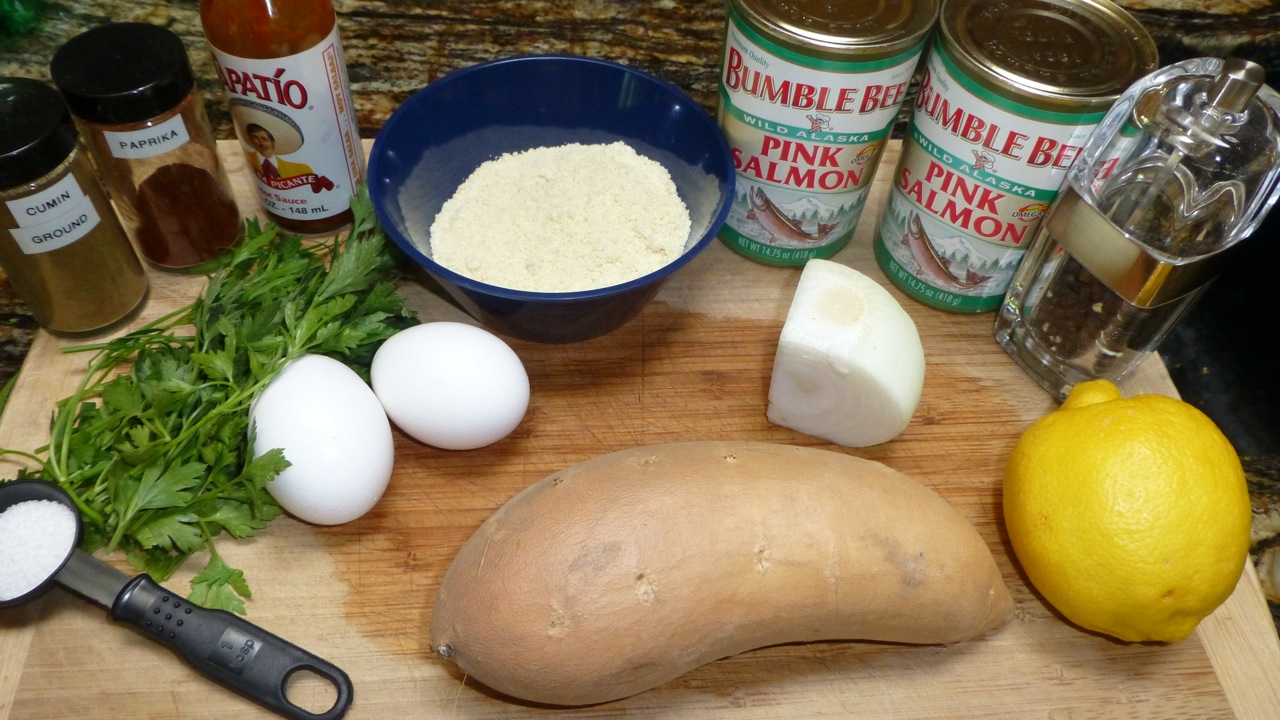
Wash the sweet potato and use a fork to poke holes in it.
Bake the sweet potato in the oven at 375 degrees Fahrenheit for approximately 30-45 minutes. A fork should pierce through easily when done.
After removing the potato from the oven, let it sit for 15 minutes or so to cool then mash it.
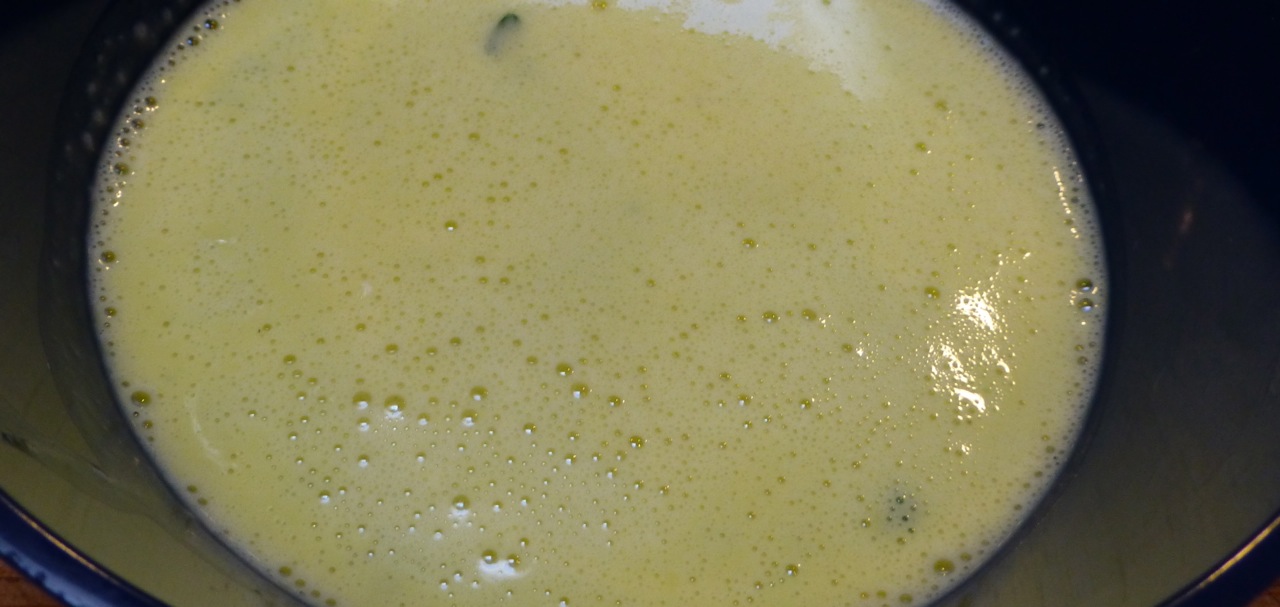
Add the almond meal, chopped parsley, onion, lemon juice, hot sauce, salt, cumin, paprika, black pepper and eggs to the mashed potato.
Open the cans of salmon and slowly turn the can upside down and dump the salmon in your hand. With the other hand, halve the salmon and remove the bones from the inside. At this point, you should remove any skin that’s on the outside also.
Add the salmon to the other ingredients and mix thoroughly.
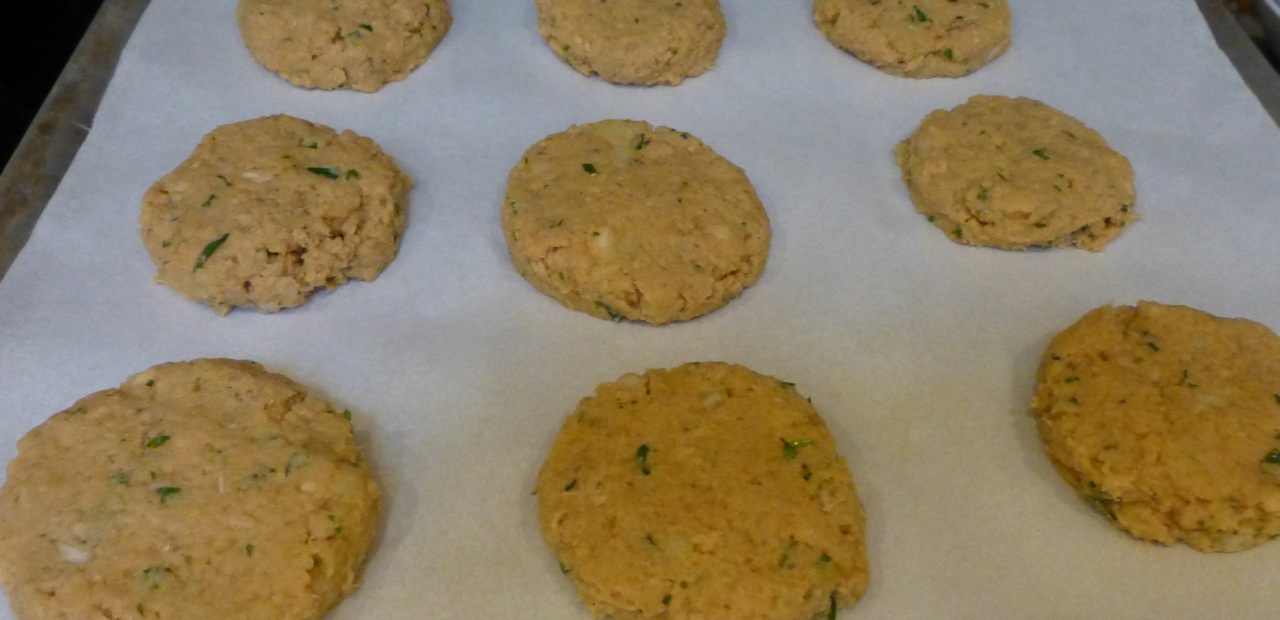
Using a 1/3 measuring cup, scoop out evenly sized salmon cakes until you have approximately 12 patties.
Chill the mixture in the refrigerator for a minimum of 30 minutes.
Heat a large frying pan over medium high heat. When it’s hot, add 1 tablespoon coconut oil for every six patties. Let the oil completely melt until the pan is very hot then slowly add the patties and cook for 4 minutes on each side.
This was truly a great recipe! I made 6 and froze 4 patties. My patties were a little larger as once I had them in the frying pan, I flattened them out. Very very good.
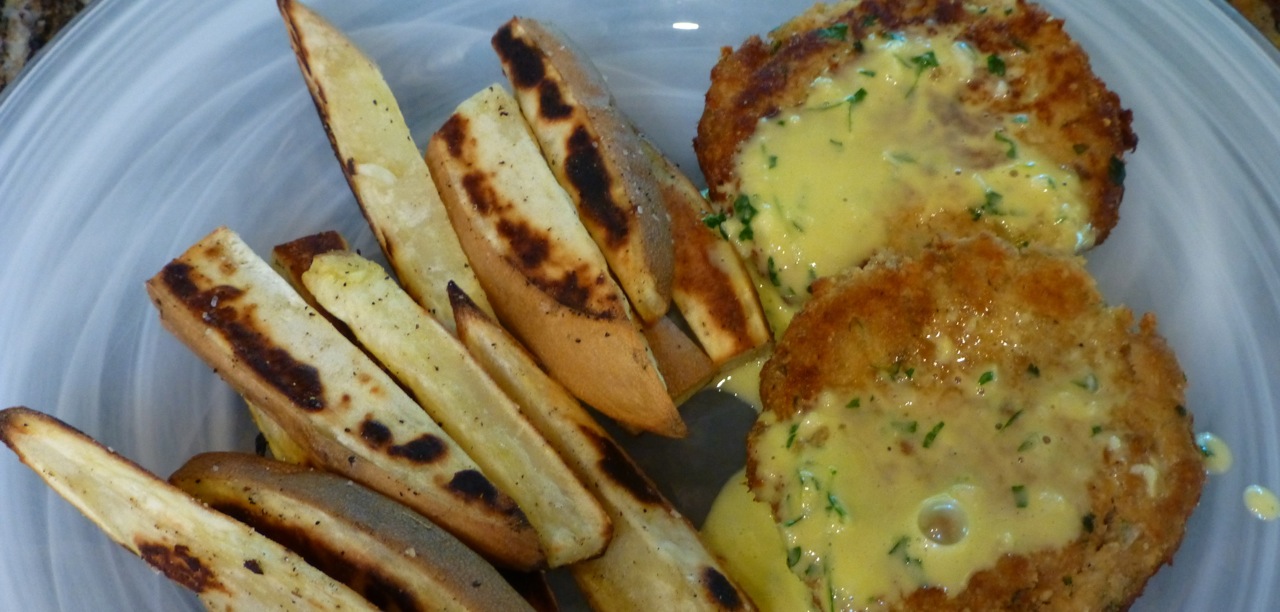
I served these with Sweet Potato Fries. Another simple but goodly recipe.
Salmon Patties with Fries
Special thanks to EverydayMaven for these delicious salmons!
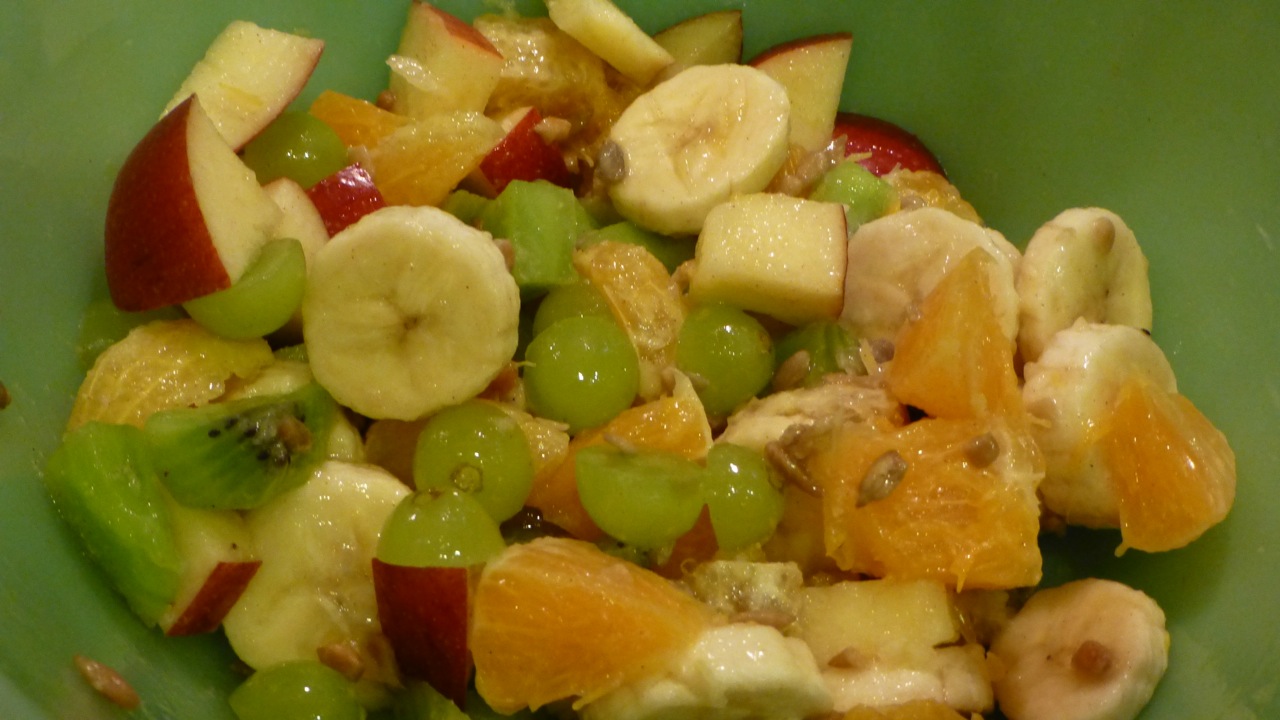
This is a really easy Cinnamon Fruit Salad with a hint of coconut. Very good to have as a snack, side or “just because” you feel like it.
Ingredients
1Â medium navel orange
1Â kiwi, peeled, sliced and quartered
1Â medium ripe banana, sliced
1Â medium apple, sliced
6Â seedless grapes, halved
2Â tablespoon sunflower kernels
1/4Â cup coconut milk
1/8Â teaspoon ground cinnamon
Directions
In a large bowl, combine fruit and sunflower kernels.
In a small bowl combine coconut milk and cinnamon then mix well.
Pour over fruit and toss to coat.
Serve immediately. This yields approximately 8 servings.
See how easy that was?
Now, I have a confession to make. I didn’t grow up in the kitchen whipping up food from whatever was in the pantry. As a matter of fact, when I was a single mother I would make baby cereal for me and my son for dinner. I just didn’t have the “cooking” instinct in me. Later in life, I developed a desire for cooking but with mostly tried and true recipes like this one.
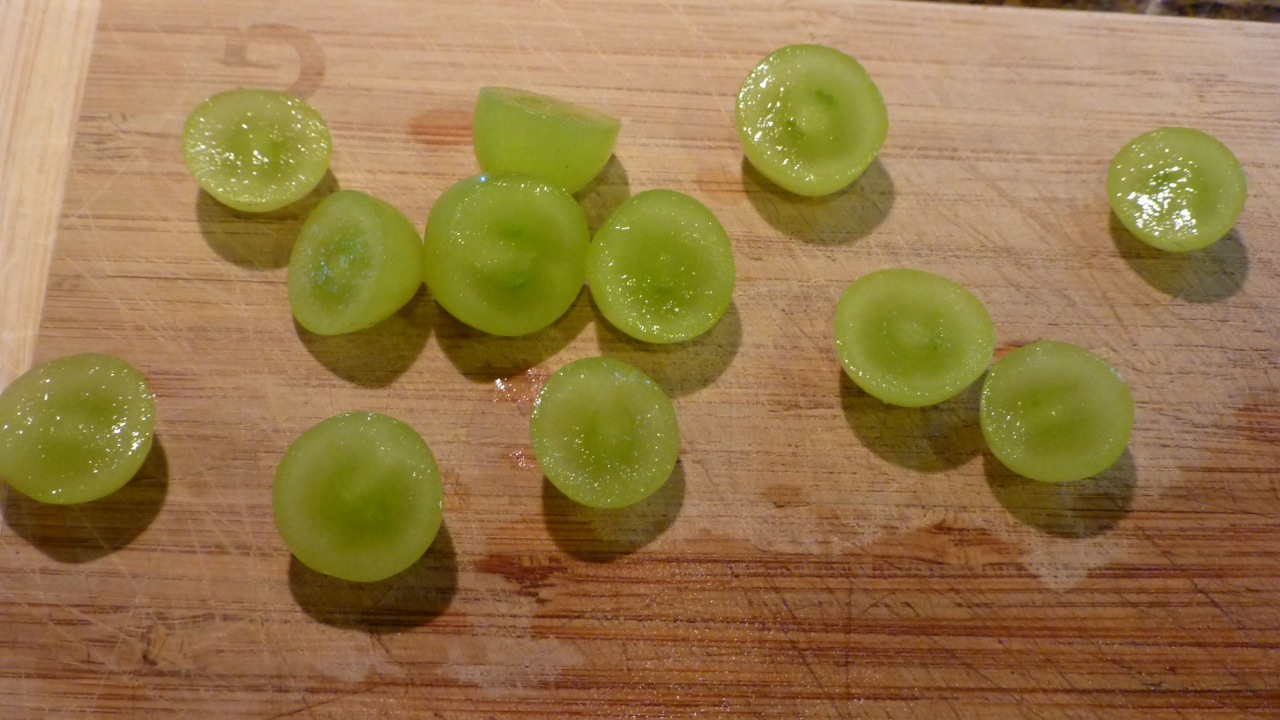
But, having said that, I follow most recipes right to the letter. So … wanna have a nice laugh today? Here goes. What do you see in the picture below?
Six Green Grapes Sliced
Are you laughing yet? The recipe called for 6, count them, six green grapes halved. So, that’s what I sliced. After I did this, I laughed out loud and just about rolled over on the floor. I became a rebel and doubled the green grapes to twelve! Â (I have to be careful what I write because I’m sitting at a coffee shop right now laughing out loud and people might think I’m nuts.)
The only reason that I can think of to stick with the quantities in this recipe is because of the coconut milk. Add too much fruit and you won’t have a good coconut-cinnamon taste.
So — let’s all be rebels in the kitchen. I don’t know why I reverted back to my “really old” days of making sure I stick by the recipe, especially with a recipe like this one which has lots of room for flexibility.
Oh — it was good! I loved it — my non-coconut-loving husband thought it was just okay. I served it on the side with Orange Chicken as my entree.
Cinnamon Fruit SaladOrange Chicken with Cinnamon Fruit Salad
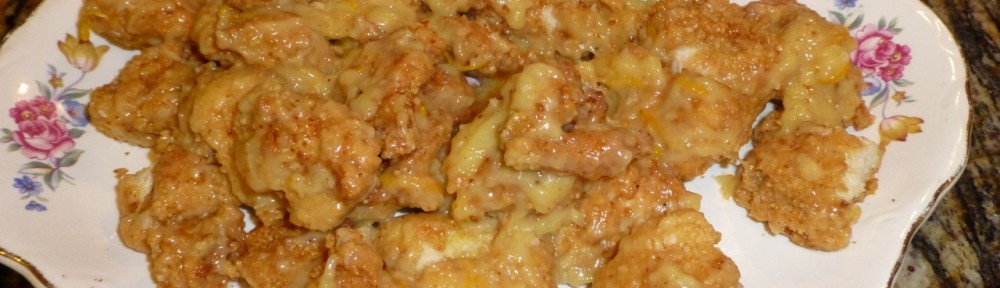
Wow! This Orange Chicken recipe that I made is wonderful and will be on my “must have again” list. Served with a Cinnamon Fruit Salad, it fit the bill to satisfy an empty stomach. I imagine that one could make these vegetarian by using FriChik by Worthington (although I haven’t made them that way yet).
I did have a “learning” moment while going through it so I’ll share that with you later in this post. So — here goes!
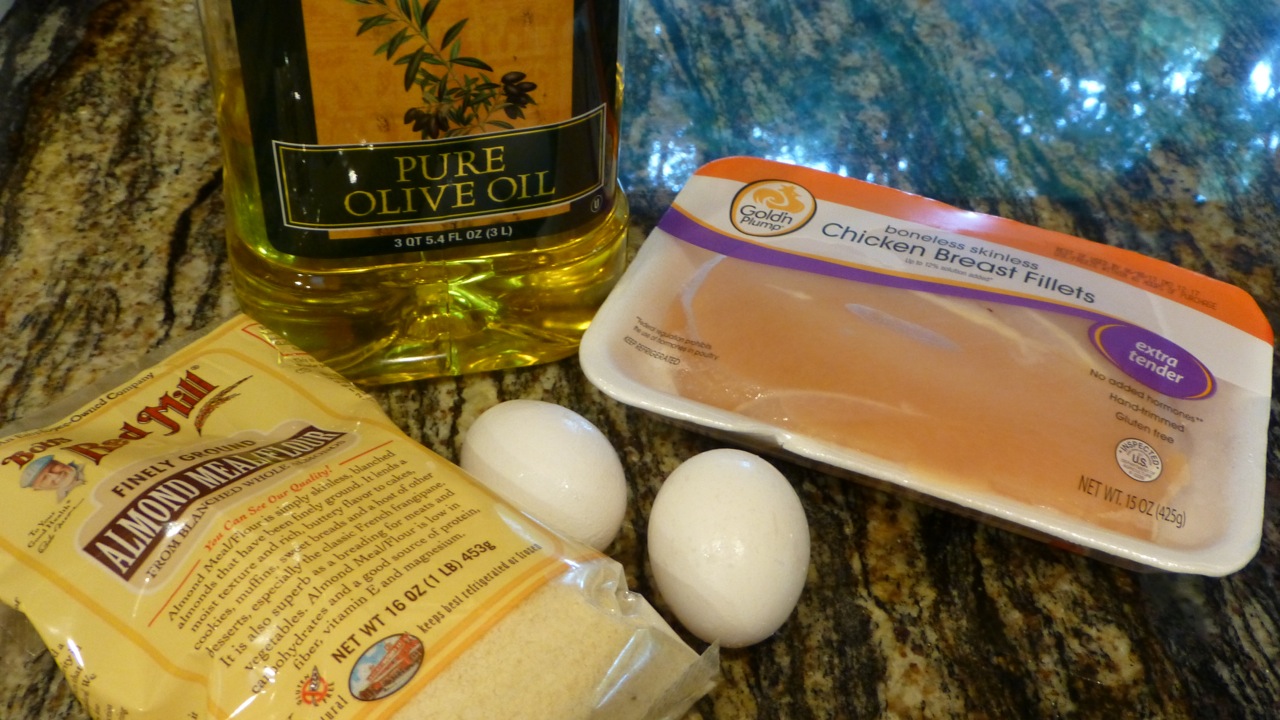
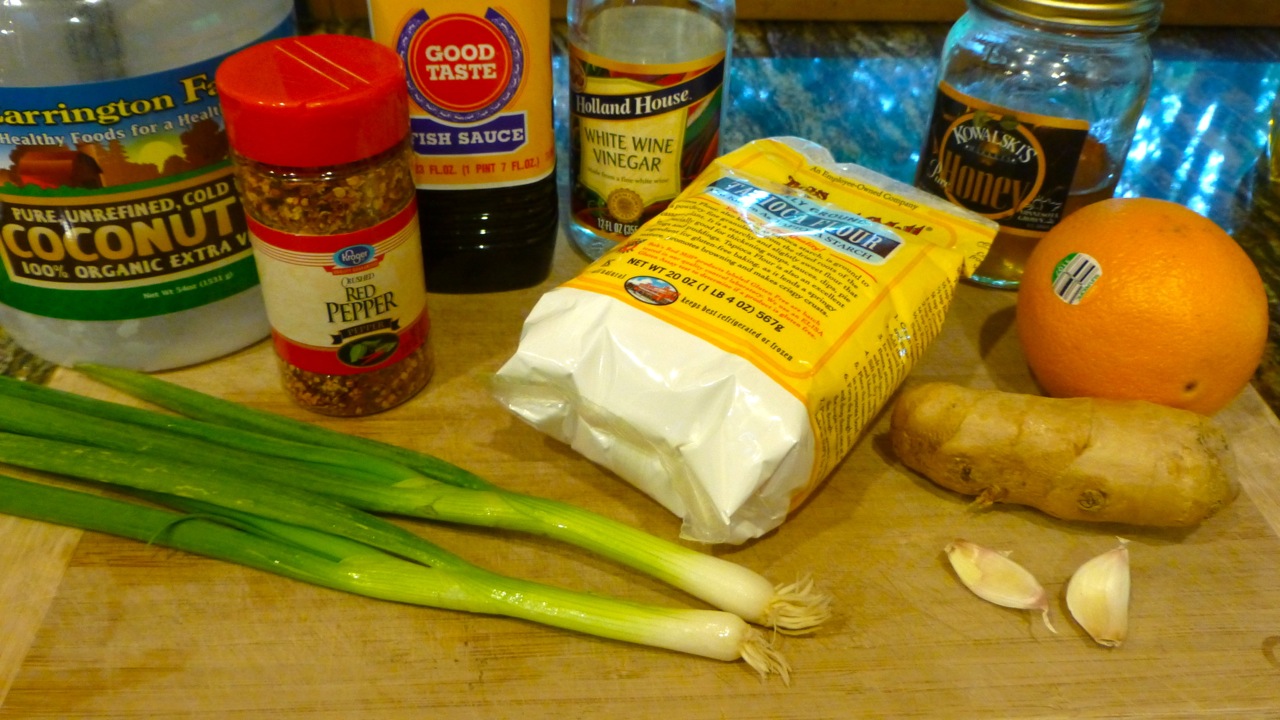
Orange Chicken Ingredients (1 of 2)Orange Chicken Ingredients (2 of 2)
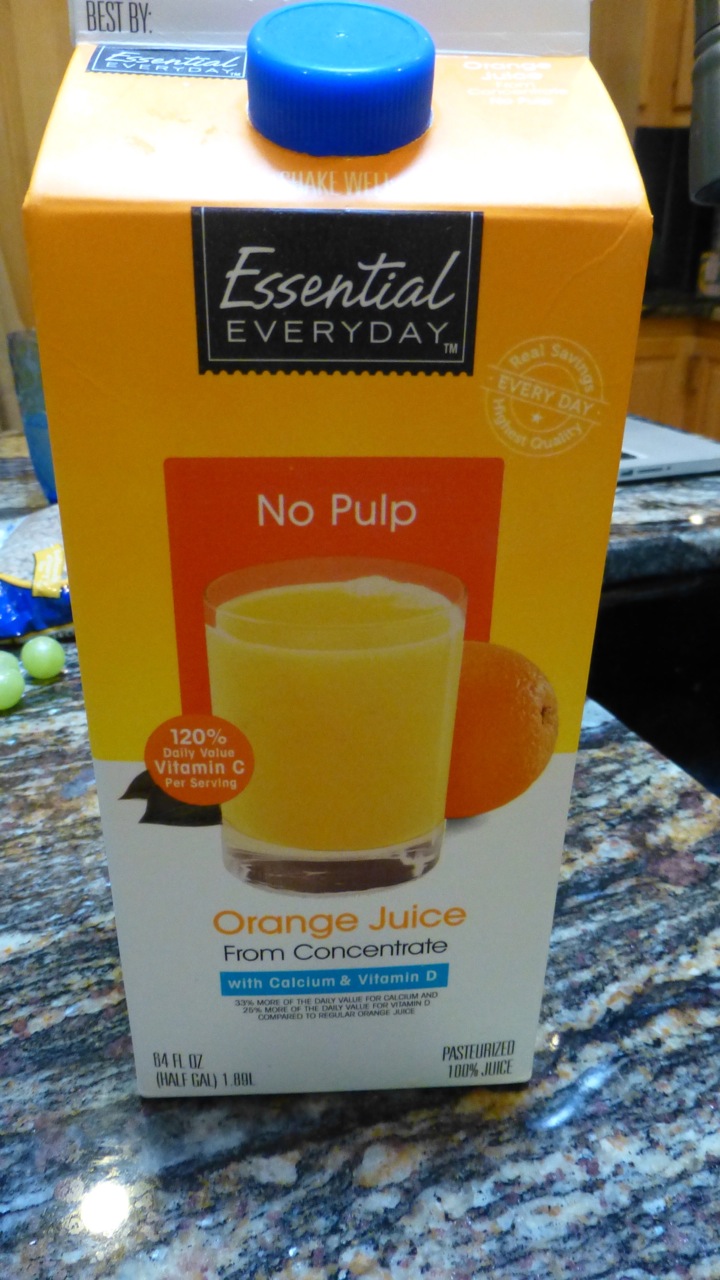
And of course, the orange juice (without pulp)
Orange Juice (no pulp)
Ingredients
1Â lb. chicken breast cut into bite size pieces
2Â eggs
1Â cup almond flour
Olive or coconut oil (I used olive)
For Orange Sauce
1/2Â cup freshly pressed orange juice
The zest of 1 orange
2Â tbsp. tapioca starch
1Â tbsp. coconut oil
2Â cloves garlic, minced
2Â tsp. fresh ginger, minced
1/8 tsp. crushed red peppers (more if you want it spicy)
1Â tbsp. fish sauce
1Â tsp. white wine vinegar
1Â tbsp. honey
2Â green onions, thinly sliced
Directions
In a small bowl, mix the orange juice with the tapioca starch and whisk until the starch is all dissolved. Set this aside.
To prepare the sauce, preheat 1 tbsp. coconut oil in a skillet over medium heat, add the garlic, ginger, crushed red peppers, and half of the orange zest. Cook until golden, about 1 minute.
Once the oil and spices are golden, add the fish sauce, the white wine vinegar, honey and cook about 10 seconds.
Add the orange juice/starch mixture to the skillet and bring to a boil, stirring constantly. Note: Be careful not to keep it on the burner too long or you’ll get a really thick consistency which is what you don’t want.
Reduce the heat and simmer for a minute or two. Remove the mixture from the heat, but leave it in the skillet.
Break the two eggs into a bowl and whisk them together.
Dunk each piece of chicken in the raw eggs and coat them with the almond flour.
Pour olive oil (or coconut depending on your preference) into a big skillet until it’s about 1/2 an inch deep. Heat it to at least 365 F.
Add the pieces of chicken to the oil and cook until golden on each side, about 5 minutes.
Transfer the cooked chicken pieces to a paper towel for a few minutes then transfer them to a serving dish.
Once the chicken is fried, place the skillet containing the sauce back on medium heat and warm it up. When it’s warm, pour it over the chicken pieces and mix to get them nicely coated with the sauce.
Garnish with the remaining orange zest and the sliced green onions.
This was really delicious. As I mentioned in direction #4, I did have a problem with the sauce but it was easily corrected thanks to the advice from my friend Kathy.
Here are a few pictures for your perusal …
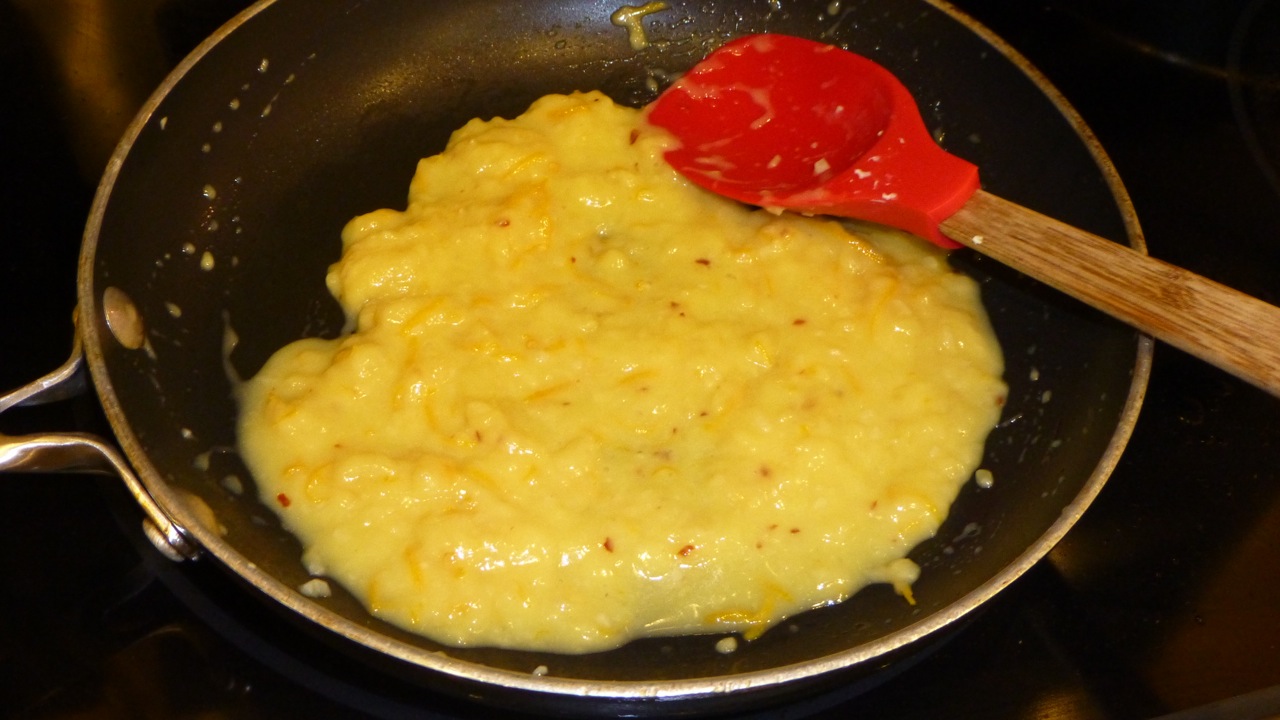
So — this is what happens if you cook the orange sauce too long … quite “gummy.”
Unusable Orange Sauce
I added a little bit of orange juice at a time to make the consistency pourable but still “thick.” Like this …
Orange Sauce
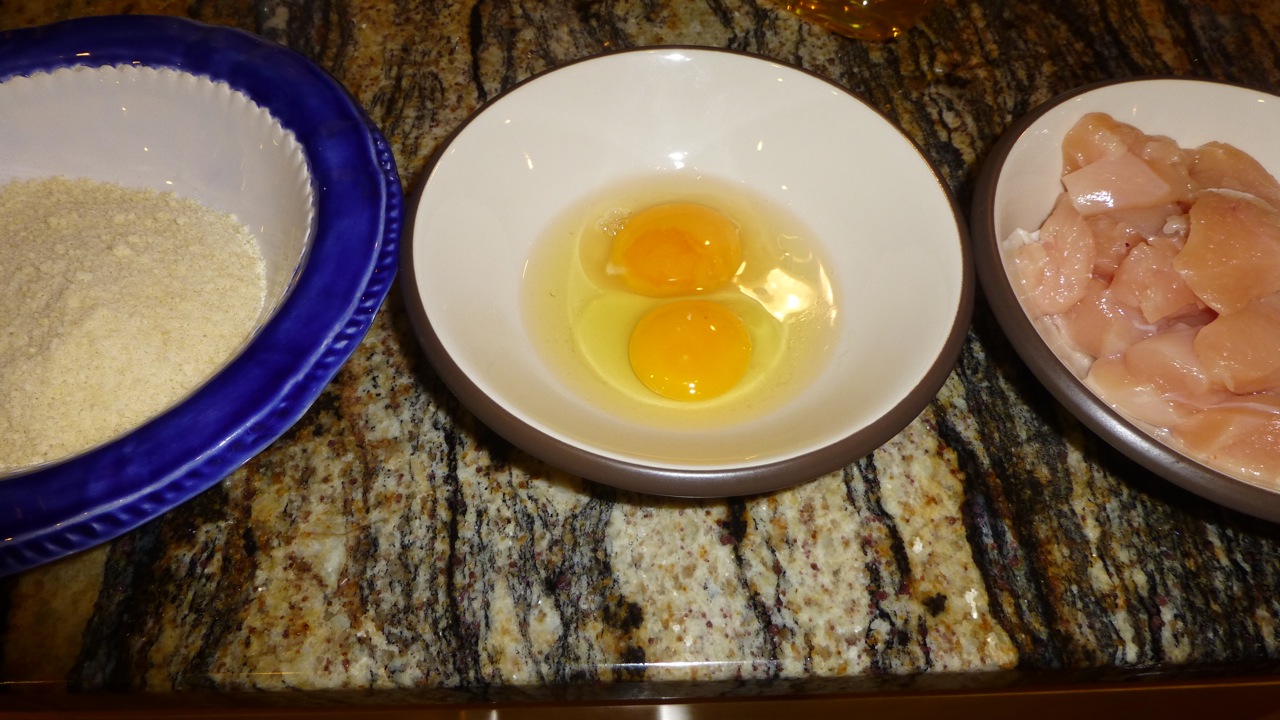
Here’s my “workstation.” I had it to the right of the stovetop so I could “dunk” the chicken in the egg and flour and straight into the hot oil. Those eggs should be whisked!
Workstation
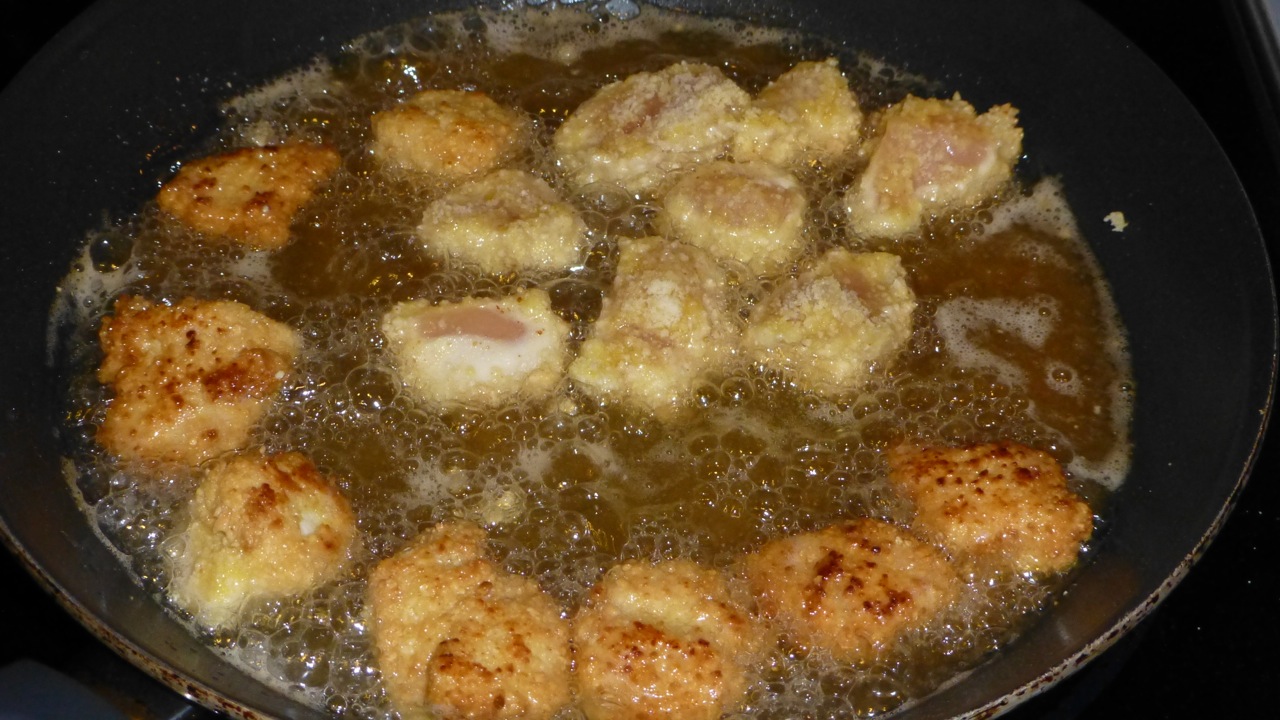
The frying went well. I “eyeballed” when the chicken was done by how crispy it looked. See the ones I turned already in the picture? They were nice and browned and ready for turning.
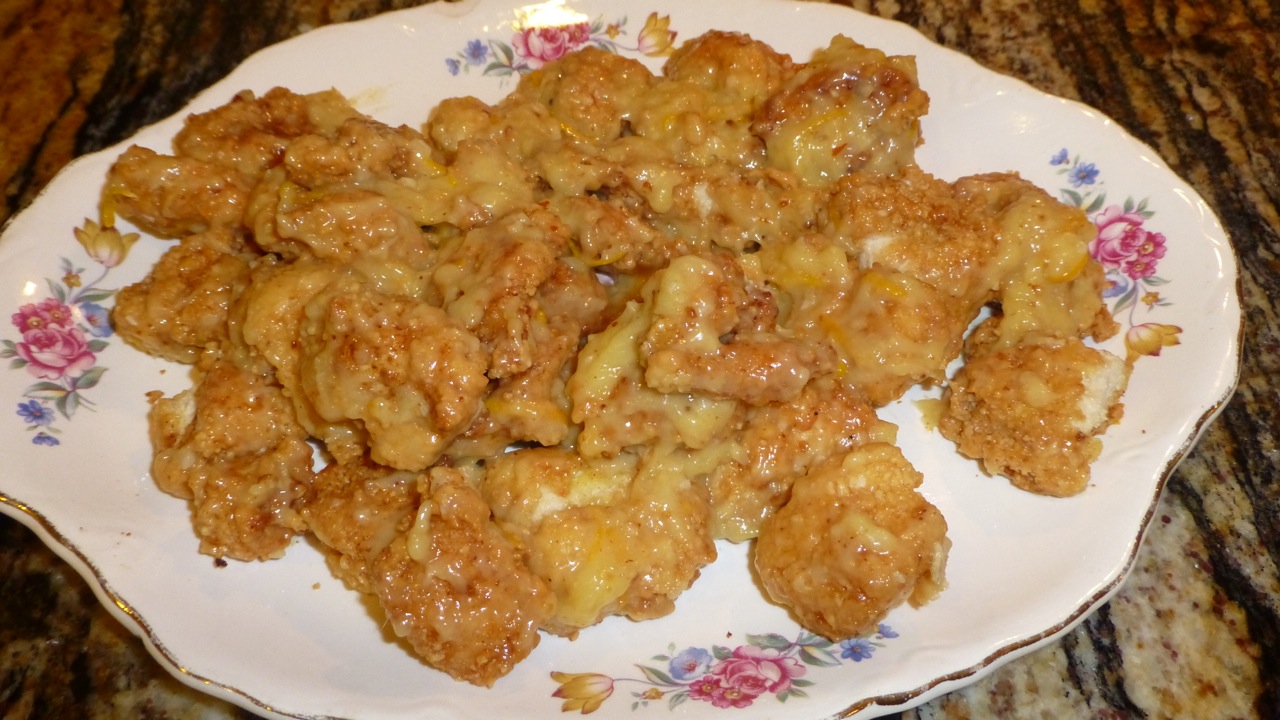
And of course, the finished product. Â Oh, did I already say how delicious they were?
Orange ChickenOrange Chicken with Cinnamon Fruit Salad
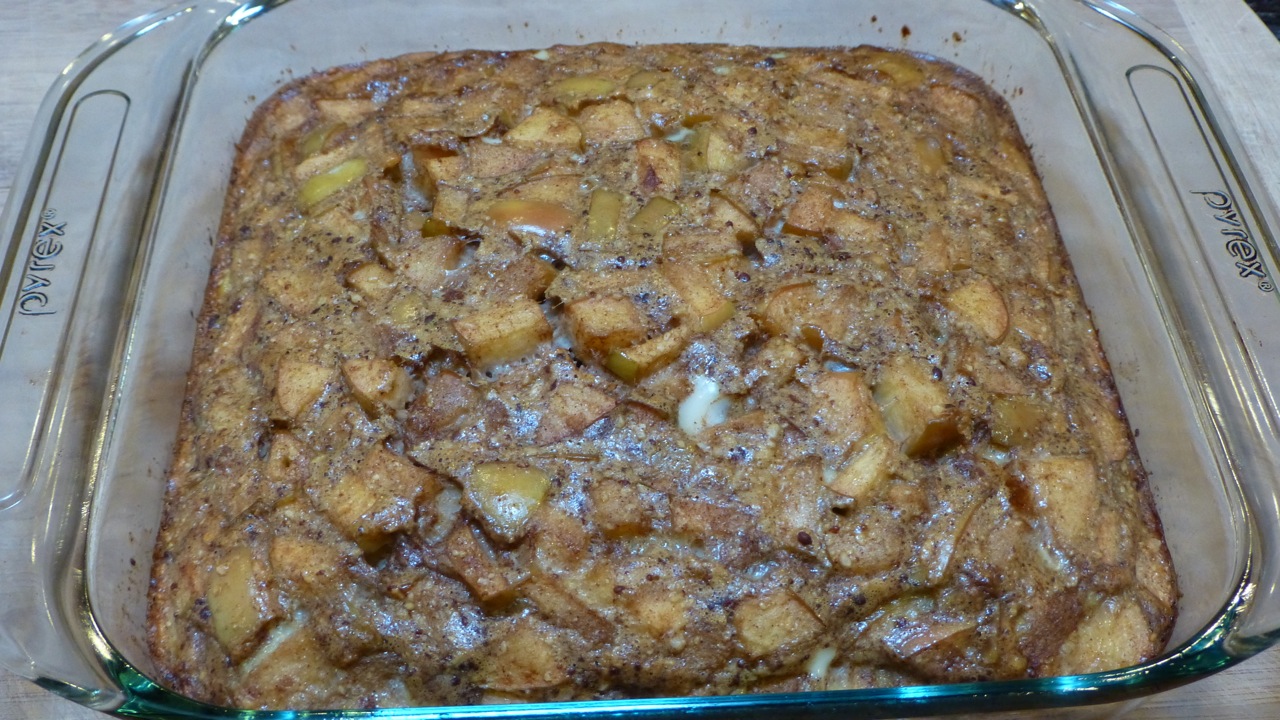
This paleo Apple Cinnamon Breakfast cake was pretty good for a paleo cake (normally they don’t have much taste — perhaps that’s a cook problem?).
Because the recipe calls for 9 eggs (yes, you read that right), we refrigerated it after we ate some. The next day for breakfast, it still tasted good.
Because my husband doesn’t like coconut flour too much, he was not overly fond of this cake — so, personal preference on whether one will like it or not (of course, that’s how it is with all recipes, eh?)
It was quite simple to make.
Saute the apples, water, vanilla and cinnamon in a skillet until the apples are the consistency of apple pie filling – approximately 10 minutes. Once the apples are finished cooking, add 2 tablespoons of coconut oil or butter to the mixture and stir until the oil or butter is melted. Allow the apple mixture to cool for a few minutes before adding it to the egg mixture.
This is what it will look like …
Sauteed Apples
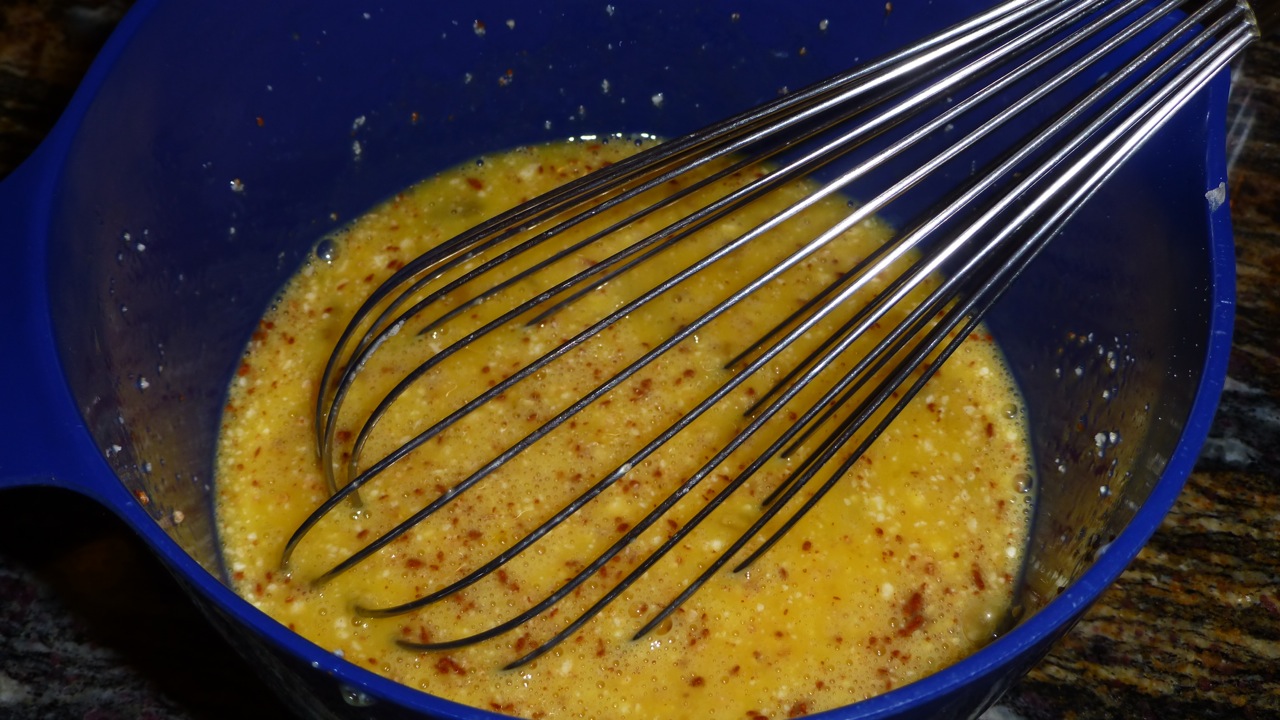
Next, you’ll be combining the eggs, coconut milk, coconut flour, ½ tsp cinnamon, maple syrup, baking soda and salt until its well whisked up.
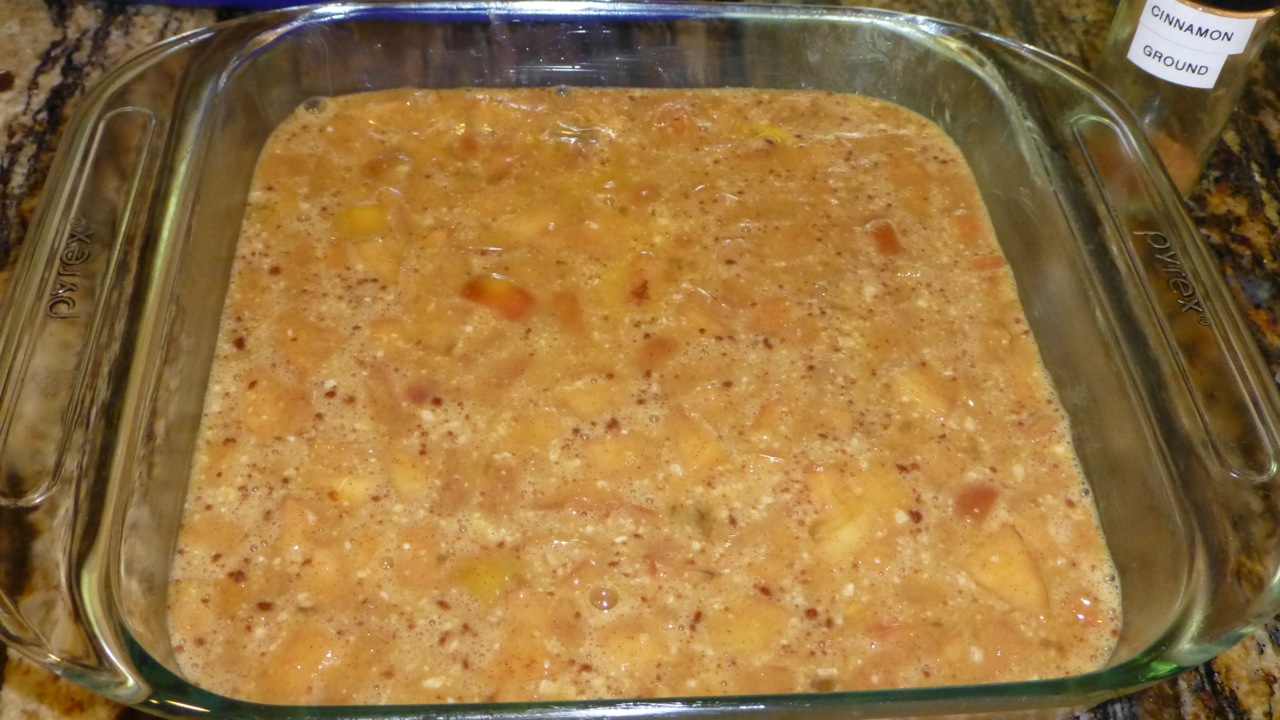
After combining the apple mixture with the egg mixture, pour everything into a greased 8×8 glass pan. Here’s what it looks like unbaked.
Unbaked Apple Cinnamon Cake
And, the finished product will look like this …
Baked Apple Cinnamon Cake
The apples rose to the top of the cake but in reading the reviews for this recipe, this is normal.
Okay then. Ready to bake? Here’s the recipe …
Ingredients
4 cups diced apple (cored and peeled)
½ cup water
1 Tablespoon cinnamon
1 teaspoon vanilla
2 Tablespoons butter
9 free range eggs
2 – 3 Tablespoons pure raw honey
3 Tablespoons coconut milk (if paleo) or milk of choice
1 ½ Tablespoon organic coconut flour (no substitutions per the original recipe as it will not work correctly)
1/2 tsp additional cinnamon
heaping ¼ tsp baking soda
pinch of salt
Directions
Preheat oven to 350 degrees fahrenheit.
In a skillet, saute the apples, water, vanilla and cinnamon until the apples are the consistency of apple pie filling – approximately 10 minutes.
Add 2 tablespoons of butter to the mixture and stir until the butter is melted.
Allow the apple mixture to cool for a few minutes before adding it to the egg mixture.
In a bowl, whisk the eggs, coconut milk, coconut flour, ½ tsp cinnamon, maple syrup, baking soda and salt until its well combined.
Combine the egg and apple mixture then pour it into an olive oil or butter greased 8×8 pan. Bake for 50 minutes or until the top is nice and golden and the middle is cooked through.
Even though this recipe has almost 1.5 tablespoons of cinnamon, it wouldn’t hurt to add more — if you’re a cinnamon lover like I am.
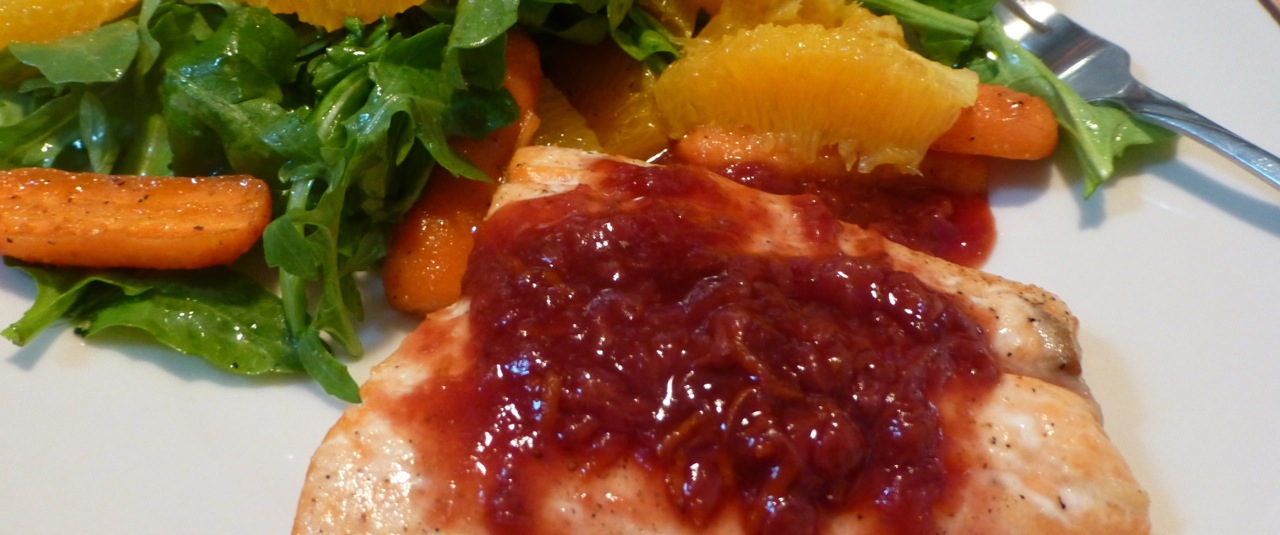
This Salmon with Strawberry Balsamic Glaze was delicious. I loved the sweetness in the glaze that melded with the tenderness of the salmon. We used honey instead of agave syrup and it turned out just fine.
Salmon with Strawberry Balsamic Glaze
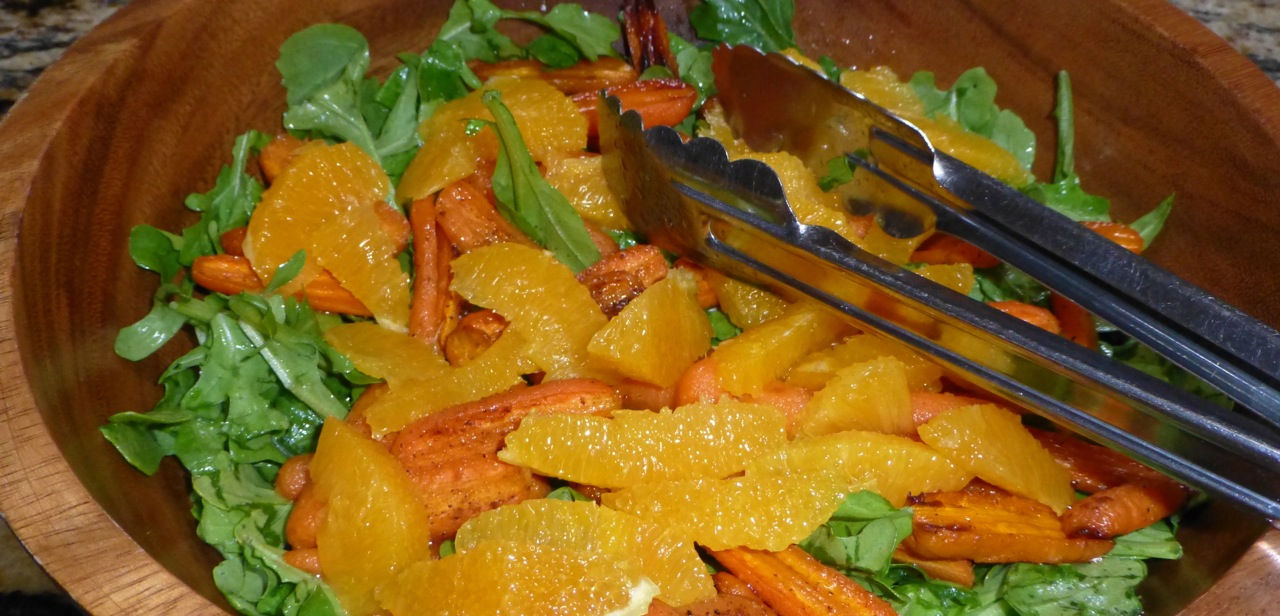
Served with a paleo Roasted Carrot & Blood Orange Salad with an arugula base (replace the brown sugar with honey), it made for the perfect meal.
Roasted Carrot & Blood Orange Salad
I enjoy trying different marinades/glazes and salads with salmon. For awhile, we were having salmon once a week and for some reason I started to get tired of it. I wanted a different kind of fish. But the feeling soon wore off as salmon is one of my favorite meals.
I’m still catching up with some of the reviews on some paleo recipes that my son cooked for us while he was here.
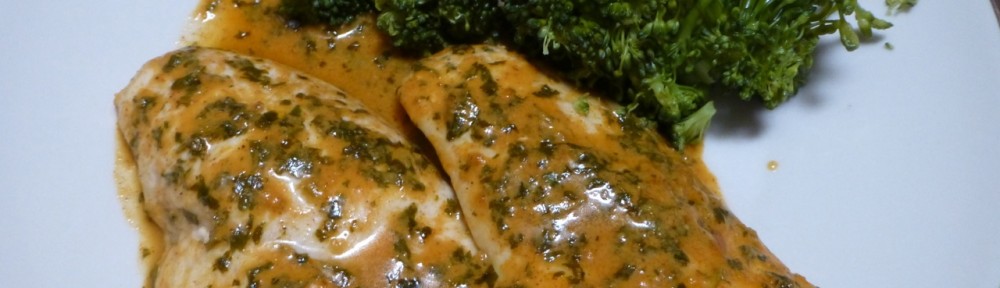
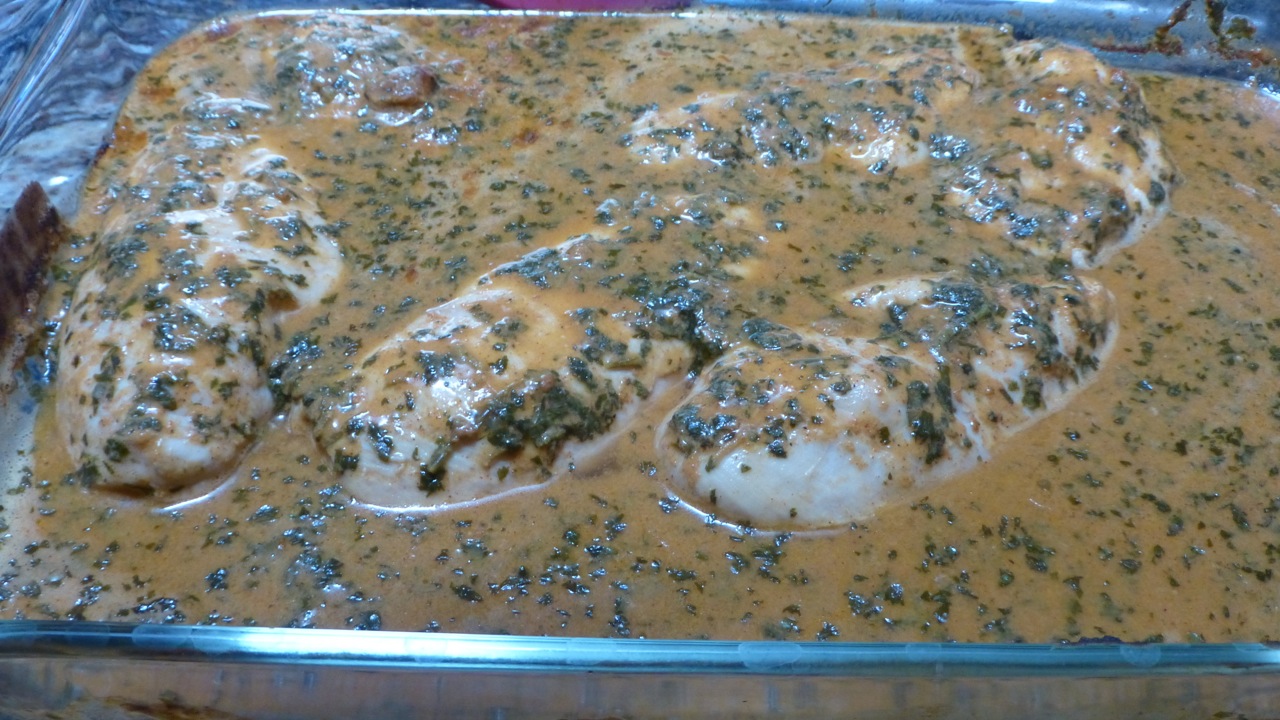
This Baked Mustard Lime Chicken was very limey. The recipe calls for 1/2 cup of fresh lime juice. I would halve that amount so that it won’t make me pucker — unless, that is, you happen to really really like lime. I couldn’t get past the lime flavor in this recipe.
Baked Mustard Lime Chicken
Looks pretty juicy, doesn’t it?
My son served this with steamed broccoli which accompanied it very well. I dipped my broccoli in the chicken sauce and it tasted okay that way.
I will be trying this recipe again but, again, with less lime juice.
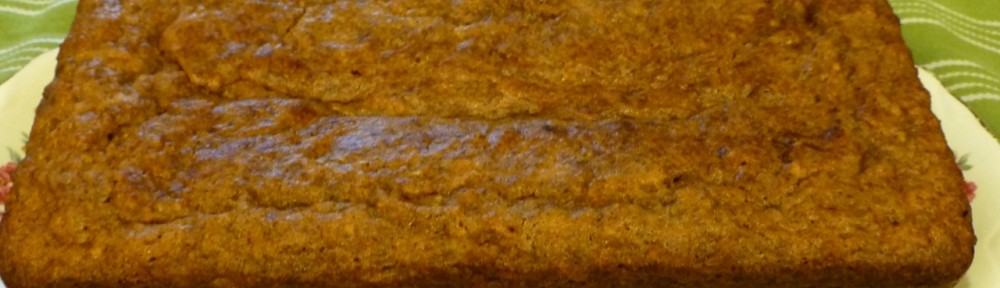
I made this Apple Cinnamon Paleo Bread that my son had given me his recipe for. It turned out okay but not great. It’s worth my giving it another try though as it’s paleo and I like both apple and cinnamon.
I served it with a Cabbage Soup and that turned out delicious. Not everything can be perfect, eh?
Ingredients
2 ripe bananas
1/2 cup apple sauce
4 eggs
1/2 cup almond butter
4 tbsp coconut oil, melted
2 apples, peeled, cored, and shredded
1/2 cup coconut flour
1 tbsp cinnamon
1 tsp baking soda
1 tsp baking powder
1 tsp vanilla
pinch of sea salt
Ingredients
Preheat the oven to 350 degrees fahrenheit.
Combine the bananas, apple sauce, eggs, nut butter and oil in a mixer and mix well on medium speed until its fully incorporated. (Start slow then increase the speed.)
Once all of your ingredients are blended together, add the coconut flour, cinnamon, baking soda, baking powder, vanilla and sea salt then mix well.
Grease a 9×5 glass loaf pan with olive oil spray or butter. (I used a dark pan and that may be why I had a problem — see below.)
Pour the batter into the pan and spread it evenly.
Place the pan in the preheated oven and bake for 55-60 minutes or until a toothpick inserted into the center comes out clean.
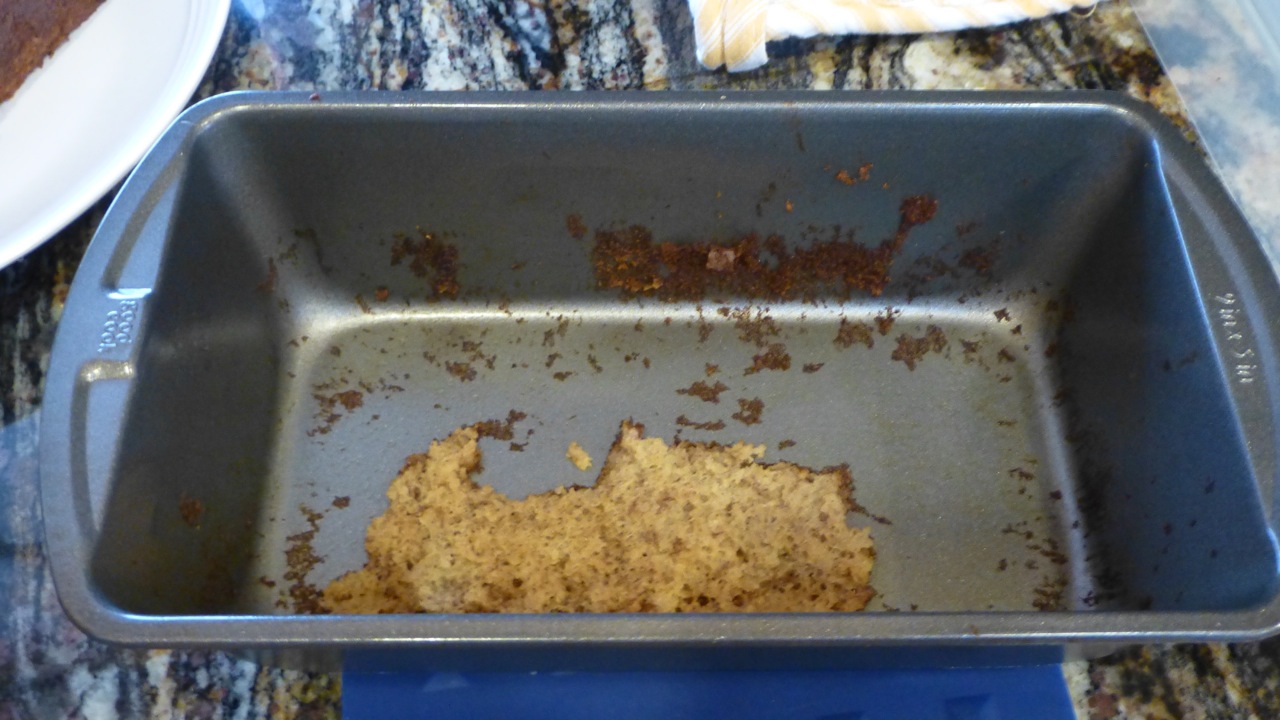
Remove from the oven and flip your bread out onto a cooling rack after it cools.
Slice and serve.
I allowed the bread to cool for about 10-15 minutes before trying to remove it and this is what happened …
Ugh! Oh well, live and learn. I probably should have used (besides the glass pan) more olive oil spray on the bottom.
It was a pretty simple recipe to follow. I liked the bread but my husband did not. He’s not a big fan of coconut though and that probably made a difference.
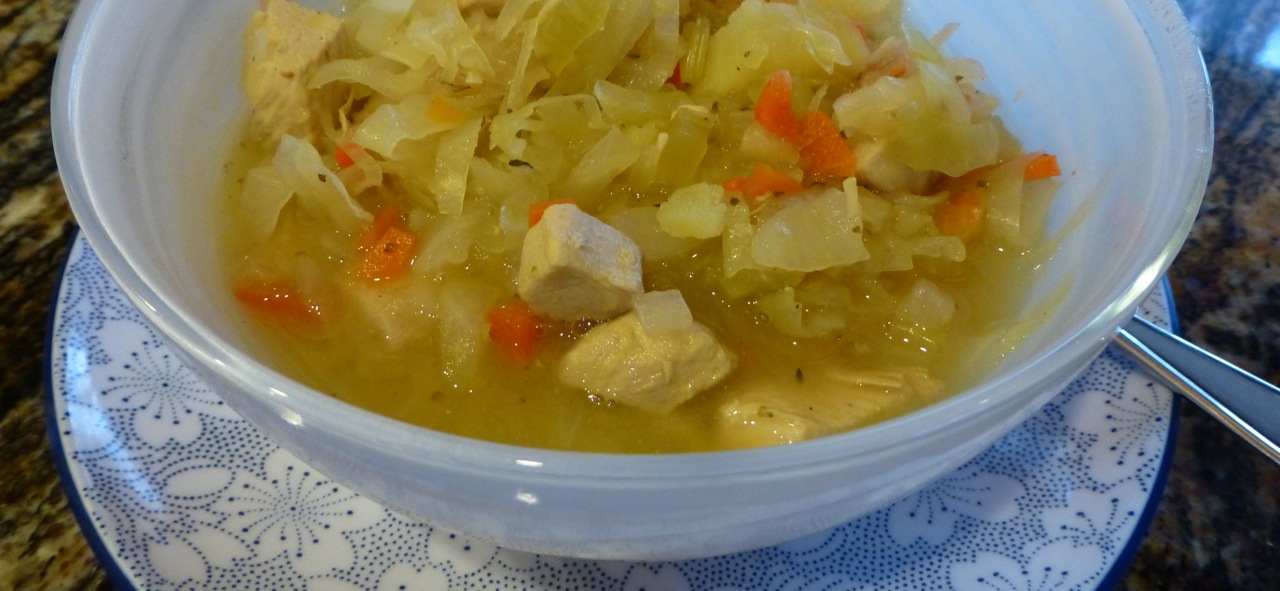
This recipe, called Veselka’s Cabbage Soup, was exceptionally good even though it had sauerkraut. Yes , you heard me right — sauerkraut. Now, before you move on from this post, let me tell you that I don’t like sauerkraut but this soup surprised me and was really delicious.
When my son gave me this recipe to try, I wrinkled my nose and automatically knew I would hate it. But I was wrong. So — for those of you who don’t like sauerkraut, I say “give it a try.” You can be proved wrong also. (We won’t tell anyone though.)
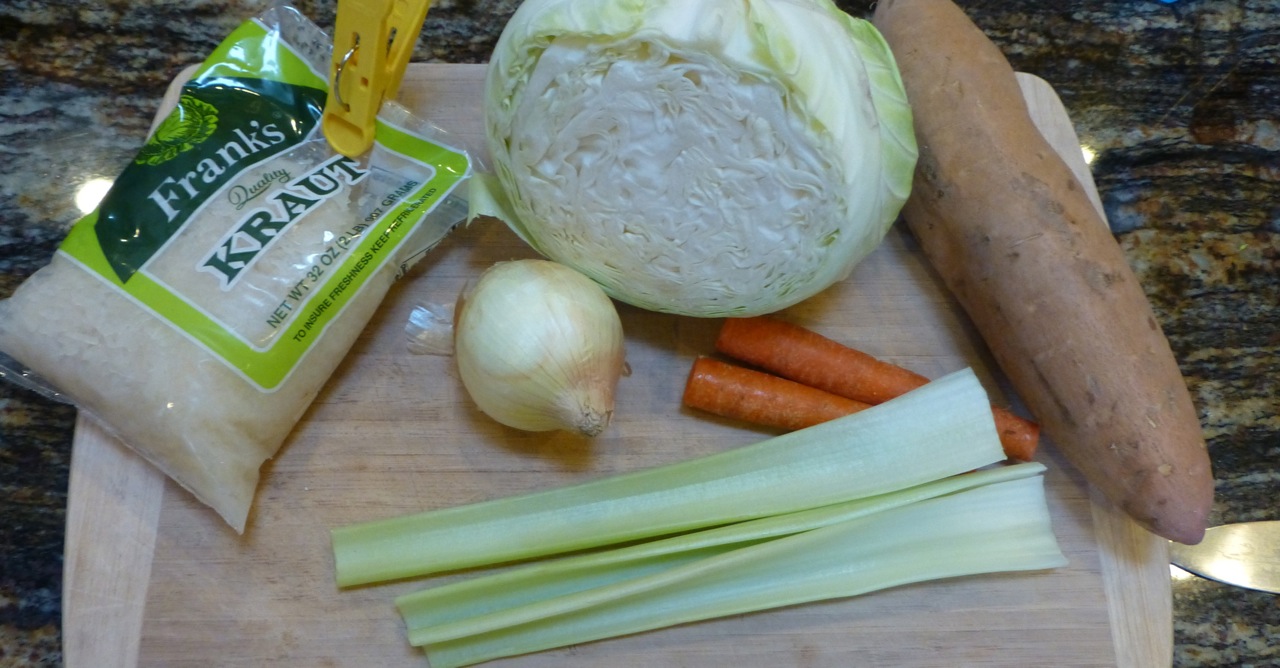
And look how easy it is to make — not too many ingredients.
Cabbage Soup Ingredients
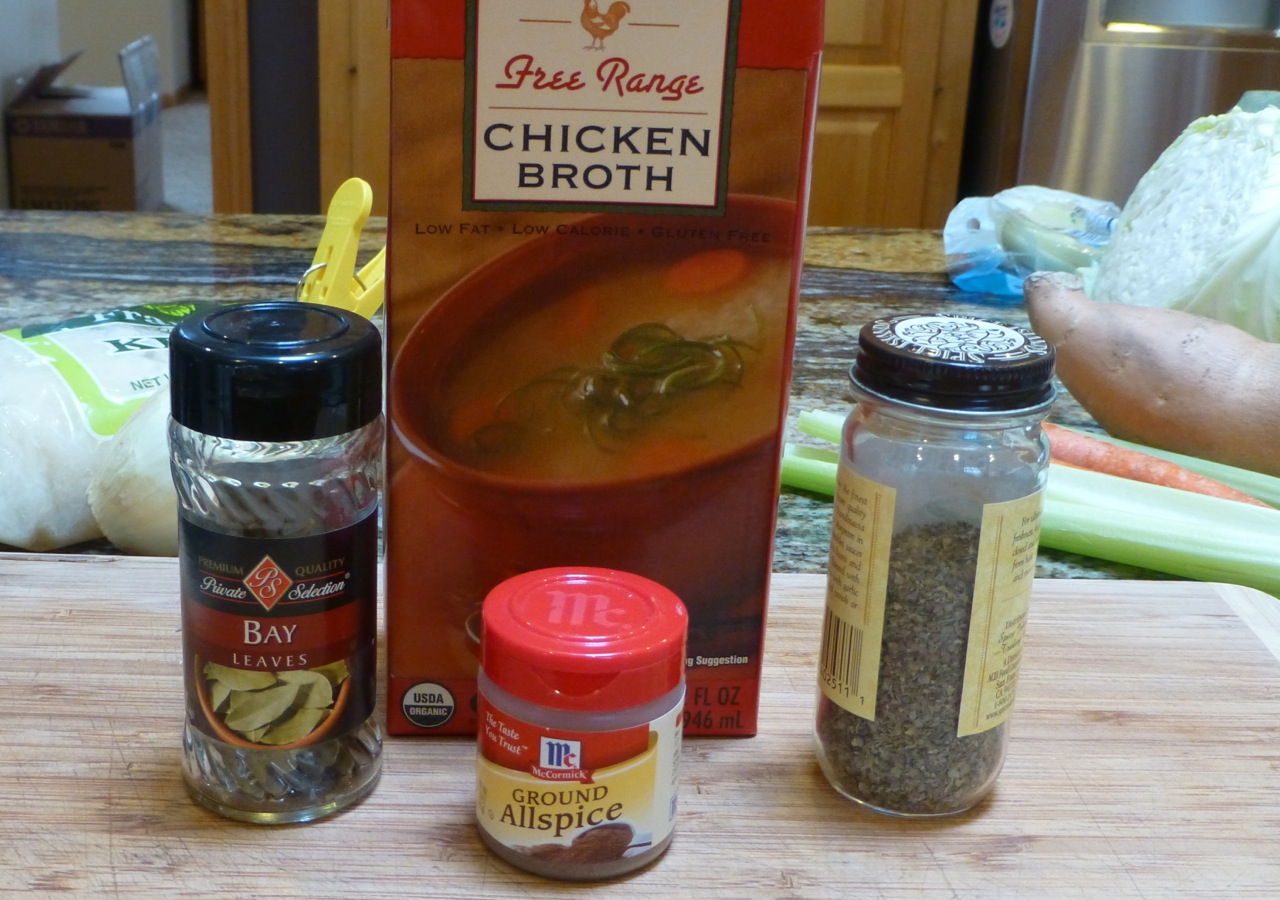
Hey! How did the marjoram get turned around?
More ingredients
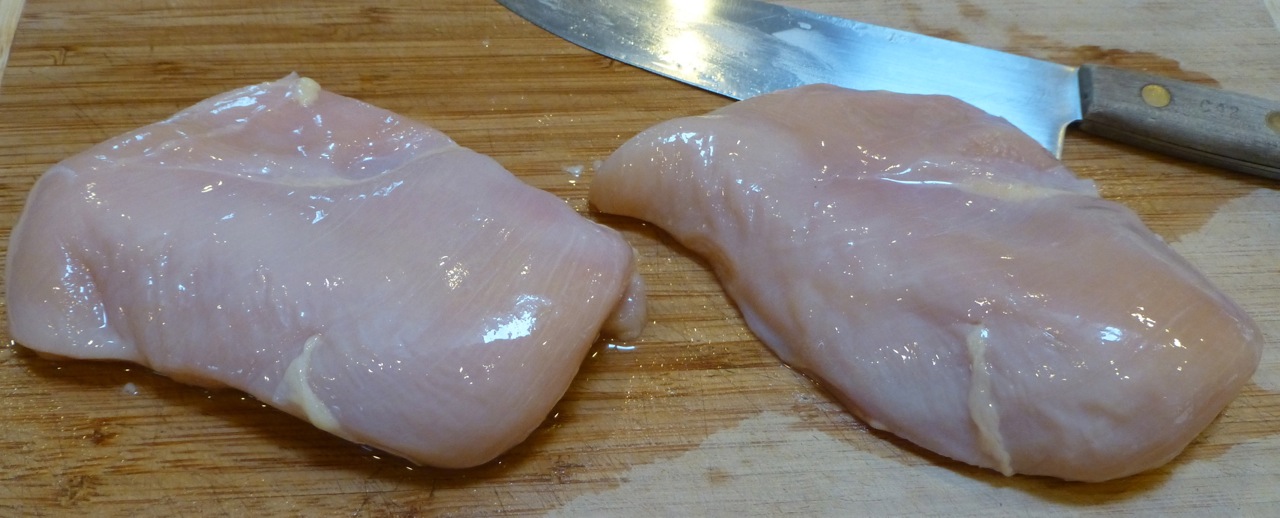
I used 2 boneless skinless chicken breasts instead of pork.
Chicken Breasts, Skinless and Boneless
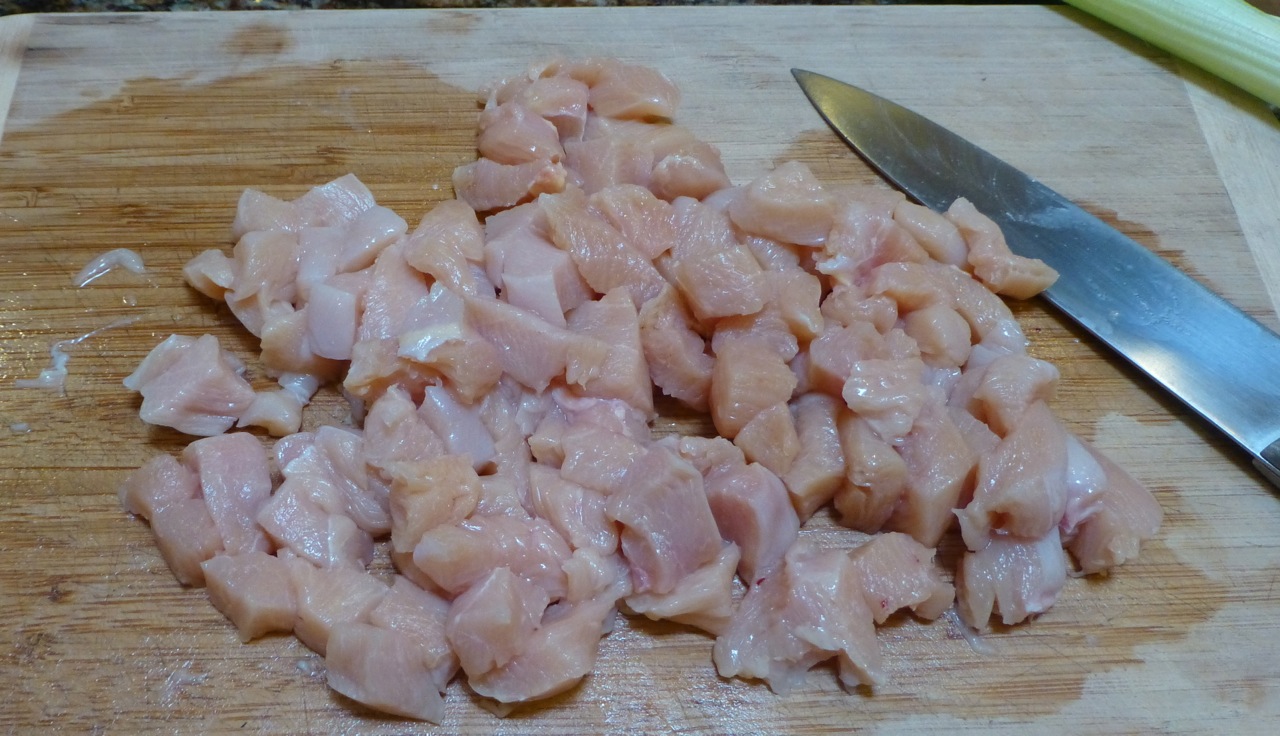
Cut the breasts into small bite size pieces.
Cut up Chicken
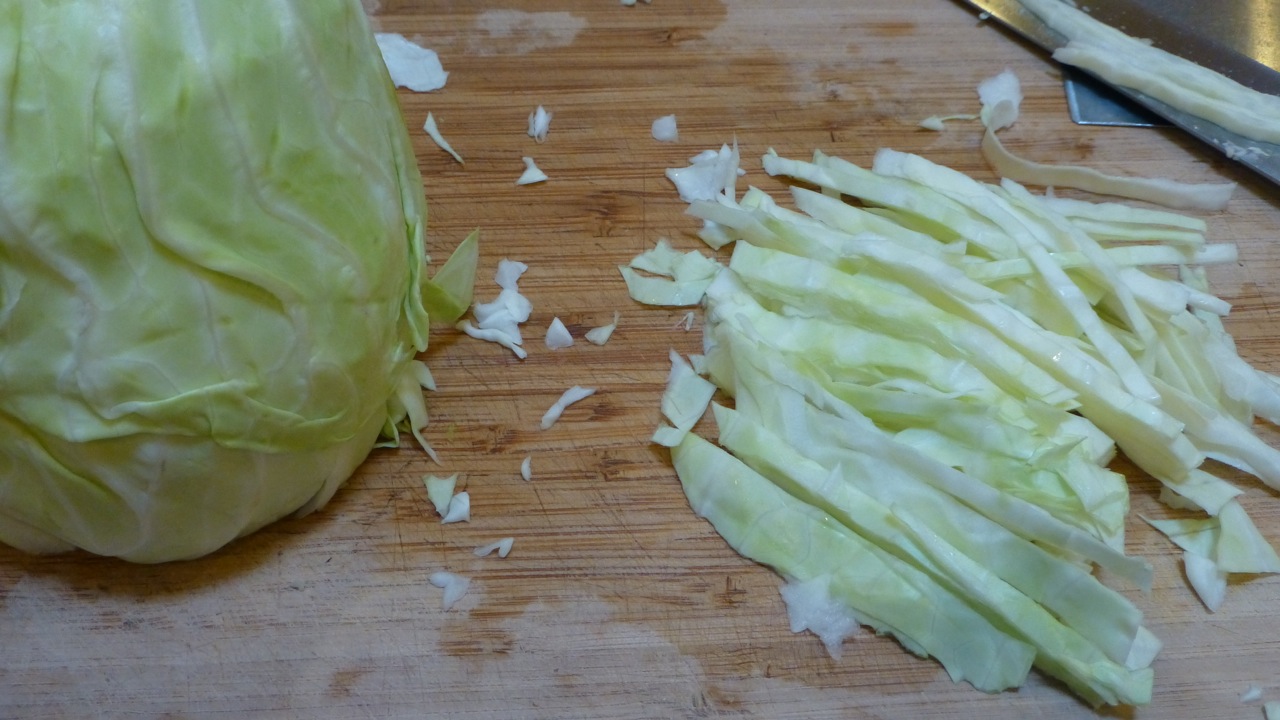
Slice the cabbage thinly …
Slice Cabbage
Everything will be going into a large pot … but not all at once (see directions below).
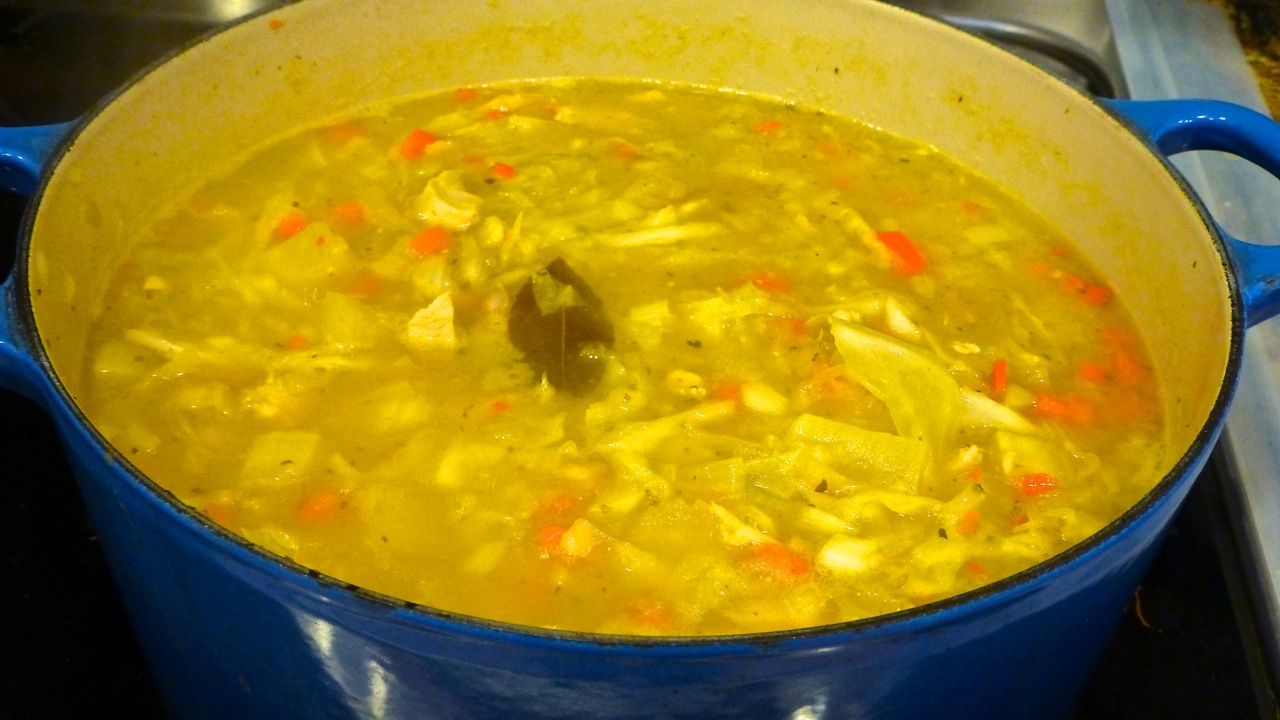
This is what happened to me while I allowed the soup to simmer … my liquid evaporated so I had to add more water to cover the ingredients.
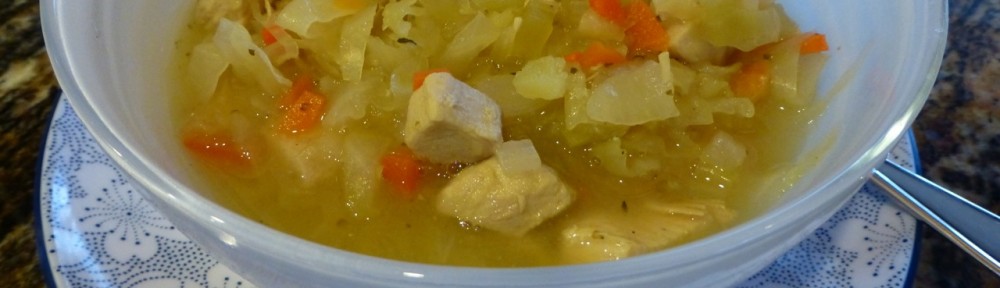
Ahhhh … this is much better.
Cabbage Soup
It was perfect!
Cabbage Soup with Sauerkraut
Now that I’ve got you hooked, here’s a list of all the ingredients and the directions.
Ingredients
1 pound of skinless, boneless chicken breasts, cut into bite size pieces
1 1/2 quarts chicken stock
4 cups water
2 teaspoons allspice
3 bay leaves
1 tablespoon dried marjoram
1 cup sauerkraut, plus around 4 tablespoons juice
1 large sweet potato, peeled and diced
2 carrots, minced
3 stalks celery, minced
1 small onion, diced
2 cups fresh cabbage, shredded thin
Directions
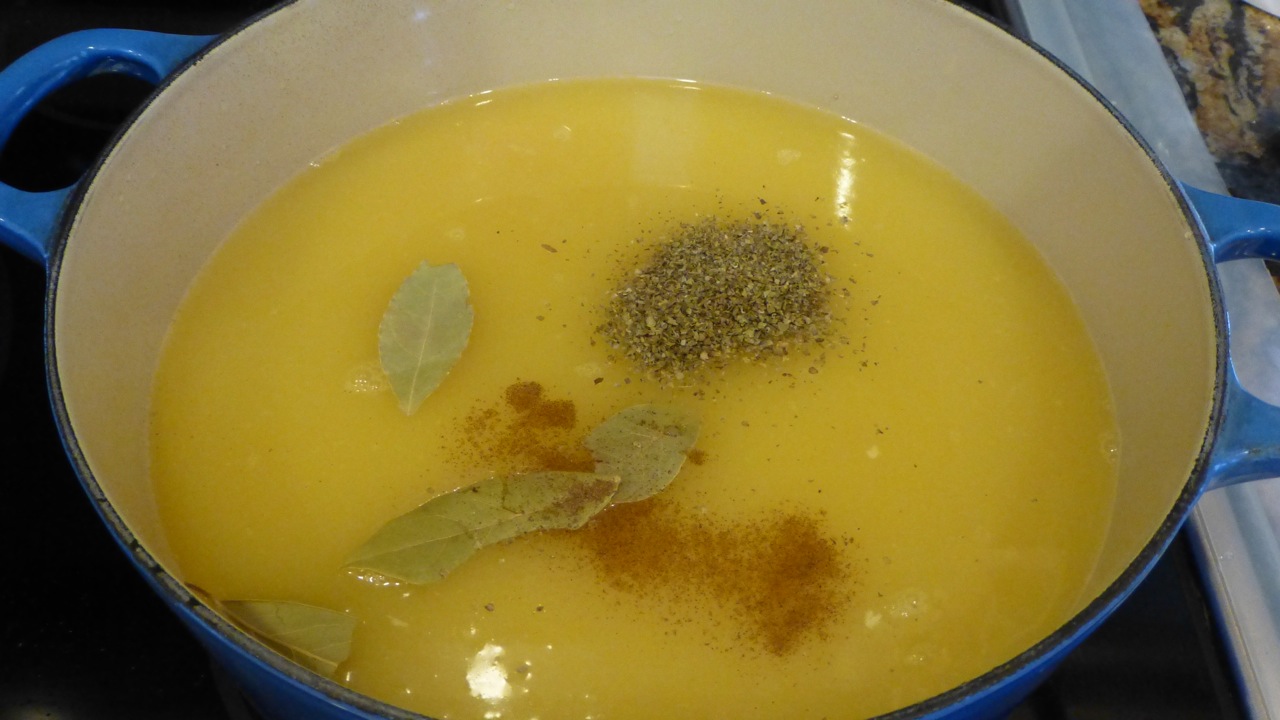
Place the chicken in a large pot with the chicken stock, water, allspice, bay leaves, and marjoram.
Bring this all to a boil and simmer on low heat for about 2 hours.
Remove the chicken and set it aside on a plate to cool. Skim fat from the stock, leaving a little bit of fat for flavor.
Add sauerkraut and simmer for 20 minutes.
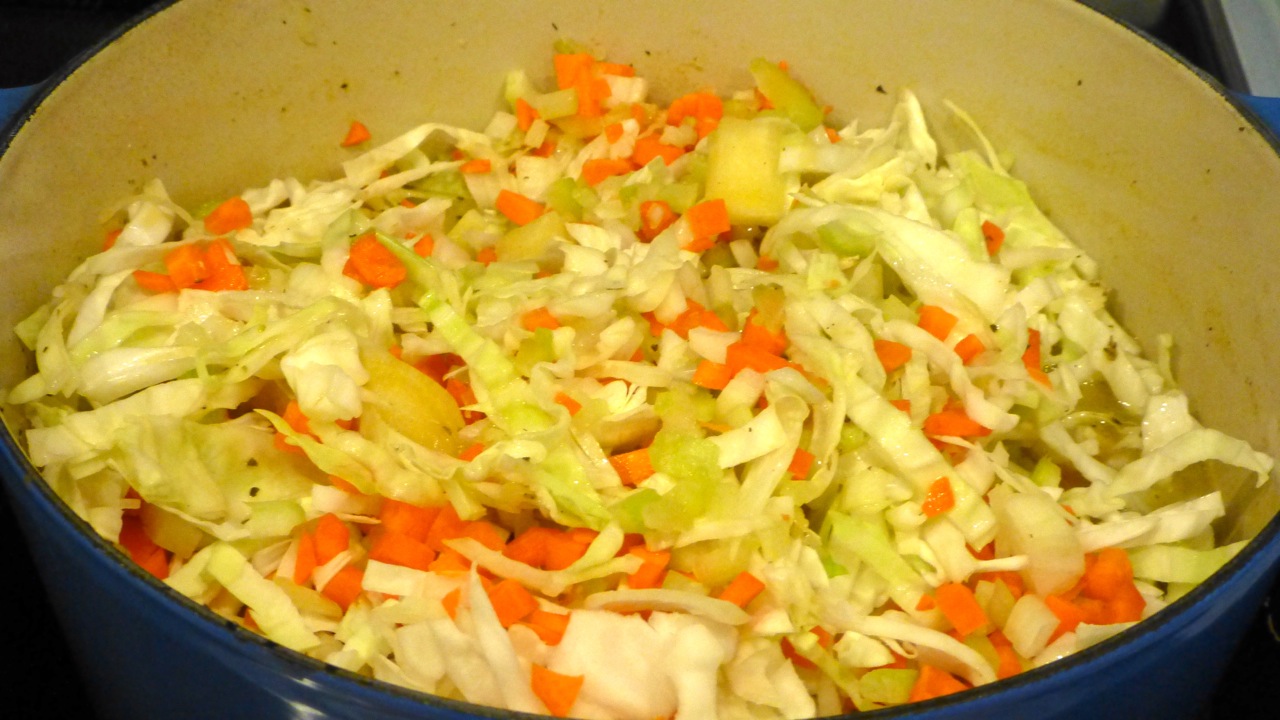
Add the sweet potato and simmer for 5 minutes.
Add the carrots, celery, onion, and cabbage and simmer for another 20 minutes.
Add the cooked chicken and simmer for 10 more minutes.
Season with salt and pepper then add the extra sauerkraut juice.
Keep your eyes on the pot to make sure your liquid doesn’t evaporate like mine did. You can add more water or chicken stock — whatever your preference.
Give it a try though. I really believe you won’t be disappointed. This recipe has been adapted to be paleo friendly.
Besides posting reviews on paleo recipes that our family has tried, I will be posting some new ones that I am making. (As you recall, my son was cooking for us before but he’s off to new adventures now.)
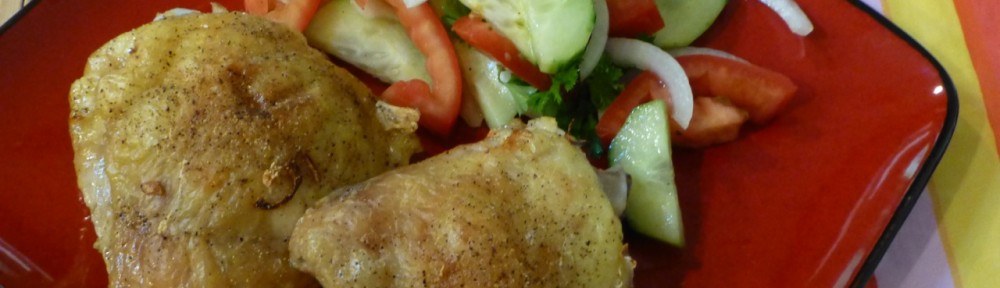
This entree and salad are very simple to make. The chicken does take a little time to bake (40 minutes or so) but it’s well worth it. Even though you use few ingredients for the chicken, it is quite tasteful.
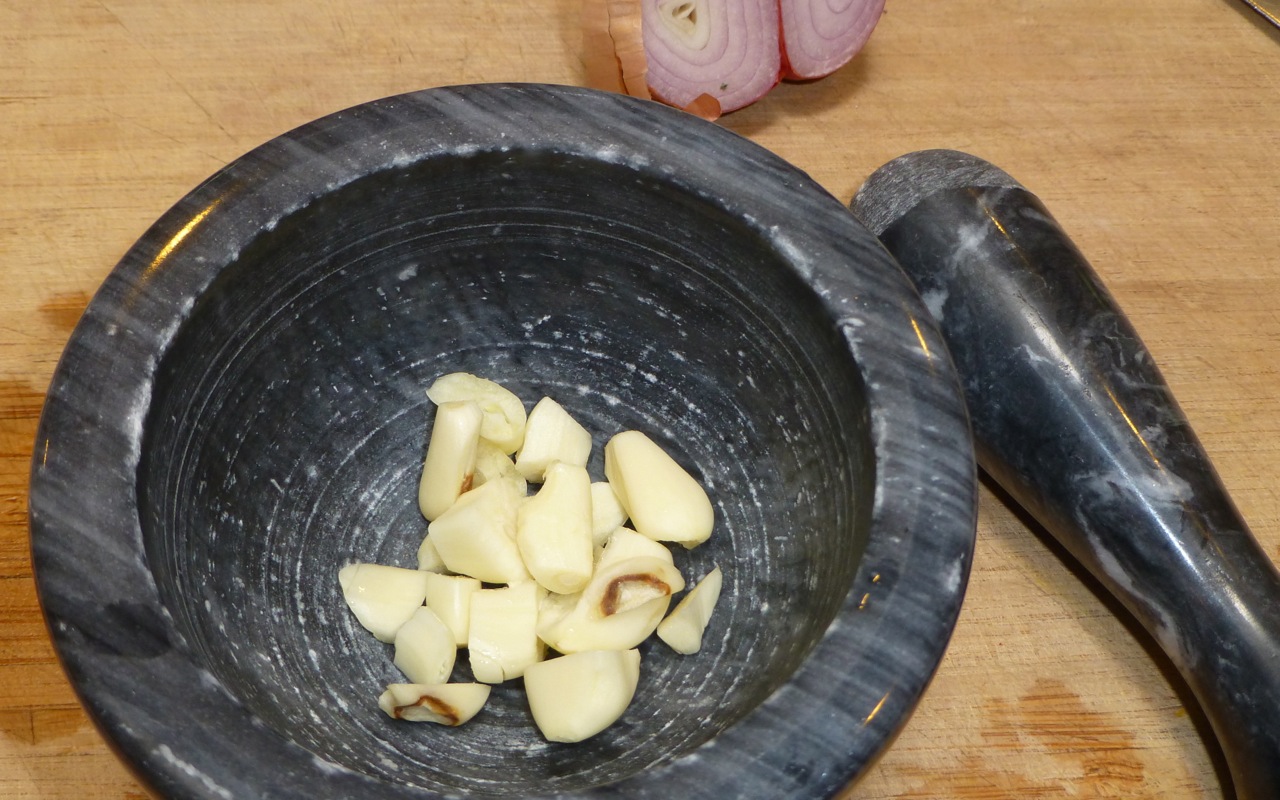
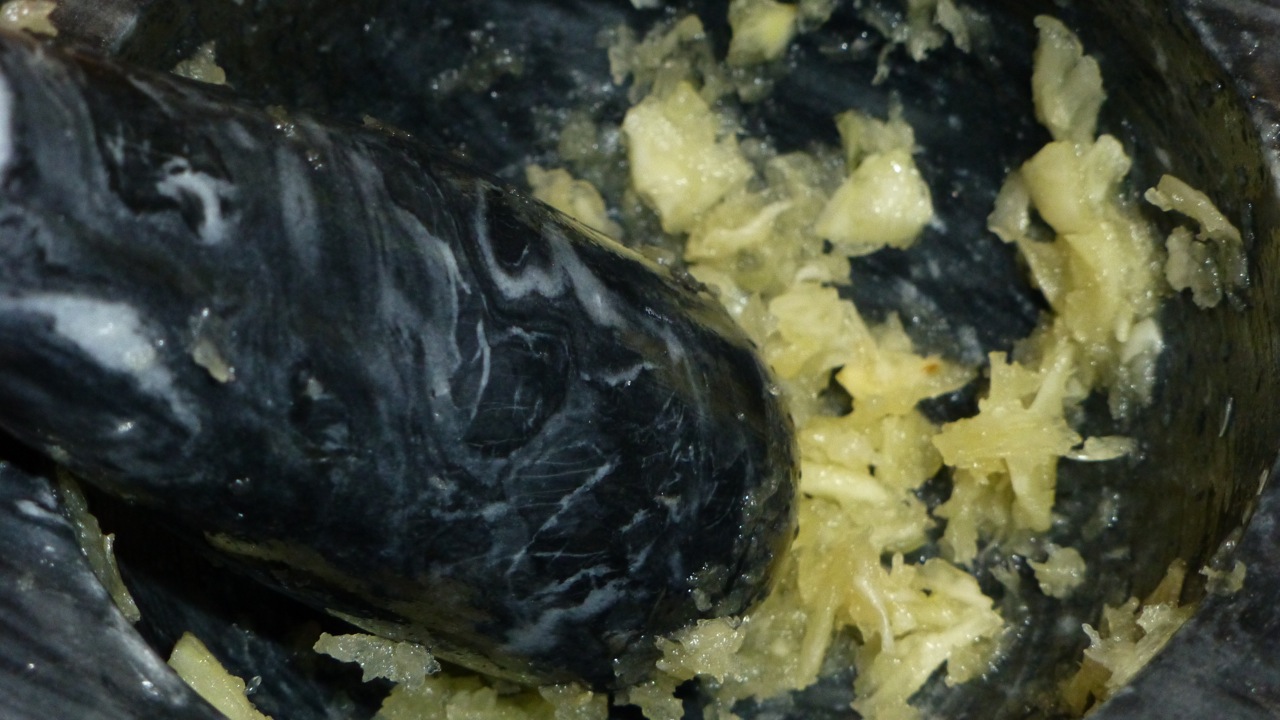
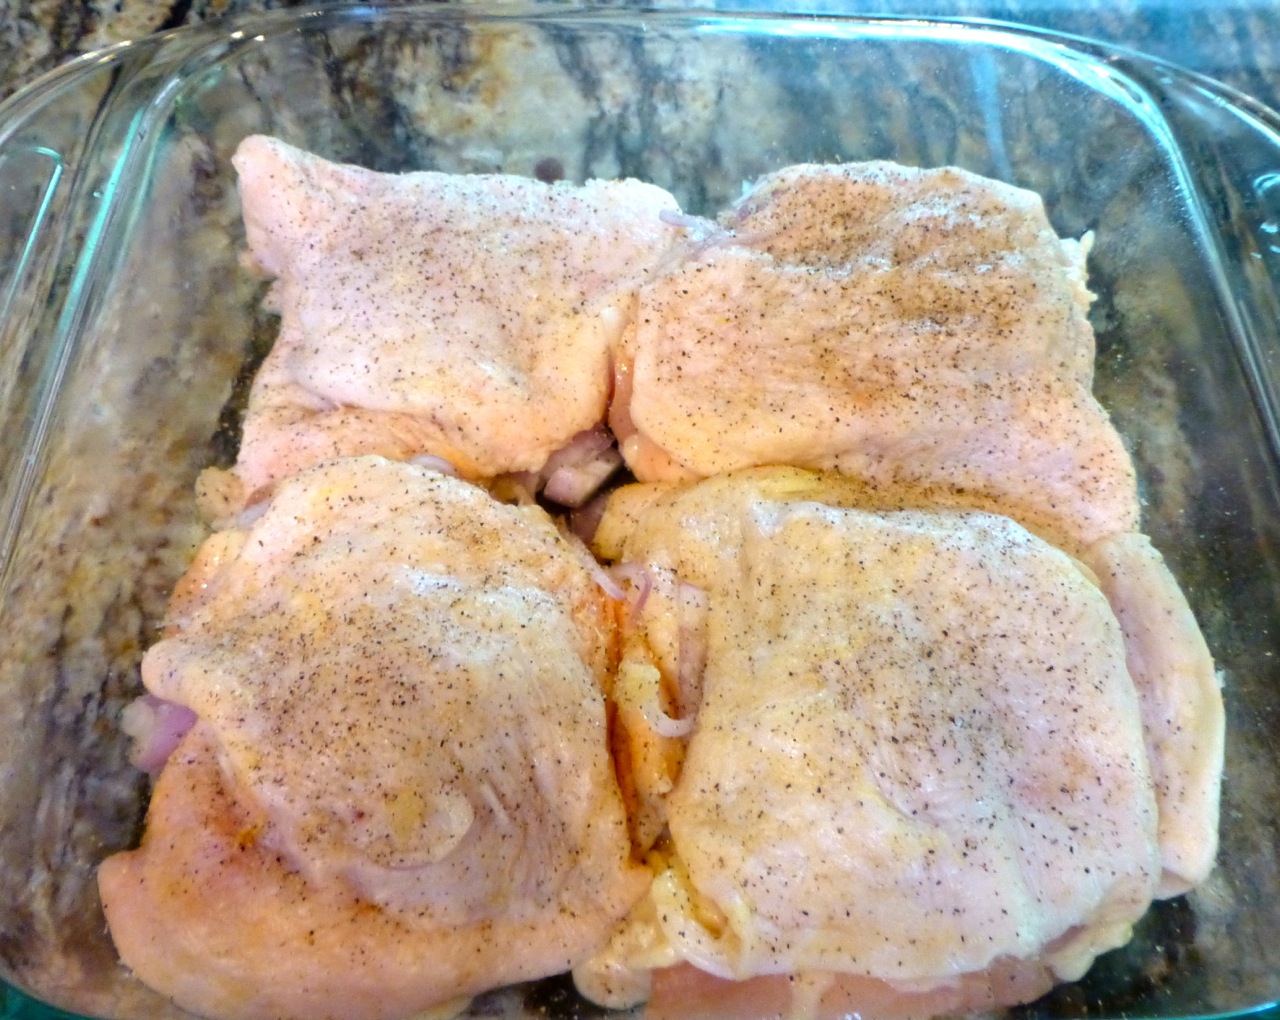
Using your finger gently separate the skin from the thigh to create a pocket on top but make sure you don’t remove the skin
Combine the shallot and garlic then use a butter knife or small spoon to spread the mixture under the skin
Sprinkle the skin with salt and pepper
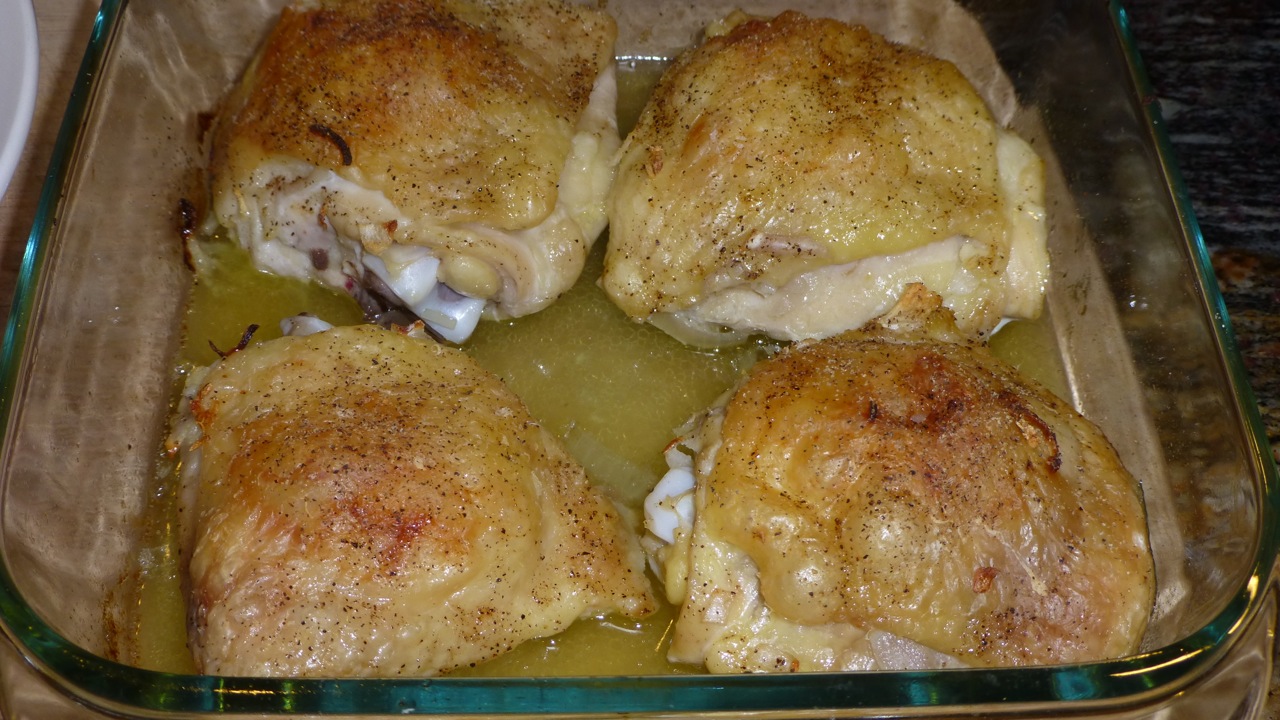
Bake for 40–45 minutes, or until the juices run clear.
The chicken will look like this after its prepped.
Prepared Chicken
And like this once it’s baked …
Baked Chicken
These were absolutely scrumptious. The original recipe calls for 8 chicken thighs but I don’t think there would have been enough of the pasty mixture to fill them and have them taste good.
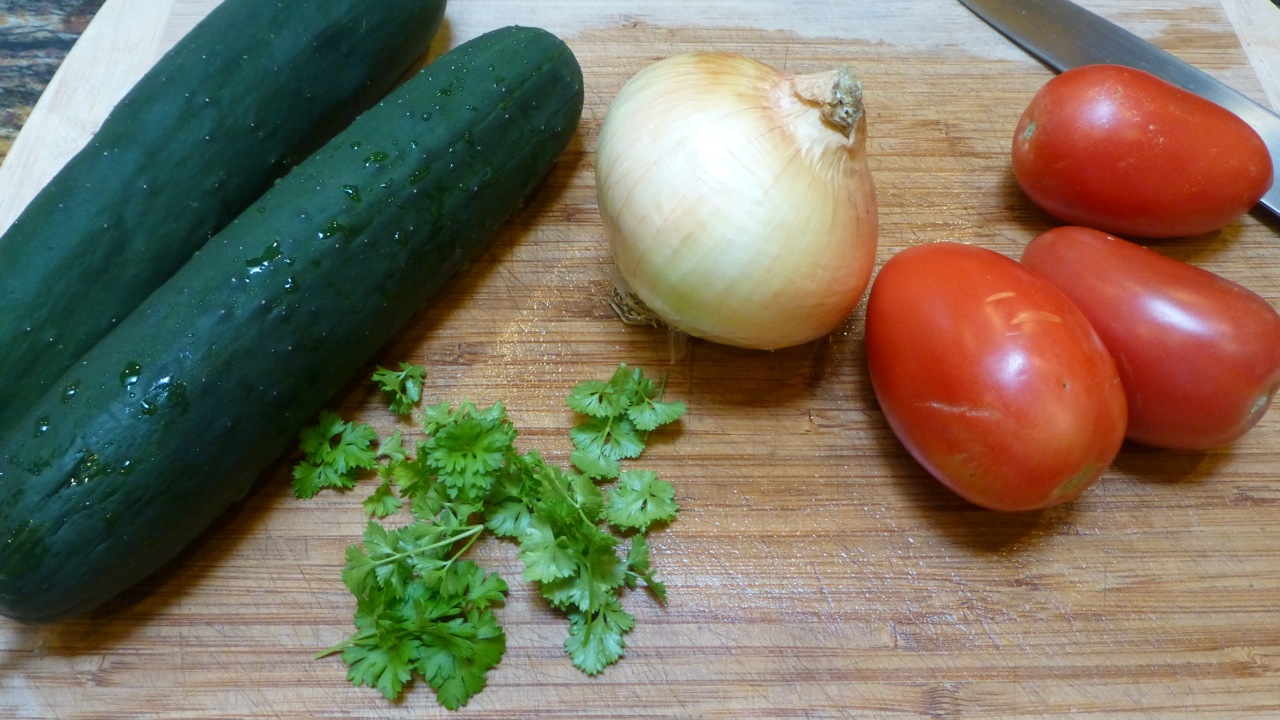
Oh yes, the salad. (Don’t worry, I didn’t forget.) My husband used to make this salad when I would allow him into the kitchen. It’s easy, nutritious and quite goodly to the palette. It’s called a Cucumber, Tomato and Onion Salad and here are the ingredients you need.
Salad Ingredients (not pictured olive oil, apple cider vinegar, salt and pepper)
Ingredients
2 cucumbers, peeled and thinly sliced
4 roma tomatoes (original recipe calls for pint cherry tomatoes) sliced thickly
1/2 Vidalia onion, sliced thinly
2 tablespoons chopped fresh parsley leaves
1 tablespoon apple cider vinegar
1 tablespoon olive oil
Salt and freshly ground black pepper (to your taste)
Directions
In a medium sized bowl, combine the cucumbers, tomatoes, onion and parsley
In a small bowl, combine the vinegar, olive oil, salt, and pepper.
Add half of the oil mixture over the salad and toss lightly
Refrigerate for approximately 10 minutes
Set out the rest of the oil mixture to add if you need more dressing.
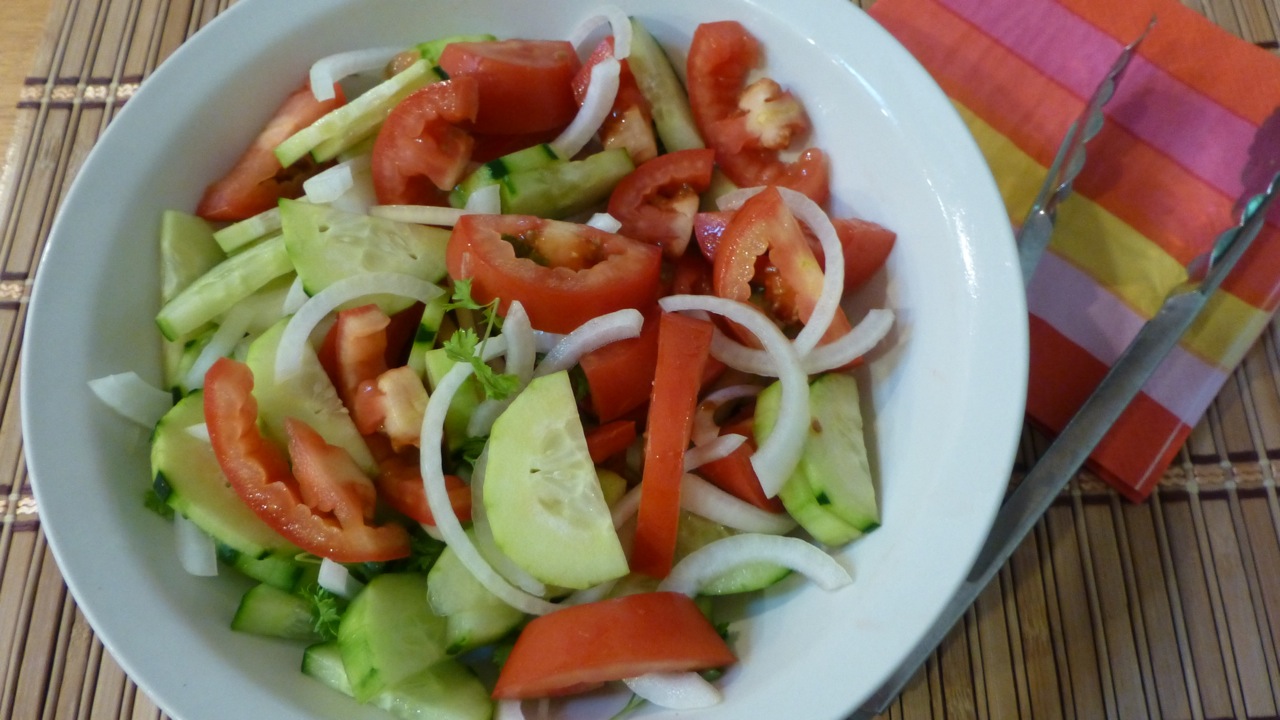
That’s it! And it’s a pretty salad.
Cucumber, Tomato & Onion Salad
This combination was perfect. I think it will become one of my staples.


 [/amazon_link]
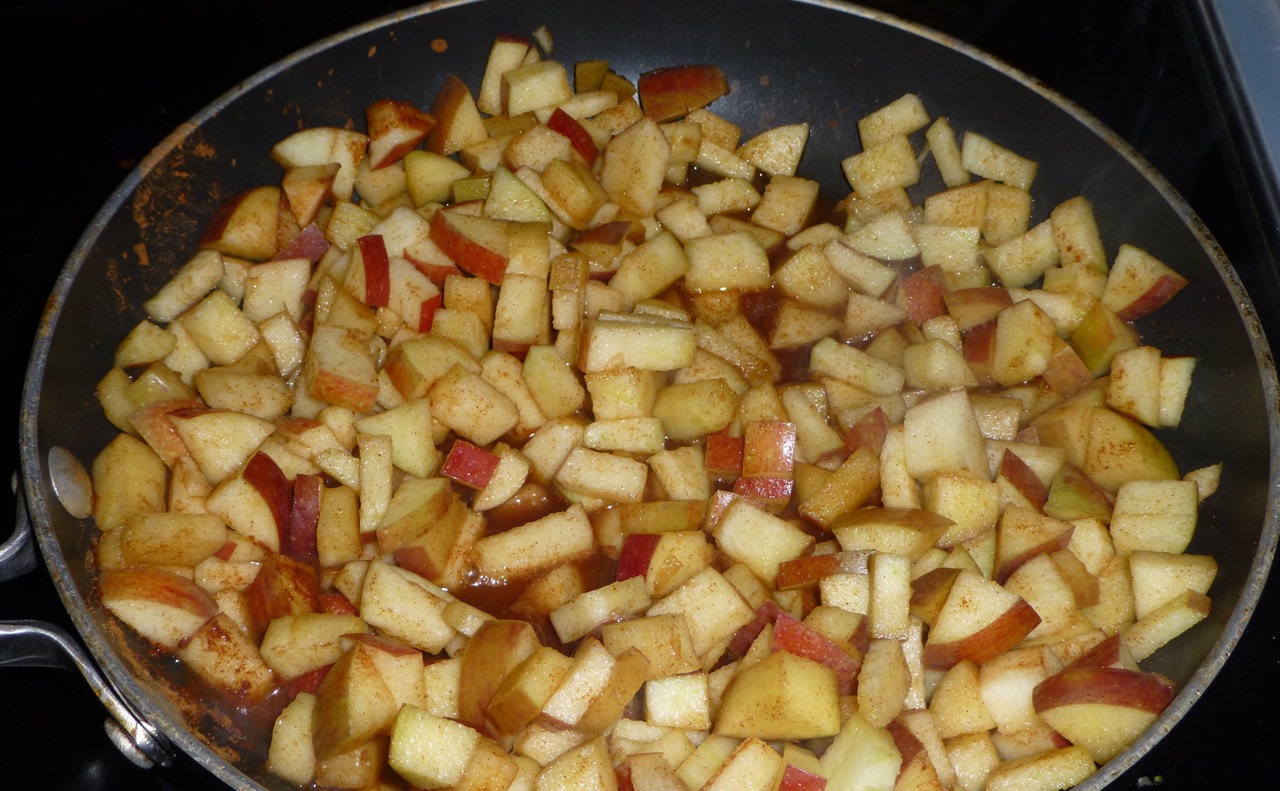

 [/amazon_link]