Paleo Brownies

These will be the second paleo brownie recipe that I have tasted. The first ones were made by my son awhile back when we first started eating paleo.

These brownies were not bad but could have been a tad better. My husband and I had different opinions of what more was needed though. I thought they were a bit dry but my husband thought they weren’t sweet enough. Interesting how two people eating the same food can critique it differently, no?

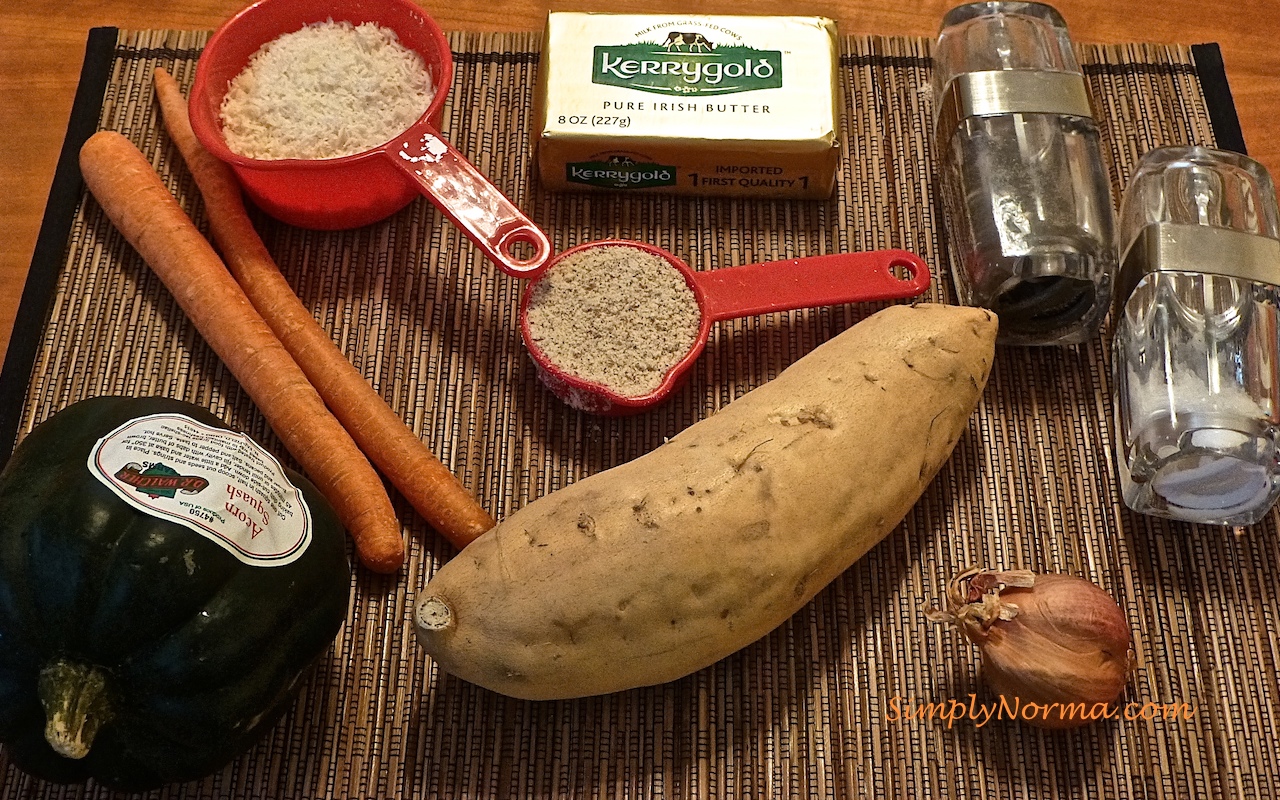
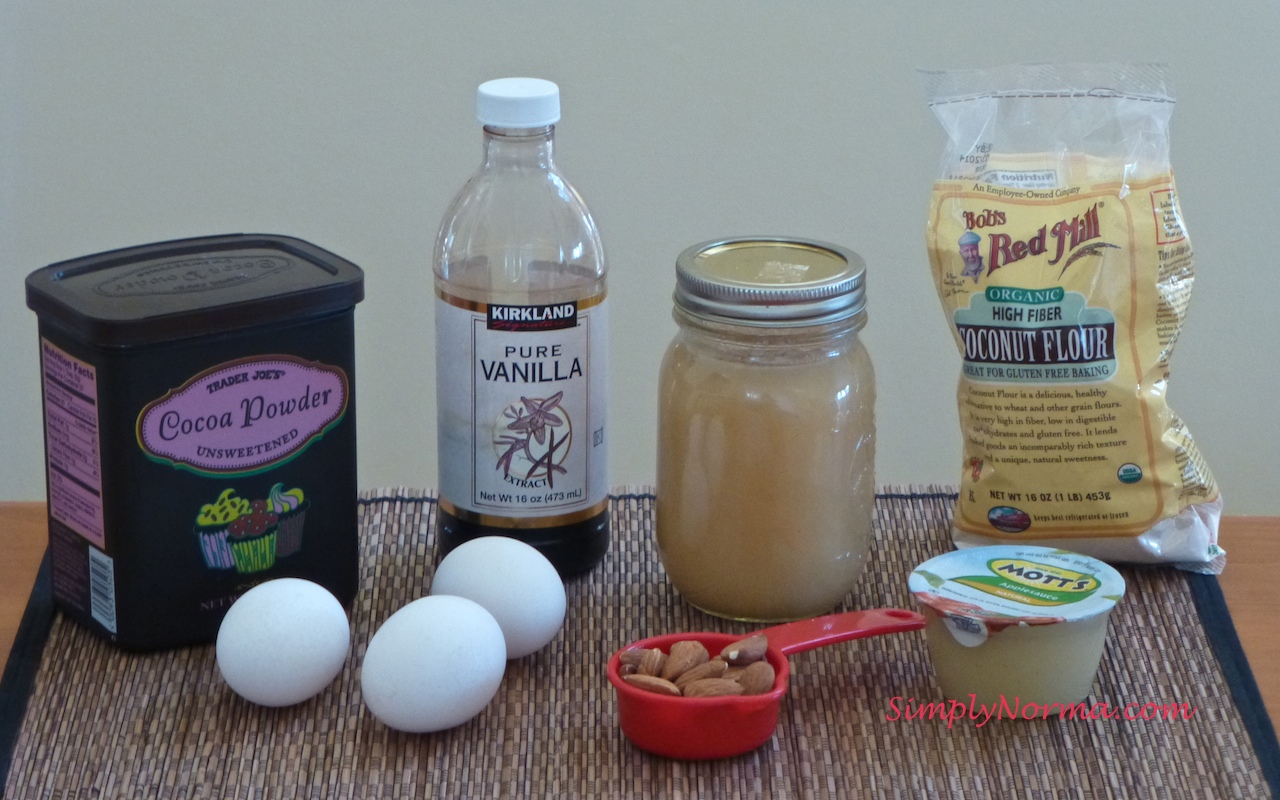
I had some problems with the original recipe as you’ll soon see. The ingredients were pretty simple though.

Ingredients
Ingredients

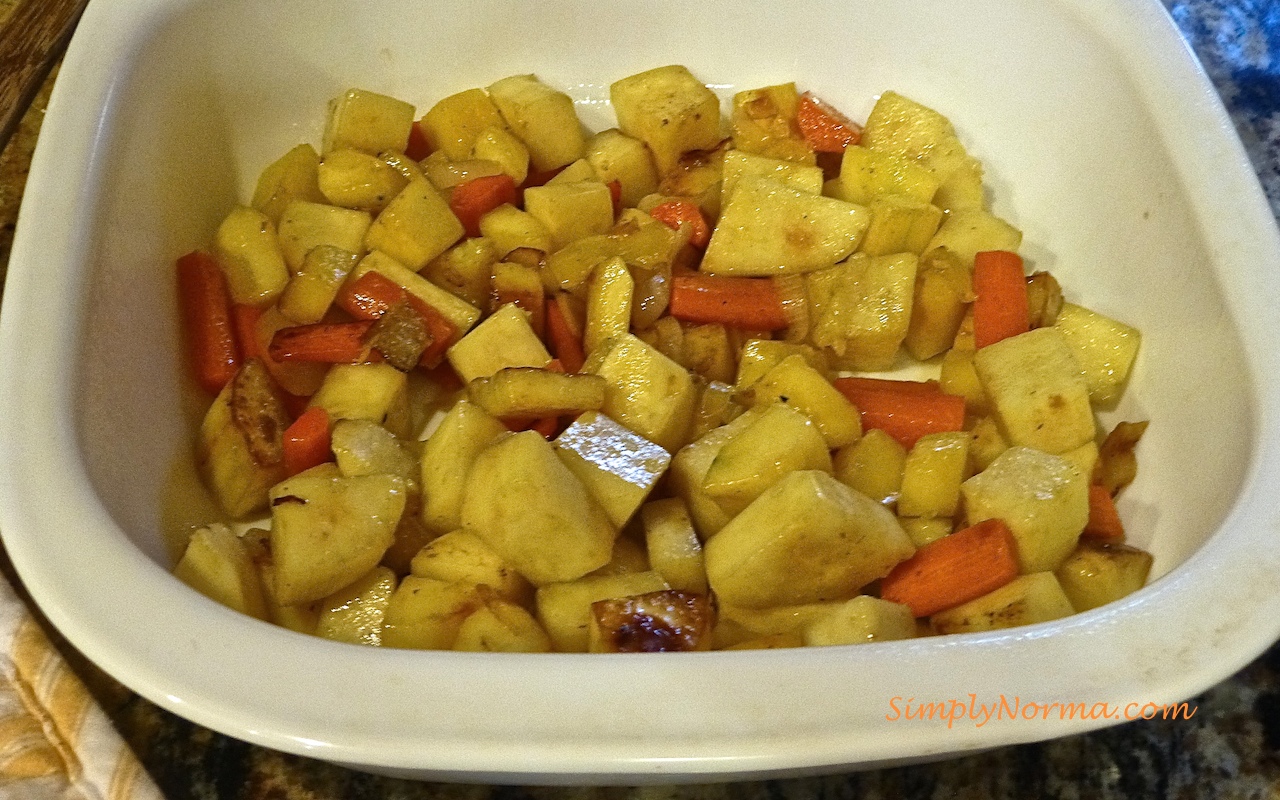
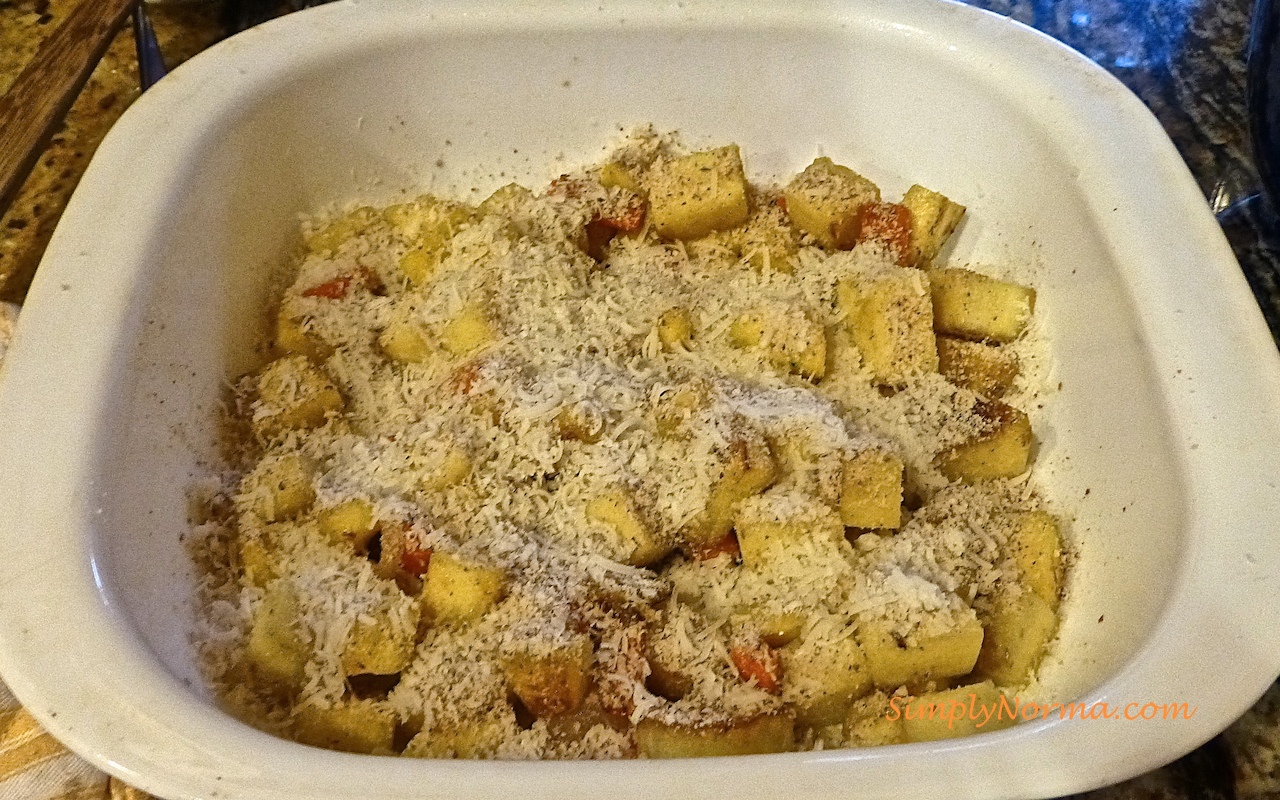
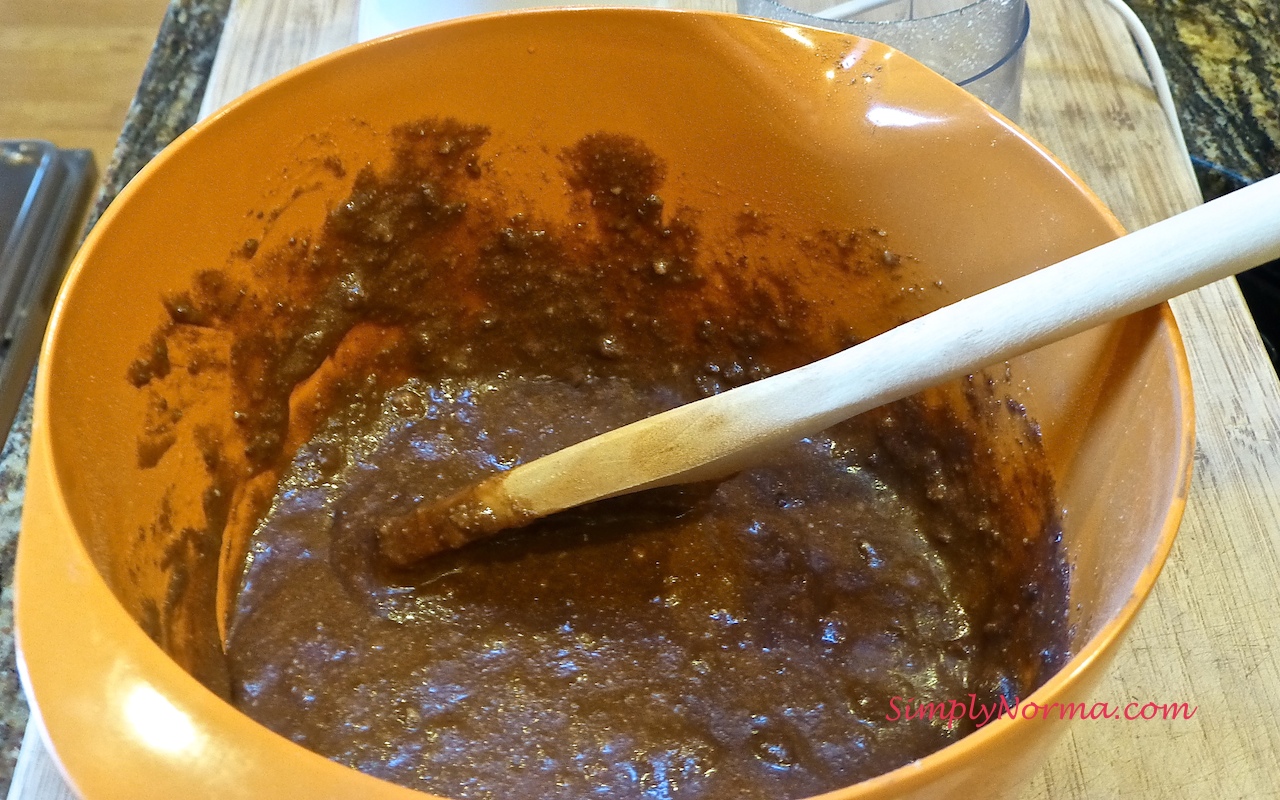
And once everything is put together, this is what the mixture will look like.

Paleo Brownie Batter

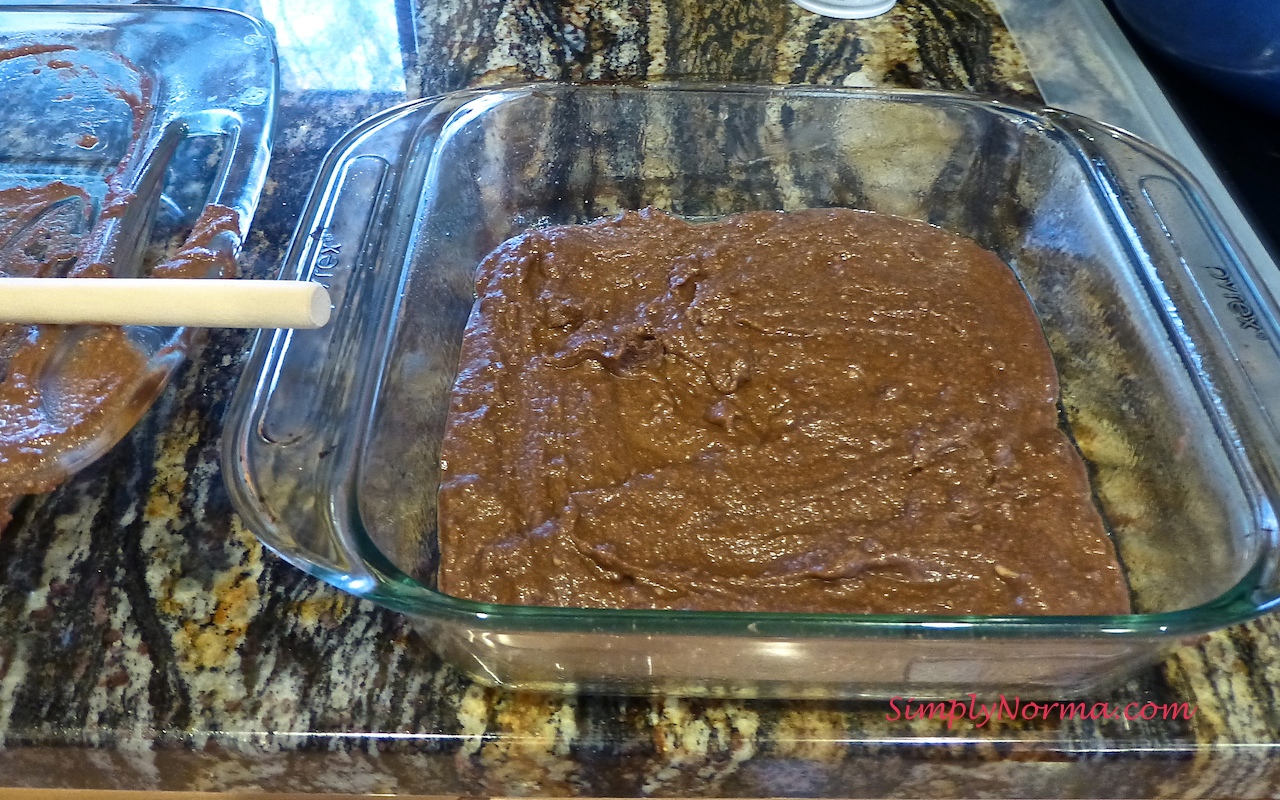
The original recipe calls for a 9×13 baking dish.  Uh, no. There is no way this batter will spread out into a 9×13 baking dish.  See?

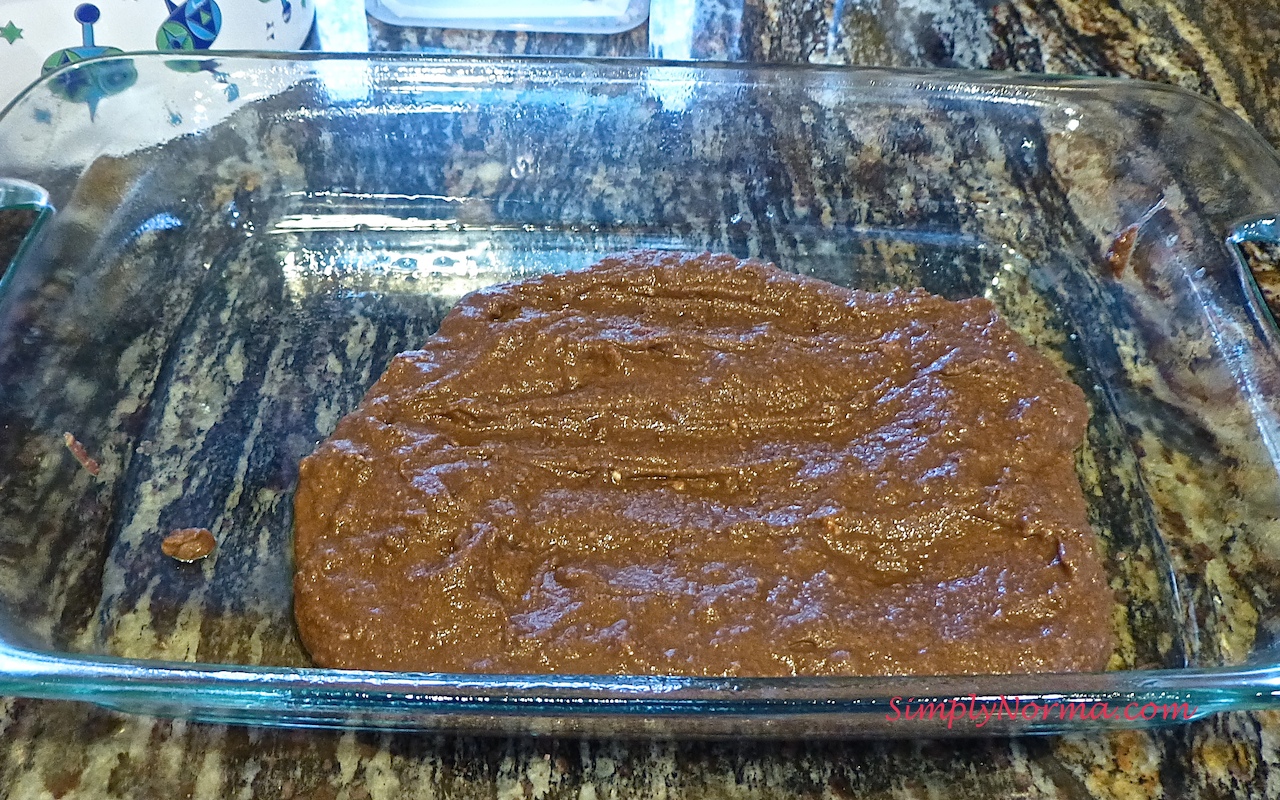
I used an 8×8 baking dish and it worked quite well.

Pour Batter in 8x8 baking dish
Pour Batter into an 8×8 baking dish

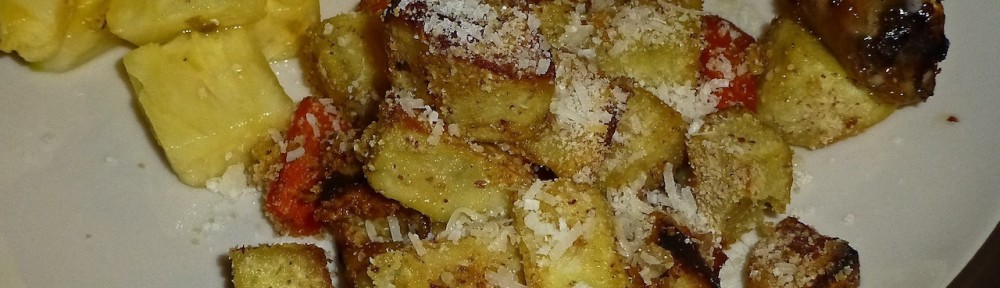
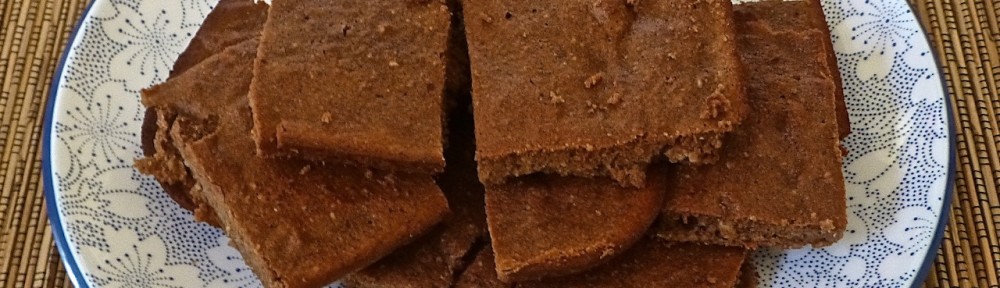
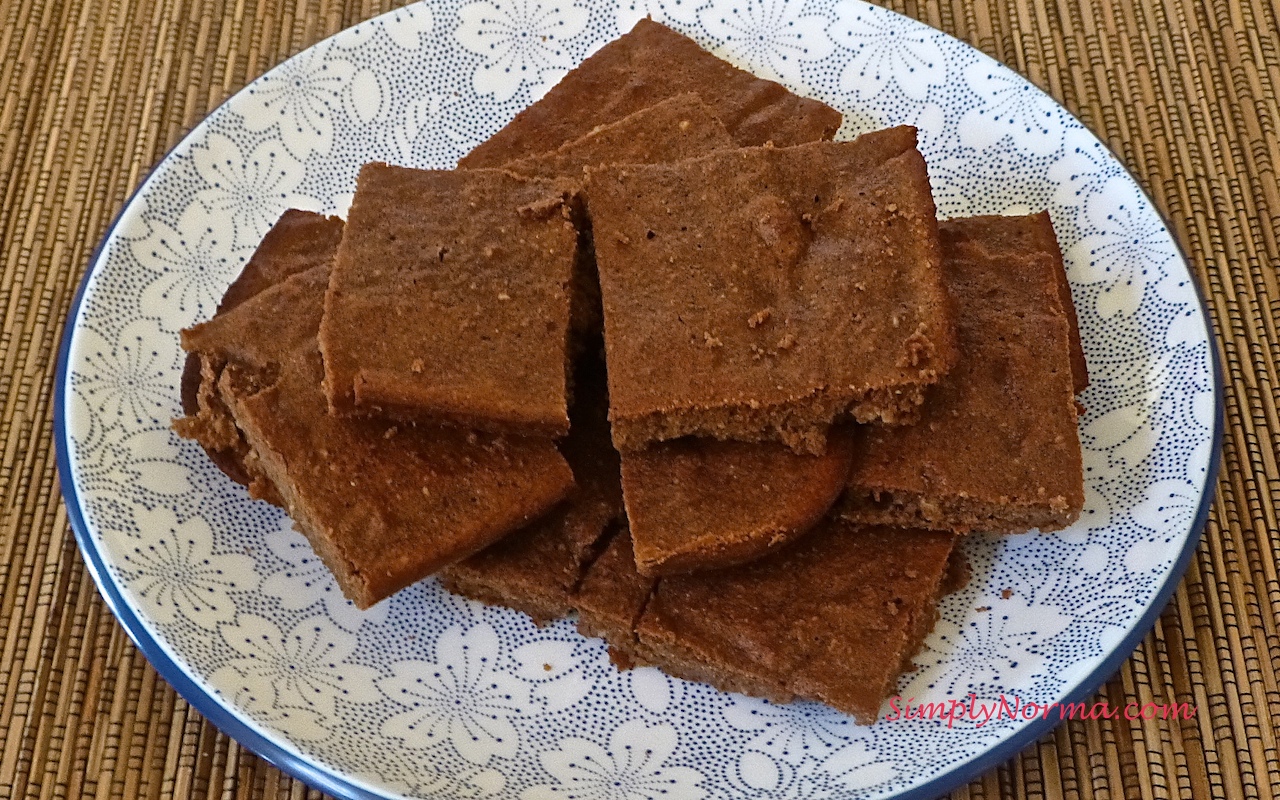
And the final product came out looking pretty good.

Baked Paleo Brownies

Alright so — I’m going to change the recipe just a tad to make it sweeter and to (hopefully) give it more moistness.  Let me know what you think. (Keep in mind I haven’t tried the variation yet as we’re still eating this first batch.)

Ingredients

  • 1/4 cup coconut flour
  • 1/4 cup almonds, ground
  • 1/3 cup cocoa powder, unsweetened
  • 5 large eggs (instead of 4), at room temperature
  • 1/2 cup raw honey (instead of 1/3)
  • 1/3 cup apple sauce, unsweetened
  • 2 teaspoons pure vanilla extract
  • 1/3 cup coconut oil

Directions

  1. Preheat the oven to 350° degrees Fahrenheit.
  2. In a medium sized bowl, combine the coconut flour and unsweetened cocoa powder then sift 2 times to lighten the mixture.
  3. Add the almonds to the flour/powder mixture.
  4. In another medium sized bowl, whisk the eggs then add the raw honey, apple sauce, vanilla extract and coconut oil.
  5. Make a hole at the center of the dry ingredients and whisk in the liquid mixture until well blended.
  6. Spray a non-stick baking spray in an 8×8 baking dish.
  7. Put the batter into the baking dish and place it in the oven.
  8. Bake for 30 minutes or until a toothpick comes out clean. Set aside to cool then enjoy!

Note: In my convection oven, it took 25 minutes to bake but I tested it at the 20 minute mark. Convention ovens tend to cook things quicker.

Ahh … goodness!

Paleo Brownies
Paleo Brownies

This recipe was taken from Paleo Brownies Coco Nutty Recipes and they have more recipes there for you to try. Check them out!


Orange Vegetable Gratin

If you like vegetables, this Orange Vegetable Gratin might be a recipe you’ll embrace.

With squash, sweet potatoes and carrots as the base, you can’t go wrong with using this as a side dish. The ingredients are pretty straightforward although I’ve made a few changes on the amounts and have paleo-ized the recipe by using almond flour instead of bread crumbs.

Ingredients for Orange Vegetable Gratin

After preparing your ingredients, they’ll be put in a casserole dish for baking.

Orange Vegetable Gratin

Add the a tad of grated fresh aged parmesan cheese, almond flour, salt and pepper …

Add Grated Parmesan
Add Grated Parmesan

Then bake.  Ready to try it?

Ingredients

  • 1 acorn squash, seeded, peeled and cut into cubes
  • 1 large sweet potato, peeled and cut into cubes
  • 2 carrots, peeled and cut in half lengthwise, then into chunks
  • 1 shallot, thinly sliced
  • 3 Tablespoons Kerrygold butter
  • 1/4 cup almond flour
  • 1/2 cup grated aged parmesan cheese (if you’re not a strict paleo dieter)
  • Salt & pepper (to your taste)

Directions

  1. Heat the butter in a large skillet. I had to use two skillets for this step as the recipe says to keep them in a single layer.
  2. Saute the vegetables for about 15 minutes until they start to brown and are just tender.
  3. Preheat oven to 375.
  4. Transfer all the vegetables to a baking dish.
  5. Sprinkle with salt, pepper, almond flour and 1/2 the cheese but do not stir as you want this to sit on top and get crunchy.
  6. At about 20 minutes, remove the casserole from the oven, stir the ingredients and bake for approximately 20 minutes.
  7. You want to remove the casserole when everything looks golden and the vegetables are soft. Pricking a fork through one of the larger vegetable pieces and having it be soft is the best way to know if its cooked.
  8. Sprinkle with the remaining cheese and serve.

That’s pretty much it. I used a whole acorn squash and reduced the sweet potatoes from two to one.

The results?

Orange Vegetable Gratin

I served this with baked chicken and fresh sliced pineapple.

Enjoy!

Halibut – Parmesan and Parsley Crusted (Paleo)

This recipe uses Sole as the main ingredient but I was not able to find it locally so substituted halibut instead. It came out quite good.

I was also not able to find a small piece of Halibut so paid $19 for the piece I bought, however, we had it as leftovers for a couple of other meals so it worked out just fine cost-wise.

You’ll notice there aren’t very many ingredients for this recipe. I used aged parmesan cheese and almond flour as a substitute for the bread crumbs along with using parsley instead of cilantro (gotta use what you have in the kitchen sometimes).

Ingredients
Ingredients (less the halibut)

See? This is one very large piece of halibut but fortunately the recipe re-heated quite well.

Halibut
Halibut

For me, the hardest part of the recipe (if you can call it hard) was dicing the onions.

Diced Onions
Diced Onions

This is what the topping will look like and it will be spread over the top of the halibut then baked.

Halibut Topping
Halibut Topping

You want to make sure you don’t over-bake the fish so it won’t come out too dry.

Halibut - Parmesan and Cilantro Crusted
Halibut – Parmesan and Parsley Crusted

Ready to try the recipe?

Ingredients

  • 1 pound Halibut
  • Kosher Salt and Ground Black Pepper
  • 1 cup Almond Flour/Meal
  • 2 tablespoons grated yellow Onion
  • 2 tablespoons dried Parsley
  • 1/2 cup grated aged Parmesan
  • 1/4 cup Olive Oil

Directions

  1. Preheat the oven to 400 degrees Fahrenheit.
  2. Arrange the fish on an oiled baking pan then season with salt and pepper. (I used aluminum foil on the top of a baking sheet and spread a little bit of olive oil on top of the foil before putting the fish on it.)
  3. Combine the rest of the ingredients in a bowl then press the mixture evenly on top of the fish.
  4. Bake for 15 to 20 minutes, or until the fish is cooked and the crust is firm and golden.

Sit back now and enjoy this great meal. I served mine with salad and steamed asparagus.

Halibut - Parmesan and Parsley Crusted
Halibut – Parmesan and Parsley Crusted

This recipe was adapted from Dinners and Dreams Parmesan and Cilantro Crusted Sole.

Parmesan and Cilantro Crusted Sole

Of Sewing, Laughter and God

Last year for Christmas, my husband gave me a new Brother sewing machine. I had put it on my Christmas list of things I wanted although, I have never sewn on a machine a day in my life. But, I am enthralled with the beauty of quilts and wanted to see if perhaps, just perhaps, I could learn how to quilt.

I don’t know if life was too busy for me this past year or if perhaps I, unconsciously, was afraid I wouldn’t be able to learn how to quilt — whatever the reason, I did not touch or look at the machine until this past summer when I took it out of its box, signed up for a beginner’s sewing class at JoAnn’s Craft and learned how to thread the machine.

I have to say that I was a little disappointed with JoAnn’s. It was a 3 hour or so class and my expectations (why are they so high?) were that I would learn a LOT of basics. With only two of us in the class, I felt cheated – there should have been more taught. But — that’s water under the bridge.

At a recently made “workstation,” I started practicing how to sew straight lines and different stitches. Not bad, I told myself. (Below is a “newbies” workstation. You’ll notice my laptop is close by as I have been reading tons of online tutorials.)

Sewing Workstation
Sewing Workstation

I decided to start my first project — sewing a hem on a pair of new pants. How hard can this be? I asked myself.

I measured the length of the hem I wanted, put it under the sewing needle and started to sew. A sense of accomplishment welled within me. (Yes, it doesn’t take much to make me feel that way.)

Measuring Hem Pants
Measuring Hem Pants

After sewing one hem, I removed the pants from under the machine and stepped back to admire my handiwork. Uh … let’s check it out.

Improper Hem Sewing
Improper Hem Sewing

HAHAHAHAHAHAHAHAHAHAHAHA!   My loud and boisterous laught could be heard throughout the house.  HAHAHAHAHAHAHA!  I found this quite comical and continued laughing out loud feeling God and the angels nearby. For, as you can see, I sewed the hem on the wrong side.

After 15 minutes of uncontrollable laughter (I can’t remember the last time I laughed so hard), I found the “seam ripper” and removed the thread from the hem and re-sewed it.  Now — it was finished and, although not perfect, it was great for a beginner.

Large Seam Ripper
Large Seam Ripper

Because of the focused concentration I have when sewing, I had time time to reflect on this situation.  Hey! Why didn’t You (God) have an angel tap me on the shoulder and warn me of this mistake before I made it? I just had to ask Him that.

And God, being who He is, replied –  “You will never make this mistake again because of how you learned it. Plus, I had so much fun watching you laugh.”

Oh — that God!  He’s always making sure I learn the way that’s best for me.

I wonder what my next project — a lap quilt — has in store for me.


The Persimmon

A friend of ours recently invited us to lunch and while I was in the kitchen helping him make a salad, I noticed a piece of fruit sitting in a bowl. I inquired about it and he told me it was called a persimmon and that it tasted wonderful.

Now — I am normally leery of trying new foods. I’m not sure why as over the years I have learned to eat so many different and great-tasting foods. But — I asked him if I could take one home with me to try it and he said yes. (What friend wouldn’t say yes?)

And that is how my love relationship with a persimmon got started. Have you had the opportunity to try one?

Persimmon
Persimmon

What I like about it is that the taste is quite flavorful (when it’s ripe — I hear it’s bitter when it’s not ripe). The texture is not overly juicy like an orange so you don’t have to worry about wearing a bib.  hahahahaha

And — you can eat the peel!!! But — you must remove the stem at the top — I think your mouth might complain if you happen to chew on the stem.  Blech!

Here is what the inside looks like (for those of you who still have some naiveness in you, like me):

Persimmon Insides
Persimmon Insides

This one was not totally ripe but was edible. Soft but not quite soft enough. Still — it was good. When it’s not totally ripe, you don’t get as much juiciness.

So — what are the benefits of eating this fruit?  Well …. since you asked ….

It’s been said that they contain “anti-oxidant compounds like vitamin-A, beta-carotene, lycopene, lutein, zea-xanthin and cryptoxanthin. Together, these compounds function as protective scavengers against oxygen-derived free radicals and reactive oxygen species (ROS) that play a role in aging and various disease processes.”

They are also a good source of Vitamin C, potassium and also have B-complex vitamins like folic acid, and thiamin.

Here are a couple more links (just in case you need convincing to try one for its health benefits):

Harvest of the Month

Vegetarians in Paradise

Try one — I believe you’ll like it.

Note: There have been people who have had an allergy to persimmons. I’ve read that this is rare but thought you should know — it’s possible.


Guacamole

Here’s a paleo Guacamole recipe I put together in a moment of inspiration. It came out quite nicely and I had all the ingredients in my kitchen already.

Ingredients for Guacamole

Since there’s only two of us who were going to eat at this meal and since I prefer fresh guacamole, I just made a small batch for two.  (Doesn’t that sound cute? A small batch for two …)

So — here’s the paleo recipe.

Ingredients

  • 1 ripe avocado, smushed (did you know that smushed is an actual word — 🙂
  • 1 ripe tomato, diced
  • 1/2 tablespoon fresh lemon juice (or you could substitute with lime depending on if you want to pucker more)
  • 1 garlic clove, minced
  • Cumin – just a dash
  • Cayenne — a smaller dash than the cumin unless you want it spicy
  • 1/8 to 1/4 teaspoon kosher salt
  • 1/8 teaspoon pepper

Directions

  1. Combine all the ingredients in a medium sized bowl.

Tada! You’re finished!

Paleo Guacamole
Paleo Guacamole

The avocado has monounsaturated fat (from what I’ve been reading) that may lower your cholesterol and help regulate your blood sugar levels. It’s also high in potassium which may help to regulate your blood pressure and prevent hypertension.

Enjoy on your favorite foods — I put a large dollop over beef stew and it was wonderful!

Beef Stew ala Crock Pot

The original recipe for this beef stew is called Oven Braised Beef Stew but I have adapted it for a crock pot and made a couple other changes. Although I have a dutch oven, I find it’s a little harder to clean and I didn’t feel like dealing with that today. The crock pot, on the other hand, is quite an easy thing to clean.

I made a guacamole sauce to go on top of this stew which made it turn out all the more wonderful.

Here are the ingredients (minus the meat and salt) …

Ingredients
Ingredients

It’s quite easy to put together.

Ingredients

  • 2 pounds beef stew meat cut into 1 1/2-inch cubes
  • 1 tablespoon chili powder
  • 1 1/2 teaspoons salt
  • 1 medium onion, thinly sliced
  • 1 tablespoon tomato paste
  • 4 garlic cloves, minced
  • 1/2 cup Chunky Salsa (this is different than the original recipe which used Double Roasted Salsa — I like a more mild flavor)
  • 1/2 cup chicken stock
  • 1/2 teaspoon Fish Sauce
  • 1/4 cup chopped Cilantro

Directions

  1. In a large bowl, combine the beef, chili powder, and salt.
  2. Add the beef mixture to a crock pot.
  3. Add the remaining ingredients to the top of the beef in the crock pot (the order doesn’t matter).
  4. Cook on low for 6-7 hours or on high for approximately 4 hours.
  5. Check to make sure your meat is fully cooked before serving.

See how simple it is? I served the stew on a bed of rice with guacamole on top and steamed broccoli and brussels  sprouts. Quite delicious!

Beef Stew ala Crock Pot

Special thanks to NomNomPaleo for the “flavor” ingredients.

Lamb Burgers

These paleo Lamb Burgers were easy to make, delicious, but a tad expensive. And the expense includes driving around looking for ground lamb — not an easy search, at least not in my Minnesota neighborhood. But, I finally found a small, off the highway, market that I walked into that has a full butcher shop in the “back” called Hagberg’s Country Market.

The cashier told me she had worked at a large supermarket nearby for 27 years but would never go back. Nor, she said, would she purchase meat from anyone else as the flavor you get at Hagberg’s is superb.  I don’t believe she was biased either.

You’ll be grilling these burgers on the stovetop after combining the ingredients together.

Grilled Lamb Burgers

Since we’re still on a paleo diet, we are eating very little bread (except for the occasional “cheat”). So, I attempted, and failed, to put them on large lettuce leaves but it didn’t turn out well as the rest of the ingredients made it quite heavy. Next time we’ll use cut-up lettuce on the bottom which will work perfect then we’ll stack the veggies on top, i.e. lettuce, tomatoes, avocado, cucumber and a tad of feta.

This is what it looks like — quite scrumptious!

Paleo Lamb Burger
Paleo Lamb Burger

Here’s the recipe for you to try …

Ingredients

  • 2 pounds ground Lamb (it’s okay to have leftovers — we didn’t eat 2 pounds in one sitting — just in case you’re wondering)
  • 1 tablespoon Coriander Seeds, ground
  • 1/4 cup chopped fresh Mint
  • Salt and Pepper
  • 1 Cucumber, sliced
  • 1/2 cup crumbled Feta
  • 4 cups Romaine lettuce, in pieces
  • Tomatoes, sliced
  • Avocado, sliced

Directions

  1. Preheat your skillet to medium-high.
  2. Put all the ingredients (except the vegetables) in a bowl and mix together (hands work great for this).
  3. Form the meat into 6 large balls or 10 small balls making sure not to flatten yet.
  4. Place the balls on the griddle and press down with a large spatula to make thin patties.
  5. Place the cooked patty on a plate then top with cucumber, feta, lettuce, mint, tomatoes and avocado or any other vegetables of your choice.

These burgers can be made ahead of time.

Make sure you check for “doneness” using a meat thermometer. For medium (which I don’t recommend as I don’t eat meat that is not fully cooked) the recommended temp is 160.  So keep them on there a tad longer and make sure nothing red oozes out.

Then sit back and enjoy your dinner.

(This recipe was adapted from the one I found at The Chew.)

Orange Chicken with Romaine Salad

Orange chicken. I usually think of Chinese food when I think of orange chicken — like sweet and sour orange chicken. Hmmm … haven’t had any in awhile.

I found this recipe on The Chew — an ABC food show that I sometimes watch. It came out pretty good so I’d recommend you try it.

The ingredients aren’t hard to find …

Ingredients for Grilled Orange Chicken
Marinade Ingredients for Orange Chicken

And the ingredients for the dressing/salad that goes along with it … You’ll, of course, need romaine lettuce for this recipe which is not shown in the picture.

Marinade for Grilled Orange Chicken
Dressing for Orange Chicken Salad (minus the lettuce)

You’ll be putting the marinade ingredients in a large bowl that can also accommodate the chicken breasts.

Marinade for Grilled Orange Chicken

Then add the chicken breasts in the marinade …

Marinade for Grilled Orange Chicken

I deviated from the original recipe which says to remove the chicken from the marinade and then grill it.  I cooked the chicken on the stovetop — Minnesota weather is just too cold right now to grill outdoors.

Grill or Cook the Chicken

The rest … well, the rest is below. Just a few pictures to show you how easy it will be (no pictures of the salad since that too is quite simple).

Ready to try it?

Ingredients (for the chicken)

  • 1/2 cup Extra Virgin Olive Oil
  • 1 Orange (zest and juice)
  • 2 Garlic cloves (minced)
  • Pinch of Cayenne Pepper
  • Salt and freshly Black Pepper to taste
  • 4 Chicken Breasts (boneless and skinless)

Ingredients (for the Salad)

  • 1 Head of Romaine (chopped)
  • 2 Oranges (segmented – reserve 1/2 of an orange for the juice)
  • 2 tablespoons Honey
  • 2 tablespoons Dijon Mustard
  • 1/2 teaspoon Oregano leaves
  • 1/2 cup Extra Virgin Olive Oil
  • 1/2 Red Onion (slivered)
  • Pinch of Cayenne Pepper
  • Salt and Pepper to taste

Directions

  1. Whisk together the marinade ingredients in a rimmed baking dish.
  2. Add the chicken and turn it to coat it in the marinade.
  3. Allow the chicken to marinate for up to 30 minutes at room temperature. (But do not marinade for more than 30 minutes or the citrus from the orange juice will start to break down.)
  4. Meanwhile, put a large skillet on the stovetop on medium low heat.
  5. Add the chicken and the marinade to the skillet.
  6. Cook the chicken for 7 minutes or so on one side then flip it over and cook it on the other side.
  7. While the chicken is cooking, start the salad (see directions below).
  8. Use a meat thermometer to test the temperature of the chicken for doneness — it should register 160 degrees when its fully cooked.
  9. Remove the chicken and serve with the Orange and Romaine Salad.

Directions for the Salad

  1. In a large bowl, whisk together the orange juice, Dijon, oregano, honey and olive oil.
  2. Season with cayenne, salt and pepper.
  3. Toss the remaining ingredients together the with the dressing.
  4. Add only a tad of cayenne pepper — unless you like your food spicy, then add as much as you like.

And that, my friends, is pretty much it. Hope you enjoy it as much as we did.

Grilled Orange Chicken with Romaine Salad

A Nut is A Nut Is An … Allergy

My favorite nut is the pistachio and I can eat bags of them. And for weeks now, I’ve had a small bowl of pistachios as part of my lunch. Don’t think salad bowl when I say a small bowl — think a two inch wide, two inch high small snack bowl.

Nuts (Courtesy, Microsoft Free Images)

For a couple of weeks though I’ve had what I thought were problems with my lingual nerve — a burning tongue (only on the left side) and small irritable tongue bumps. The problem usually occurred in the afternoon — after lunch. So — I decided to remove the everyday lunch item from my diet and the pistachios were a major “normal” so they were eliminated.

The first day I stopped having pistachios for lunch, I had no problems.  Coincidence? The next day, I didn’t have pistachios again — no problems. I have now been without pistachios for 5 days and have had no problems. So — I have to believe that I have a pistachio allergy OR that I was simply eating too many of them at once. Is there such a thing though as eating too many of this wonderful nut? Sigh …

Wednesday, I was making a salad and decided to throw in some pine nuts. First I toasted them on the stovetop and, to make sure they were toasted enough, I popped two in my mouth. Within minutes I had a large itchy bump on my tongue — large enough for me to be concerned.

What is going on here? I knew it was an allergy immediately. I waited for 15 minutes or so to see if I experienced any other problems. Yes, I felt chest tightness but just a little. I drank lots of water and, while waiting, read a few Google articles about pine nut allergies. I knew I had to watch my symptoms carefully because throats have been known to close on people who have had pine nut allergies.

Fortunately, within the hour, the symptoms went away.

I recently read an article on the American Pistachio Growers website that said “According to the International Food Information Council, allergy to tree nuts, which includes pistachios, is one of the most common food allergies among adults and children.”

I was on the verge of a nervous breakdown.  No — not really. But I eats nuts on a regular basis so I was a little troubled that perhaps I would have to eliminate them from my diet.

I decided to try other nuts to see what happened. I don’t recommend anyone do this but consult a doctor first. I just happened to blindly do a test run of other nuts by eating some of the recent paleo granola that I had made. I had varied the type of nuts in this recipe as I don’t make the granola the same way every time anymore (so much growth in my cooking experience).

This batch of granola had almonds, macadamia nuts and walnuts. I ate a small amount and waited.  Nothing happened.  I ate a little more and I had no ill effects. Hmmm … I finished off the bowl. And I felt happy.

The pine nuts I had used were in the cupboard for at least 4 months. I wonder if that had something to do with it … But, the pistachios were fresh from the store so I could blame it on the age of the nut.

My plan is to (when my husband is home) scale back on the amount of pistachios I eat and see if I experience any problems. Perhaps eat 5 … is that possible? Pistachios to me are like Oreo cookies — can’t have just one of them.

Fortunately for me I don’t have pine nuts on a regular basis since they are so expensive which is why they were in the cupboard for 4 months — I should have frozen them. At least I’ll be able to keep my grocery bill low on a non-pine-nut diet.

Because the pine nut experience was a lot worse than the pistachios, I’ve decided not to have any — ever. Sure — I could go and be tested for nut allergies but that costs lots of money and even under the new Obamacare insurance (I say this tongue-in-cheek) things are expensive.

Anyone else experience a pine nut or pistachio allergy?