Paleo Butternut Squash Soup

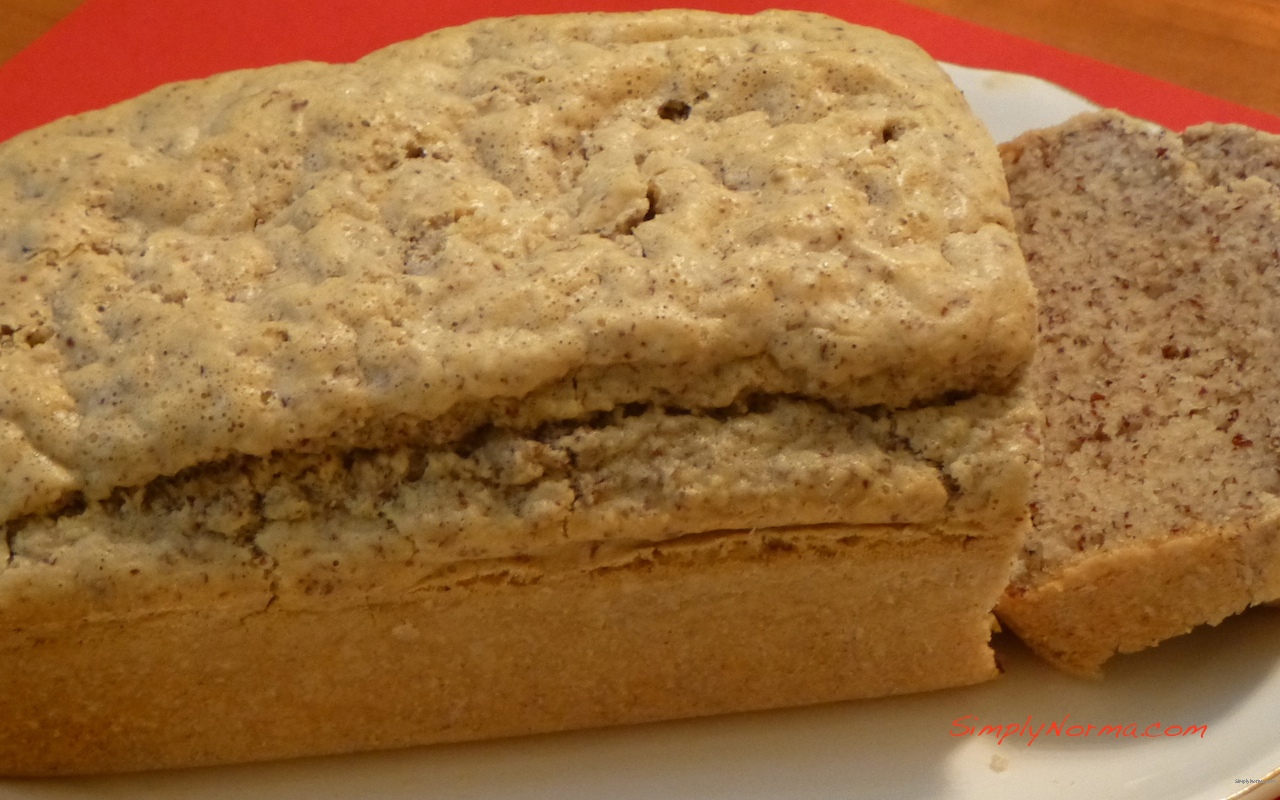
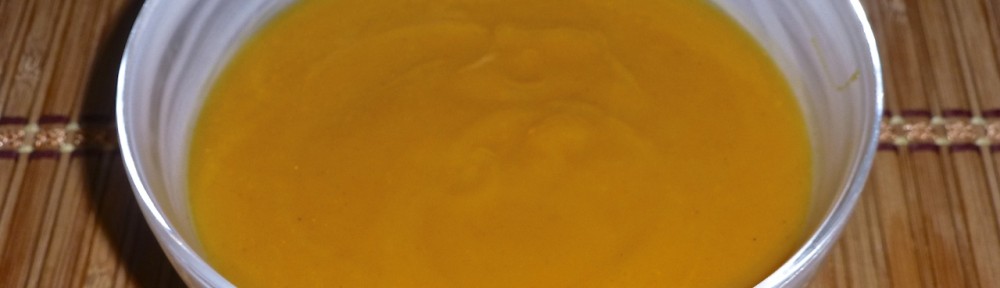
This Butternut Squash Soup is a Martha Stewart recipe that is absolutely wonderful. The soup is creamy and quite filling so make sure you don’t have it with anything heavy. I served it with a Pear and Walnut Salad.

Since we had leftovers of this soup, I froze it and it tasted just as good the second time around as the first time.

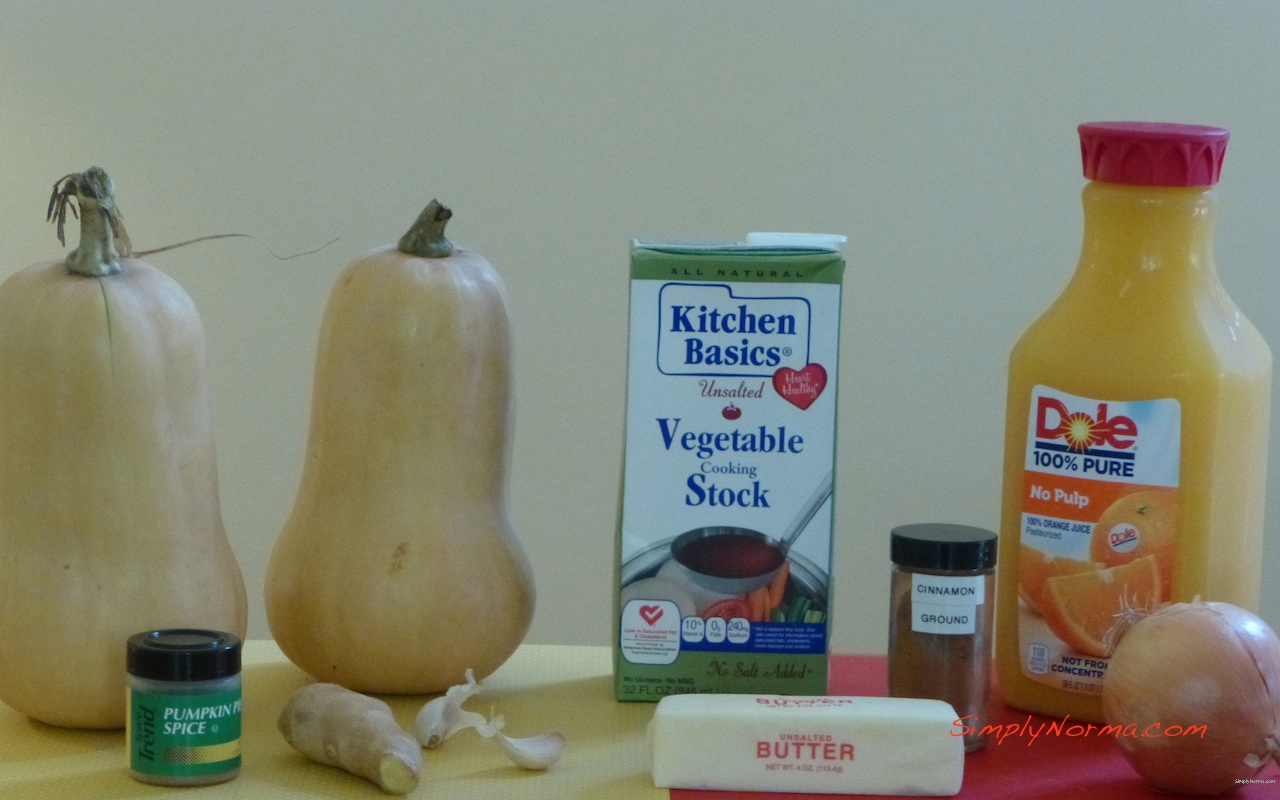
Here are some of the ingredients you’ll need. The original recipe calls for 4 cups of water but I was afraid it would taste too watery so I used a 1/2 a quart of vegetable broth and 1/2 a quart of water. I also used cinnamon and pumpkin spice because I like the taste of those spices.

The recipe also calls for 2 inches of fresh ginger but, for my taste, that was a little bit too much ginger and next time I’ll reduce it to 1 inch fresh chopped ginger.

Ingredients
Ingredients

Have you ever seen the inside of these beautiful butternut squash before?

Inside a Butternut Squash

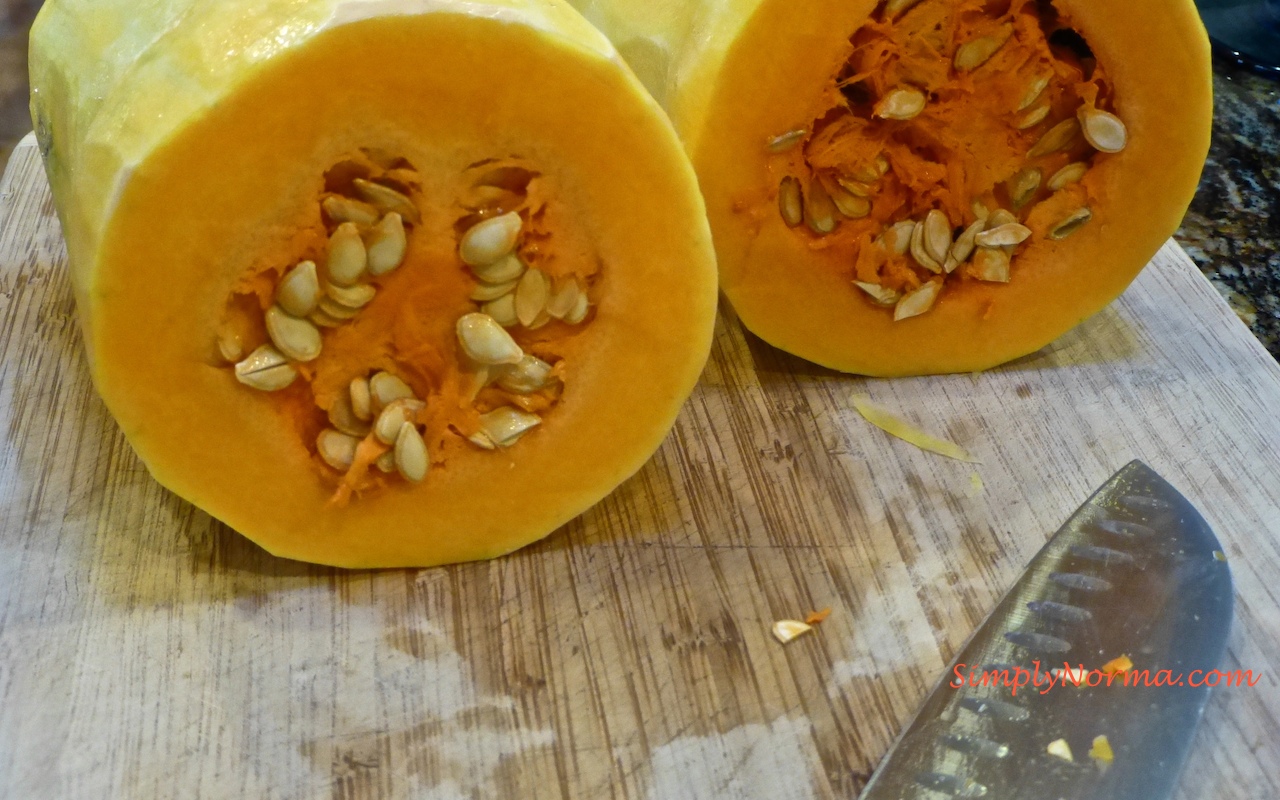
After peeling the squash and cutting off the ends, you can scoop the seeds out with a large spoon or a small knife which worked better for me.

Scoop out the seeds
Scoop out the seeds

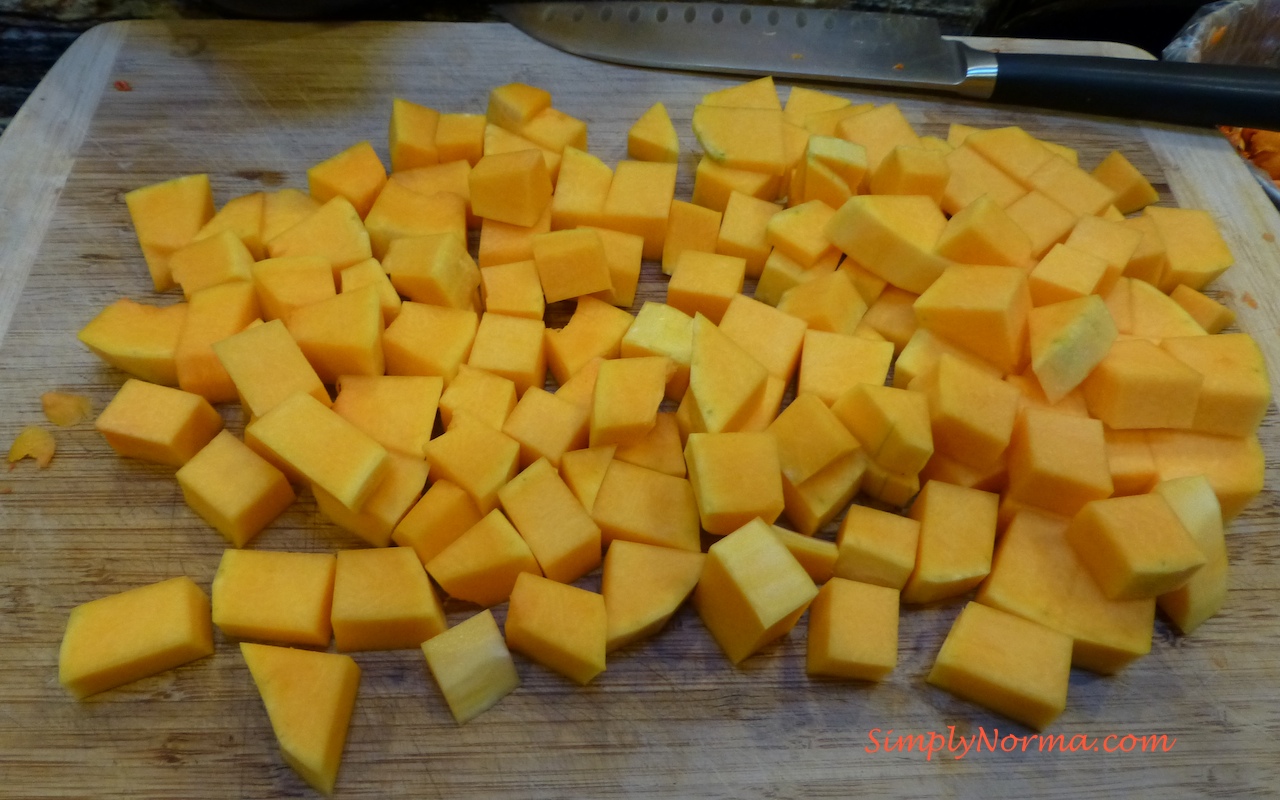
Next you’ll be slicing the squash and cutting it into bite size pieces (1 inch or so).

Slice the Squash
Slice the Squash
Cut the Squash into bite size pieces

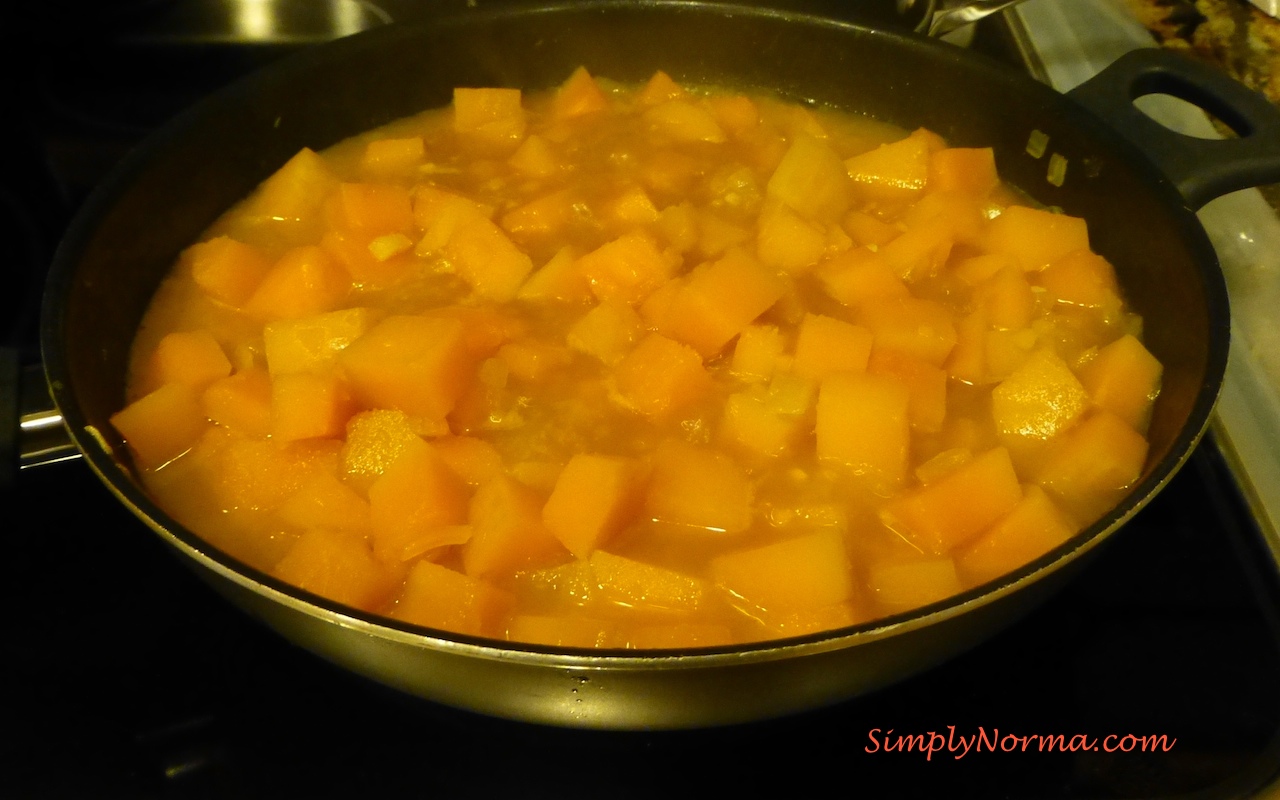
After preparing the rest of the ingredients, you’ll be putting the squash in a large skillet and allowing the squash to soften.

Cook/Soften Squash
Cook/Soften Squash

So far so good? The hardest part of this recipe is peeling and cutting the squash. Ready for the recipe?

Ingredients

  • 2 tablespoons of butter
  • 1 small onion, chopped
  • 1 piece (1 inch) fresh ginger, peeled and chopped
  • 2 garlic cloves, chopped
  • 2 3/4 pounds small butternut squash, peeled and cut into 1-inch cubes
  • 1/2 cup fresh orange juice
  • 1/2 teaspoon cinnamon
  • 1/2 teaspoon pumpkin spice
  • Coarse salt and ground pepper (to your taste)
  • 1/2 quart Vegetable Stock
  • 1/2 quart water

Directions

  1. Melt the butter in a large skillet over medium heat.
  2. Cook the onion until clear, about 2-3 minutes.
  3. Add the ginger, garlic, and squash stirring occasionally for a few minutes.
  4. Stir in the water and vegetable broth.
  5. Bring to a boil then reduce the heat and simmer until the squash is tender which is anywhere from 20 to 30 minutes.
  6. When the squash is soft (you can poke it with a fork to check it) then turn the stove top heat off.
  7. Pour 1/4 of the squash mixture into a blender and puree it.
  8. Remove the pureed soup from the blender and set it aside then pour another 1/4 squash mixture into the blender and puree. Continue doing this until all of your squash mixture is pureed.
  9. Make sure not to burn yourself while pureeing this hot soup — remove the blender cap (not the cover) and put a towel over the top of the blender. Hold the towel down as you’re pureeing.
  10. Pour all the soup into a pot and stir the orange juice into it until it’s all incorporated.
  11. Add salt and pepper to your taste.

Whala! You are finished and ready to eat.

This soup is creamy and rich. It has the texture of cream of wheat which I love but, unfortunately, my husband does not.

Paleo Butternut Squash Soup

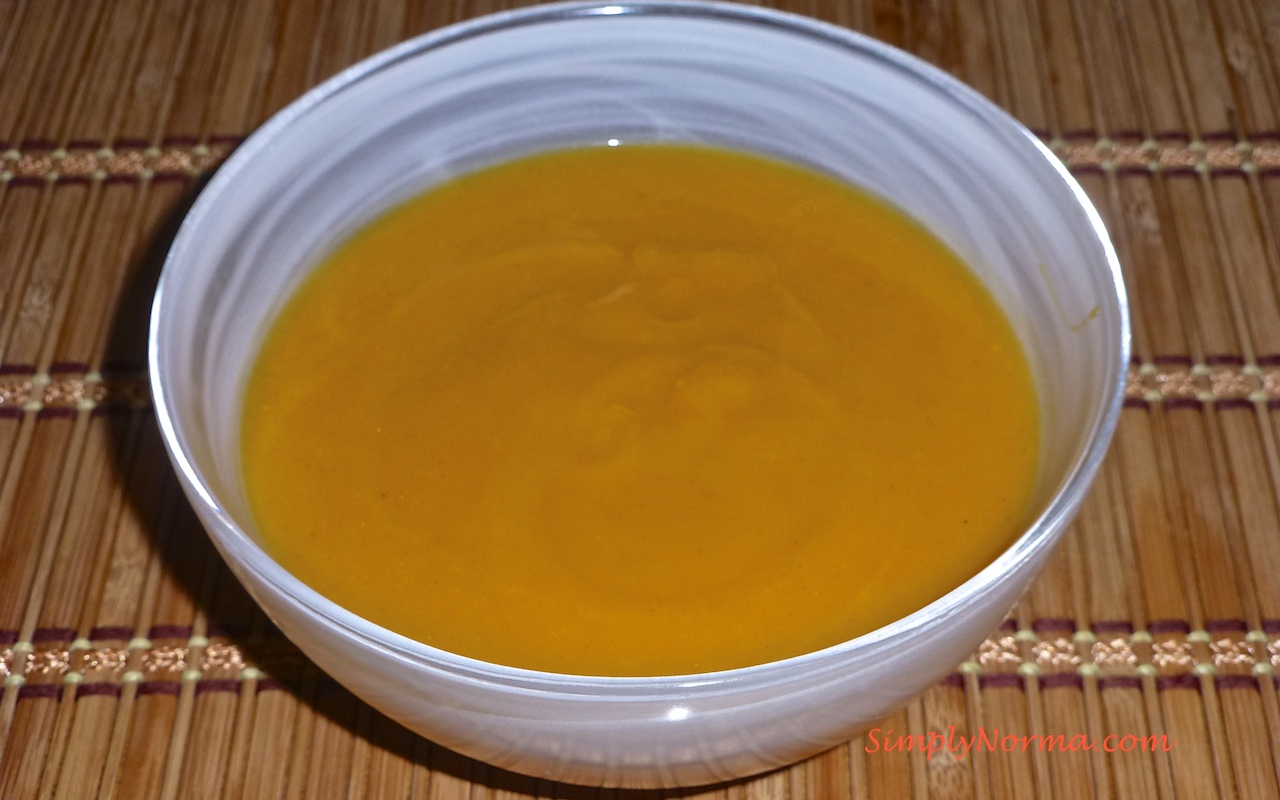
Enjoy! This is truly a hearty and healthy soup.


Crock Pot Chicken Thighs

The crock pot — used more often when the weather gets chillier. So I scrounged around looking for a recipe that uses chicken thighs and found a Paleo Savory Cinnamon Slow Cooker recipe – although the original recipe uses chicken breasts. I also altered the ingredients a little bit — but not much.

This recipe can be made ahead of time, frozen and then defrosted in the refrigerator the night before to use the following day.

I did not freeze the recipe but instead marinated everything in the refrigerator for a couple of hours in the morning then tossed it in the crock pot for a few hours.

Ingredients

  • 2 lbs boneless skinless chicken thighs
  • 2 Bell Peppers, sliced
  • 1 Onion, diced
  • 2 teaspoons Paprika
  • 4 Cloves of Garlic, minced
  • 2 teaspoons cinnamon
  • 1 cup of Chicken broth
  • 1/8 teaspoon Nutmeg

Directions

  1. Combine all the ingredients in a Ziplock freezer bag, remove all the air and seal it.
  2. Marinade for at least a couple hours or alternatively, freeze overnight and defrost before it’s time to put it in the crock pot.
  3. Pour contents of the bag into the crock pot and cook on low for 6 hours or on high for 4.

And that, my dear friends, is all it takes. It tastes absolutely delicious.

Slow Cooker Chicken Thighs

Enjoy!

Roasted Butternut Squash

Ahhh … the overweight butternut squash. What to do with this heavy vegetable?

Butternut Squash
Butternut Squash

Fortunately, I found a recipe for Roasted Butternut Squash which is paleo and quite easy to make (although I did tweak the recipe a little). The squash is cumbersome to work with — uncomfortable for small hands when peeling it. But — what an awesome burst of flavor the squash gives you in every bite! I quite enjoy eating this vegetable.

Ingredients

  • 2-3 tablespoons Coconut Oil (or olive oil)
  • 1 Butternut Squash
  • 1/2 teaspoon cinnamon
  • Salt
  • Pepper

Directions

  1. Preheat the oven to 400°F.
  2. Peel, seed, and chop the squash into 1 inch pieces and add them to a bowl.
  3. Line a baking sheet with aluminum foil.
  4. Melt 2 tablespoons of oil then add the oil to the squash and toss together.
  5. Add cinnamon, salt and pepper to the squash and toss together.
  6. Roast the squash for approximately 35-40 minutes tossing every 15 minutes.
  7. The squash is ready when soft — check by poking a fork through the squash to check for doneness.
Roast the Squash
Roast the Squash

Pretty simple, no? I served the roasted butternut squash with a salad and drumstick chicken.

Roasted Butternut Squash


Awareness

It’s late afternoon … I sense an awareness of … what?

I turn my head to the left and listen but I hear nothing.

Standing still at the kitchen counter I wait expectantly, but I don’t know what I’m waiting for.

Evening comes and the sense of awareness continues. Acutely. It’s as if I am aware of every moment as it goes by. My perception is heightened.

I sense God’s presence. Calmness surrounds me — peace enters my heart.

As I prepare dinner, I’m aware of every thing that happens — as if each moment is THE moment in my life. There’s a stillness to my being.

The stillness continues all through the evening and into the night.

The next morning I wake up with the continued sense of awareness.

As the day wears on, slowly, imperceptibly, it’s gone.

And I wonder … how life would be different living in a state of heightened awareness, calmness and peace – living with the presence of God in my heart.


Tuna Salad

I made this paleo Tuna Salad because I wanted to try some new ingredients for my husband’s lunch — namely, artichokes.  Blech!  Or … so I thought. The original recipe has you putting the tuna salad in tomatoes but that wouldn’t work very well for a lunch so I changed it up a bit.

The recipe calls for 3 cans of tuna in oil — I reduced the amount to 2 since my husband usually takes other things for lunch in addition to a salad and I didn’t want this salad to go dry sitting in the refrigerator.

Here are the main ingredients … ooohh, the capers are almost off the photo.

Tuna Salad Ingredients
Tuna Salad Ingredients (Olive Oil, Salt and Pepper not shown)

And … here’s the recipe for you with a few changes.

Ingredients

  • 2 cans tuna in olive oil, drained
  • 1/2 cup artichokes, drained and chopped
  • 1/4 cup black olives, chopped
  • 1/2 small red onion, finely chopped
  • 2 tablespoons capers
  • 2 tablespoons flat leaf parsley, chopped
  • Salt and freshly ground black pepper
  • 1 tablespoon lemon juice (I used half a fresh lemon for this)
  • 1 to 2 tablespoons olive oil

Directions (pretty simple)

  1. Mix all the ingredients in a bowl then season with salt and pepper.

And that — is pretty much it.

I am not a fan of artichokes but it tasted fine to me. My husband, whose the artichoke lover, told me that he couldn’t tasted the artichoke at all.  Maybe that’s why it tasted fine to me.  (laughing)  I’m guessing that since the artichoke is chopped up, you don’t get the full flavor of the larger pieces.

Tuna Salad with Artichokes

Enjoy!

White Paleo Bread

So … Meghan, at Paleo Effect, has outdone herself again. I recently tried a paleo bread recipe of hers and now she came up with a white fluffy gluten free paleo bread. Go Meghan!  I like trying her recipes because, so far, they have all been tried and true.

This recipe was really easy to make and it definitely will take the place of “real” bread. So, for those of you who are gluten free but long for bread, this recipe is for you.

Since we don’t normally have bread on a daily basis, I sliced my loaf and put 2 slices in plastic sealable bags so that I could grab them in the morning and toast them. Yum!

Here are the ingredients you’ll need to get started.

Ingredients
Ingredients

You’ll be combining all the ingredients together …

Mix Ingredients Together

To get a beautiful white loaf …

White Paleo Bread
White Paleo Bread

Ooh la la!  You absolutely must try it!

Ingredients

  • 1 ½ heaping cups Arrowroot Powder
  • 1 heaping cup Almond Flour
  • 4 Eggs, at room temperature
  • 4 Egg Whites, at room temperature
  • 4 Tablespoons Walnut Oil
  • ½ Tablespoon Kosher Salt
  • 1 ½ Tablespoons Baking Powder
  • 2 teaspoons Coconut Vinegar
  • Olive Oil Spray for your loaf pan (the original recipe used Coconut Spray)

Directions (the easy part)

  1. Preheat the oven to 350 degrees Fahrenheit.
  2. Combine the dry ingredients together in a bowl.
  3. Combine the wet ingredients together in a bowl.
  4. Combine the wet and dry ingredients together in a large bowl.
  5. Spray your loaf pan with the Olive Oil Spray.
  6. Pour the mixture into the loaf pan and bake for approximately 40 minutes. (The original recipe says 30-35 but mine took longer. A toothpick inserted in the middle should come out clean.)

And that is pretty much it!  The coconut vinegar is a tad expensive, however, since you don’t use a lot of it and you’ll be making this bread a lot, it’s well worth the money.

Hope you enjoy it! And check out Paleo Effect‘s website — I haven’t been disappointed yet.

Apple, Pecan, and Blue Cheese Salad with Dried Cherries

This Apple, Pecan, Blue Cheese with Dried Cherries Salad is taken from a well known blogger, The Pioneer Woman. And, I simply love the combination of the ingredients.

So — let’s take a look at what we’ll need.

Ingredients
Ingredients
Ingredients
Ingredients (Dried Cherries, Salt & Pepper Not Shown)

You’ll be making a dressing for the salad.

Salad Dressing
Salad Dressing

After prepping your ingredients, it’s just a matter of mixing everything together — pretty easy, eh?  So … here’s the recipe.

Ingredient

  • 12 ounces Salad Greens
  • 2 whole Apples, Cored And Sliced Thin
  • 1/2 cup Pecan Halves
  • 1/4 cup Dried Cherries
  • 6 ounces of Blue Cheese Cut Into Small Chunks
  • 1 Tablespoon Dijon Mustard or as much/little as your taste buds can handle
  • 1 Tablespoon Maple Syrup
  • 1 teaspoon Apple Cider Vinegar
  • 1/4 cup Olive Oil
  • Salt And Pepper, to taste

Directions

  1. Combine the salad greens, apple slices, pecan halves, dried cherries, and blue cheese in a large bowl.
  2.  In a small bowl, combine the Dijon mustard, maple syrup, vinegar, olive oil, and the salt and pepper and mix it together.
  3.  Serve the salad dressing on the side so everyone can add as much or as little as they like.

That’s it! Hope you enjoy it.  I served my salad with baked salmon and asparagus.  Yum!

Apple, Pecan, and Blue Cheese Salad with Dried Cherries


Chocolate Almond Candy

While visiting a friend recently, she made what appeared to be chocolate turtles. Have you ever had them? They’re not “real” turtles but a mix of caramel, chocolate and pecans. However, the ones my friend made had no caramel — only bittersweet chocolate and almonds.

I love people who can naturally cook, don’t you? No recipes needed. They just go to the cupboard, see what they have and make some wonderful recipe up as they go. That’s how my friend cooks. So — when I asked her for the recipe she laughed (as she usually does when I ask the question) and said “I don’t have a recipe.”

In talking with her, I’ve come up with a recipe for the homemade chocolate almond candy she made. I have to warn you — this is not a Paleo recipe as most Paleo-ites try to have no more than 85% cacao in their chocolate if they have chocolate at all.  The one I used, which is from Trader Joe’s, has 72% cacao.

Still — I wanted to try it and it came out fine although the chocolate was a little soft after 3-4 hours. My friend told me they can take hours to harden depending on the weather and where you put them to cool. I forgot to ask her if they could be refrigerated to speed up the process. I’m guessing the answer would be yes.

Any type of nuts can be used but I chose whole almonds that I toasted in the oven. My friend has made this candy with hazelnuts also and they taste just as delicious. All you need are two ingredients … your dark chocolate and a nut of some kind.

Ingredients for Chocolate Almond Candy

I didn’t use a whole pound of chocolate. Temperance, temperance.

Anyway — here’s what I did and it came out beautifully. They can be addicting so I wouldn’t make them very often.

1) Put a large sheet of parchment paper and two spoons off to the side so you can have them ready to put your candy on. The size of the spoons will be determined by how large you want your candy pieces. The larger the spoons the larger the candy pieces.

Parchment Paper, Two Spoons

Continue reading “Chocolate Almond Candy”

Pure Maple Syrup in Lutsen, Minnesota

The Lutsen Resort where we were staying had a brochure at the activities desk that showed a couple of different places you could go to purchase pure maple syrup so we decided to take a drive and check it out.

Heading up the Caribou Trail, we stopped at the first farm store called the Caribou Cream. The store was small and we were the only ones there when we arrived. After a few minutes, another couple joined us and a few minutes after that, one of the farmers came in. Both stores are on the “honor” system so you log what you’re buying in a binder and then drop your money in the container they have.

The farmer was quite talkative and I was happy we were able to interact with him. But, unfortunately, I was distracted by our conversation and forgot to take pictures. Oh well … we purchased a couple bottles of maple syrup and headed to our car.

Further down the road on the same Caribou Trail, we took a road called Honeymoon Trail then Barker Lake Road to reach the next maple syrup farm.

Driving to this farm, called Wild Country, was interesting as I saw what looked like plastic piping going from one tree to another.

Maple Syrup Collection

The Wild Country Farm is much larger than Caribou Cream. Caribou Cream has 2500 trees that they tap compared to 18,000 for Wild Country. The number of gallons of sap collected in one year obviously are different also: Caribou Cream, 25,000 gallons and Wild Country, 130,000. The Caribou Cream has 45 acres of maple trees on its farm compared to Wild Country’s 320 acres.

The plastic tubing I saw that went from one tree to another is how they transport the sap to the “sugarhouse.” Oh — we finally reach the store.

Wild Country Store
Wild Country Store
Wild Country Store
Wild Country Store

This store was similar to the Caribou Cream with shelves lined with “everything pure maple syrup.”

Wild Country Store
Wild Country Store
Wild Country Store
Wild Country Store

Off in the corner, they had a sample of the plastic piping that they use to transport the sap from one tree to another.

Plastic Tubing for Sap Collection

After perusing the store shelves, we purchased some maple syrup and maple sugar and headed out the door.

On the way out, we noticed a LOT of plastic tubing lying on the ground.

Plastic Tubing for Sap Collection

Want to know more about maple syrup collection? The Wild Country has a website that gives you more information.  Click here to visit their site.

I wasn’t able to find a website for the Caribou Cream, however, they do have a Facebook account. Click here to visit their Facebook page.

Before heading home the following day, we drove around and took one last hike on a steep trail that overlooked Caribou Lake.  Here are some pictures of some of the scenery.

White Pine Lake
White Pine Lake
Lutsen, Minnesota
Lutsen, Minnesota
Caribou Lake View/Area

Crisp mornings, blue skies, shadows falling — autumn has always been my favorite time of year.

Related Posts:


Grand Portage State Park

A neighbor of ours recommended that we head to Grand Portage State Park to see the waterfalls while visiting the Lutsen, Minnesota area.

Grand Portage State Park is literally feet from the Canadian border. We could have gotten out of the car at the visitor center and walked across the border — that’s how close it was.

We were not disappointed in deciding to drive further north to see the waterfalls. They are beautiful.

The welcome center is very well maintained and once you enter the front doors, you simply walk across the hall to the other side and there are doors that take you to the trail that leads you to the waterfalls.

Grand Portage State Park Welcome Center Sign
Grand Portage State Park Welcome Center

The half mile trail is handicapped accessible — that is truly amazing!

Trail to High Falls, Pigeon River

There are a few benches for resting along the way although the trail is not strenuous.

Trail to High Falls, Pigeon River

What’s this? Yup. A snake. Anyone know what kind it is? After encountering this one, my senses were a keenly more alert of my surroundings.

Snake
Snake

And we finally arrived. The falls are estimated to be 100-130 feet high. Approximately 3200 gallons of water per second come down these falls.

High Falls, Grand Portage State Park

Looking across the river, you see Canada.

Grand Portage State Park, Canada View

This is the Pigeon River — where the falls go when they “fall” …

Pigeon River
Pigeon River

And I was treated to a most beautiful sight! A rainbow. So calming.

High Falls Rainbow, Grand Portage State Park

Nothing else could compete with the rainbow for beauty on this day. A beautiful end to a beautiful day.

I was tempted to head into Canada to a town called Thunder Bay but that would have made for a really long day so we headed back to Lutsen.

Click here for more information High Falls on the Minnesota Department of Resources website.

Related Posts