Joseph’s Family Restaurant

Driving along Minnesota 36 toward Stillwater, we usually pass a restaurant called Joseph’s Family Restaurant.  This last time, we decided to stop and eat there. The inside reminds me of an old-fashioned diner and has both booths and tables.

Joseph’s Family Restaurant

We were seated right away in a booth next to a window.  Brrr … a little cold in that spot but I was bundled up nicely so we didn’t request to move.

The waitress came over right away. She was friendly and answered all of our questions. I decided I wanted to have breakfast and most breakfast menu items are available for dinner.  I was not disappointed with the “Skillet” that I ordered. It’s basically over-easy eggs over hashbrowns covered with hollandaise sauce and whatever other filling you want to add. In my case, I just wanted cheese — plain and simple. You could choose toast or pancakes on the side.

The Skillet

It was good! But can you really mess up an egg dish? I certainly hope not!

My husband decided to be more bold and had the pork ribs. I was told that they were good but there was not much meat on them bones.

Pork Ribs

Overall, Joseph’s is a good place to go eat. Most of the reviews I’ve read for it give them a 3 or 4. I’d probably be at a 3.5.

Another Minnesota restaurant that we’ve tried and many more to go.

Joseph’s Family Restaurant
14608 60th St N
Stillwater, MN 55082
(651) 439-3336

 (Note: Pictures aren’t that great as I used my phone and the lighting was a little dim.)


Baked Chicken Drumsticks

Ahhh … baked chicken. Growing up, we always had fried chicken but this baked chicken tastes just like its fried without all the added fat.

I recently ran across a blog that told how to fry drumsticks very easily and surprisingly, it worked for me. I didn’t use any of the “recipe ingredients” but instead focused on the directions and used whatever ingredients I had in the house.

Directions

  • Preheat oven to 350 degrees
  • Line a baking sheet with foil and spray it with non-stick spray like Pam
  • Wash the drumsticks, pat them dry then put them on the cooking sheet
  • Sprinkle one side of the drumstick with whatever you like such as: salt, pepper, poultry seasoning, garlic salt, onion salt, etc
  • Bake for 45 minutes
  • Turn the drumsticks to the other side and sprinkle with your ingredients again
  • Bake this side for another 45 minutes
Fried Drumsticks

I thought for sure the chicken would be overcooked but it wasn’t. They came out crunchy and perfect!

How simple!

Special thanks to Christie’s Recipes for the simple directions.

[amazon_link id=”B001NC8HNG” target=”_blank” container=”” container_class=”” ]PAM No-Stick Cooking Spray - 2/8oz cans[/amazon_link]


With Costco close by, I can buy large packages of drumsticks that I keep frozen until I need a simple dinner.

Fennel, Pear and Walnut Salad with Reggiano Parmesan

I’ve changed parts of this recipe (that I recently found) because I made “newbie” mistakes.

First, I didn’t read the recipe close enough so when it said “white balsamic vinegar,” I read balsamic vinegar which I already had in my cupboard. Second, the recipe called for white pepper and I read “pepper” which I, again, already had in my cupboard. That’s what happens when you try to find a new recipe quickly.

I think the original recipe was trying to make the salad look “white.” But you know what?  It turned out great!. The recipe below includes the changes I made to the original. Oh — one last thing. This was supposed to be a vegan salad but I used REAL cheese. So, if you want it to be vegan, just use soy cheese or leave the cheese out.

Ingredients for the salad

  • 1 fennel bulb, thinly sliced or shaved
  • 2 pears, thinly sliced
  • 1/3 cup walnuts, chopped and toasted in a 350 degree oven for 8 minutes or so
  • Parmesan cheese, grated
Ingredients for the dressing
  • 3 tablespoons walnut oil
  • 2 tablespoons brown balsamic vinegar
  • 1 tablespoon lemon juice
  • 2 tablespoons agave syrup
  • A pinch of salt
  • A pinch of pepper
  • 1 teaspoon freshly ground fennel seeds
Ingredients

Directions

  1. Combine the walnut oil, balsamic vinegar, lemon juice and the agave syrup in a small bowl and mix the ingredients well.
  2. Add the salt and pepper to your taste.
  3. Grind the fennel seeds and add them to the dressing. I used my small coffee grinder (cleaned, of course) to grind the fennel seeds and it worked great.
  4. Whisk everything together and set this dressing aside.
  5. Chop the walnuts, toast them and put them in a small bowl until needed.
  6. Slice the core (bottom) of the fennel.
  7. Cut the fennel bulb in half and slice it thinly.
  8. Slice the pears thinly (with or without the peel, to your delight!).
  9. Mix the pears and fennel slices together with a small bit of dressing in them to coat it (to avoid discoloration).
  10. Sprinkle the walnuts and cheese on top.
  11. Serve the extra dressing on the side.
Whala! I served this salad with butternut squash ravioli. Ummm, ummm, good!
Dressing Without Fennel Seed
Whole Fennel Seeds
Grind the Whole Fennel Seeds
Ground Fennel
Thinly Slice the Pears
Fennel, Pear, Walnut & Parmesan Salad
Oh, this was my first time using fennel and here’s what I learned:
  • Fennel also goes by the name of anise in the grocery store
  • The whole top portion of the fennel is not edible although some people use the grassy-looking part as garnish
  • If you’re going to “shave” instead of slice the fennel, a useful tool is a mandolin
  • Here’s a link to a Youtube video on fennel that I found useful (it’s not for this recipe but as a newbie cook I found it quite helpful)
  • Here’s a picture of the top of the fennel. The bottom looks like a tulip bulb.
Fresh Fennel
It’s always fun to try new recipes since I’m not the kind of person who knows how to put food together without one.  Special thanks to Vegalicious Recipes for the inspiration.

[amazon_link id=”B001F5RSEK” target=”_blank” container=”” container_class=”” ]Progressive International HGT-11 Folding Mandoline Slicer[/amazon_link]

Our First Autumn Fire

The fireplace is up and running! What a wonderful feeling to not only see the beautiful gold-orange glow but to feel the warmth that emanates from it.

First Autumn Wood Fire

Our family room has so many windows that make the room colder but when the fireplace is on — well, it warms me through and through like cuddling in a quilt.

We are on the hunt for window curtain panels but haven’t been able to find the right color that matches our yellow and bluegreen walls. Tomorrow I’ll be heading to J C Penney and possibly Ikea to check out what they have. The room is tall so we need extra long panels.

I’ve tried ordering them online (through Penney’s) but can’t quite get the right color so wind up returning them locally.

But that is tomorrow’s problem.

Today I’ll enjoy the warmth that is reaching out to me from the fireplace.


Sandy’s Effects

Watching the news yesterday on the Sandy hurricane that is passing through the United States east coast, I was shocked to see people standing close to the edge of a boardwalk playfully “teasing” the water as they walked back and forth to the edge to try to avoid the splashes coming on shore.

I didn’t get it. With all the warnings to evacuate or stay indoors, “hunker down” is what they called it, I couldn’t understand why these people felt a need to “tempt” fate.

Today we know that lives have been lost. Some of those lives were of people who did “hunker down” in their homes but trees fell on their houses killing them.

One could say it doesn’t matter — that fate will get you either way. Yet for the ones who died accidentally most people would mourn. For those who stand on the edge tempting fate, had they died, most would say they deserved it.

Life is precious. When we don’t heed the warnings then we suffer consequences, sometimes. And when we heed the warning we are safe, sometimes.

And as unpredictable as life may be, I still choose to heed warnings and do all I can to keep myself safe. For there will come a time when not heeding a warning could truly make the difference between life and death.


Lingual Nerve Damage

Brrr … its cold outside this morning but I had a chiropractor appointment so I forced myself out of my warm bed. Looking outside, the leaves still look a little wet from the recent rain we’ve received. Rain that, unfortunately, will still not get us out of the drought we’re in.

I enjoy going to see my chiropractor. He was referred to me by a masseuse that I go to every now and then. I trust her and her healing hands truly help me with my stiff neck. Just recently I asked her if she knew of a chiropractor that might work with lingual nerve damage and she said she knew of one who worked with laser treatment on nerves that might be able to help.

That’s how I found my chiropractor. He was a good listener from day one and suggested that the laser treatment he uses just might help as it helps with other nerve problems.

Initially I went to see him twice a week. The first laser treatment I received made me believe I was definitely going to be healed of this lingering problem (caused by a dentist trying to numb my mouth during a root canal).

The laser they use is an Avicenna laser. It is supposed to help in stimulating deep tissue healing. Although the chiropractor had never tried it with lingual nerve damage he was optimistic enough for me to say “let’s try it.”

Almost 6 weeks later I can say that I have definitely noticed a difference on the left side of my mouth. My tongue doesn’t have a continual burning or discomfort/pain most days. The laser treatment I receive is very simple. They point the laser on my face where the lingual nerve connects to the rest of the mouth and for 10 minutes they move the laser back and forth. After 10 minutes, I open my mouth and they point the laser inside my mouth towards the lingual nerve and work that area for another 5 minutes.

I’ve read other blogs of people who have this problem and no one has yet suggested this remedy. I was on the verge of going to see my oral facial surgeon to see if there was anything that can be done. From internet reading, the lingual nerve “might” heal itself in 2 months or 20 years. That’s a LOT of time to be in pain and I’m already at 1 year and 7 months.

I am thankful that I can try this FDA approved laser treatment and hope that it will speed up the healing of my lingual nerve sooner rather than later. It certainly seems like I’m well on my way.

I’m not sure if this is covered by insurance though as my insurance doesn’t cover chiropractic visits so I pay out of pocket and reimburse myself through the Health Savings Plan.

Has anyone else tried this kind of therapy for lingual nerve damage? I’d be interested in hearing from you.

Update: March 22, 2013

The laser therapy had worked very well and my lingual nerve problems had completely gone away by the beginning of 2013. Because I had also had problems with TMJ, the chiropractor referred me to a dentist he knew so I could have a proper mouth guard made. TMJ, according to the chiropractor, can exacerbate the lingual nerve.

However, when I became sick with bronchitis in February, the lingual nerve started acting up again. I will be heading back to the chiropractor next week.

The chiropractor had also explained that inflammation in the body can prevent the lingual nerve from healing so I should be careful with what I ate and he recommended removing sugar (except for occasional honey and pure maple syrup), gluten and dairy from my diet. At first, I was hesitant to do this because I didn’t think my husband would go along with it.

When my son came to visit in December, he decided he wanted to cook for us and in January started us on a paleolithic diet which is gluten free, dairy free (except for eggs) and sugar free. Funny how life has worked things out.

I believe that the lingual nerve is better because of the diet, i.e. it’s not as bad during this recurrence as it was initially when it first started.

So I’m hoping that this is a minor setback for me as it took almost four weeks for me to recuperate from the bronchitis which is a big inflammation causer.


A TSA Museum?

Really? A TSA Museum?

What’s next in our crazy mixed up world? I was reading a blog recently called View from the Wing and the museum is in that blogger’s town.

It’s really sickening to me. I’m not a fan of TSA. Oh, and get this — the museum is not open to the public. Yeah, okay government. Spend our money and don’t give us access to what you spend it on.

More government waste!  I think the political ads must be getting to me of late must be getting to me.


The Threat of Snow

That’s what the weather folks said “the possibility of snow up to an inch.” That was last night and the “threat” didn’t materialize in my neck of the woods. It is a tad chilly, I’d even call it cold because the wind is from the north and has quite a bit of a bite to it.

Almost all of the leaves on the trees are on the ground. The driveway has a large wet accumulation of them that I just raked up. This is the second day of raking wet leaves that can making driving slippery. So much has yet to be done with raking leaves and this morning I found out that I have until Thanksgiving week to send them off with the yard waste. Woohoo! After today we’re expecting to have a week of dry, in the 40’s, weather which is great weather in my eyes.

This morning I decided to succumb to one way of reducing our car insurance costs by starting the 8 hour AARP Online Driver Safety Course. The charge is $15.95 for taking the course (if you’re an AARP member) but it’s well worth it. Once I complete the course, AARP will send me a certificate that I will forward to my insurance company and get a 10% reduction each year for the next three years.  Not too bad, eh? I didn’t even know such a course existed except that I read some of the “paraphernalia” that the insurance company mailed me awhile back.

The AARP Driver Safety Course is pretty basic but it sure makes me feel old. It’s for people 50 and older and it has sections about our slow metabolism, slow reaction time, loss of vision and hearing — brother! Perhaps they should take me to a nursing home already!  (laughing)

Oh — a few white flakes are coming down. I guess it is our first snowfall of the year. The snow won’t stick though as it’s too warm out yet.

Well, I guess I better get back to my “senior” driving course. (laughing)


Roasted Cauliflower and White Cheddar Soup

I’m not overly fond of cauliflower but this recipe received rave reviews so I thought, why not try something new?

Ingredients

  • 2 tablespoons oil
  • salt and pepper to taste
  • 1 tablespoon oil
  • 1 medium onion, diced
  • 2 cloves garlic, chopped
  • 1 teaspoon thyme, chopped
  • 3 cups vegetable broth
  • 1 1/2 cups aged white cheddar, shredded
  • 1 cup milk or cream (I used cream)
  • salt and pepper to taste
  • Potato Flakes (optional)

Directions

  1. Toss the cauliflower florets, salt, pepper, and 2 tablespoons of  oil in a large bowl then arrange them in a single layer on a large foiled baking sheet.
  2. Roast the cauliflower in a preheated 400F oven until lightly golden brown, about 30 minutes.
  3. Heat one tablespoon oil in a medium pot over medium heat.
  4. Add the onion and saute until tender, about 5 minutes.
  5. Add the garlic and thyme and saute for one minute, more or less.
  6. Add the broth and cauliflower to the onion mixture, bring to a boil then reduce the heat and simmer (covered) for 20 minutes.
  7. Puree the soup in small portions with a stick blender or in a regular blender until it reaches your desired consistency.
  8. Bring the pureed soup back to the pot, warm through, add the cheese, let it melt then season with salt and pepper.
  9. Add the milk, stir and remove from heat.

Whala! The soup tasted pretty good although it had a grainy feel on my tongue. Next time I think I’ll puree it a little finer.

Oh — one small hint on thickening soup — I added a little bit of potato flakes to the soup while it was warm (not hot) to thicken it. You don’t need to do this but I like my soup a little thick and this works as good as the cornstarch/water trick.

This recipe is courtesy of Closet Cooking, a blogger that I follow. Click here to view the original recipe.

[amazon_link id=”B001NC8HQS” target=”_blank” container=”” container_class=”” ]Idahoan REAL Premium Mashed Potatoes - 3.25lbs.[/amazon_link]

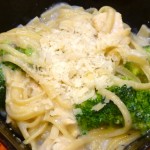
Chicken & Broccoli Alfredo

I can’t tell you exactly where this recipe came from. All I know is I saw it in the newspaper and cut it out so I could try it. It’s very easy to make and tastes just fine.

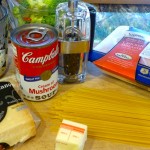
Ingredients

  • 1/2 lb linguine pasta
  • 1 cup fresh or frozen broccoli florets
  • 2 tablespoons butter
  • 1 1/4 lb skinless, boneless chicken breast halves, cut into 1 inch size pieces
  • 1 can (10 3/4 oz) Campbell’s Condensed Cream of Mushroom Soup
  • 1/2 cup of milk
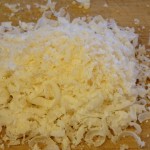
  • 1/2 cup grated Parmesan cheese
  • 1/4 teaspoon ground pepper

Directions

  1. Prepare the linguine according to the directions on the package.
  2. Add the broccoli during the last 4 minutes of cooking.
  3. Drain this mixture in a colander and rinse in cold water so the noodles don’t stick together.
  4. Heat the butter in a large skillet over medium-high heat.
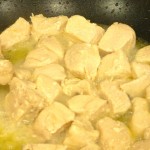
  5. Add the chicken and cook until it’s well browned and cooked through, stirring often.
  6. Add the soup, milk, cheese, black pepper and linguine to the chicken and mix it thoroughly.
  7. Cook until the mixture is hot and bubbly, stirring occasionally.

If you like, you can have some extra shredded cheese on the side to put on top of the servings.

It actually tasted pretty good. I also added a wee bit of salt but other spices can be added if you think it might be too bland for you. I found it perfect just the way it was.

Enjoy!