Gingersnap Cookies

It’s not too late in the Christmas season to post another cookie recipe, is it? This recipe is one my son made last year and recently I decided to make it myself because I remember the smell and taste of the cookies. It was a very sweet memory.

With these cookies, the dough is frozen so you can make as few or as little as you want at a time. Hey, make them all at once and … no, no, no temperance is key here.
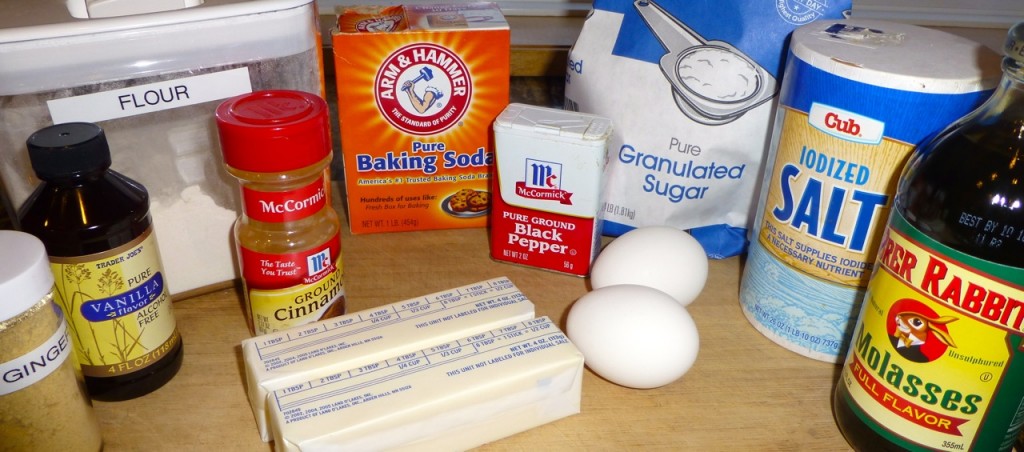
Ingredients

  • 8 ounces unsalted butter (that would be 2 sticks)
  • 1 1/4 cup + 2 tablespoons sugar
  • 1/2 teaspoon vanilla extract
  • 2 smalls eggs (at room temperature)
  • 1/3 cup molasses
  • 3 cups all purpose flour
  • 2 1/2 teaspoon baking soda
  • 1/2 teaspoon salt
  • 2 1/2 teaspoon cinnamon
  • 2 1/2 teaspoon ground ginger
  • 1/8 teaspoon black pepper

Directions

  1. Allow the butter to warm at room temperature (or soften in microwave)
  2. In an electric mixer, cream the butter until soft
  3. Add the sugar and beat until the mixture is light and fluffy
  4. Add the vanilla and the eggs then beat until fluffy (fluffy seems to be the theme here)
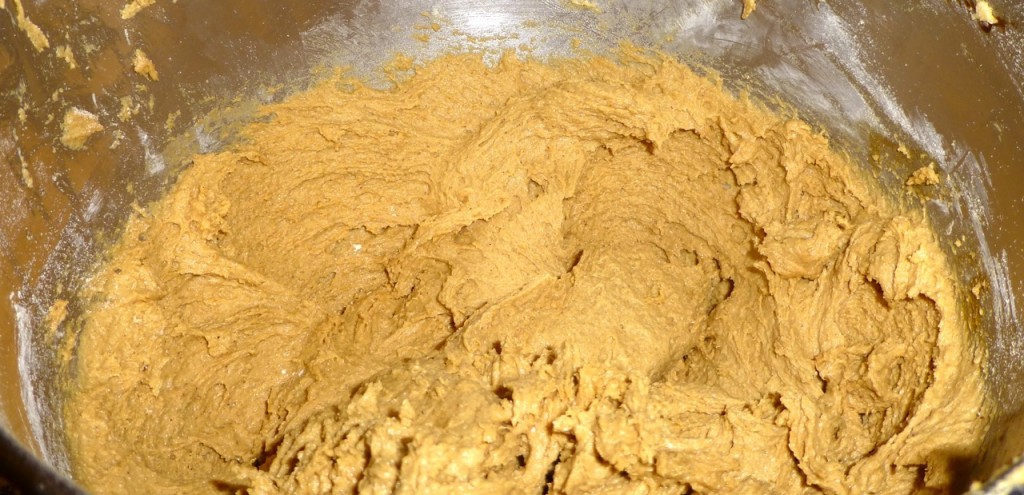
  5. Add the molasses (making sure you get every bit of it out of the measuring cup) and beat until everything is well combined
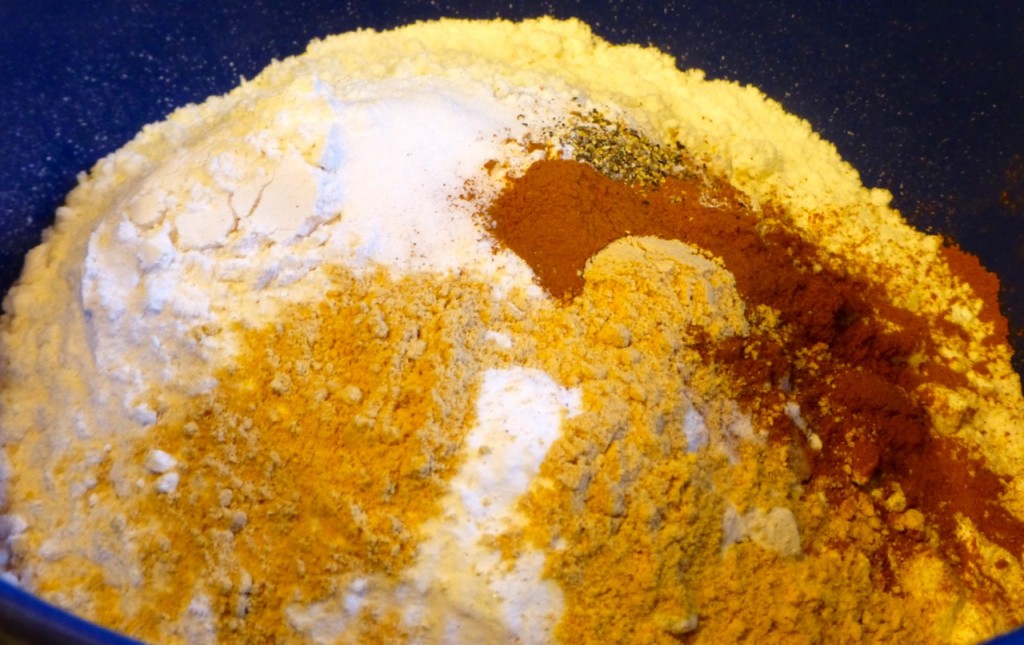
  6. Combine the dry ingredients together, sift them,  then add them to the mixture
  7. On low speed, mix everything together until it is just combined
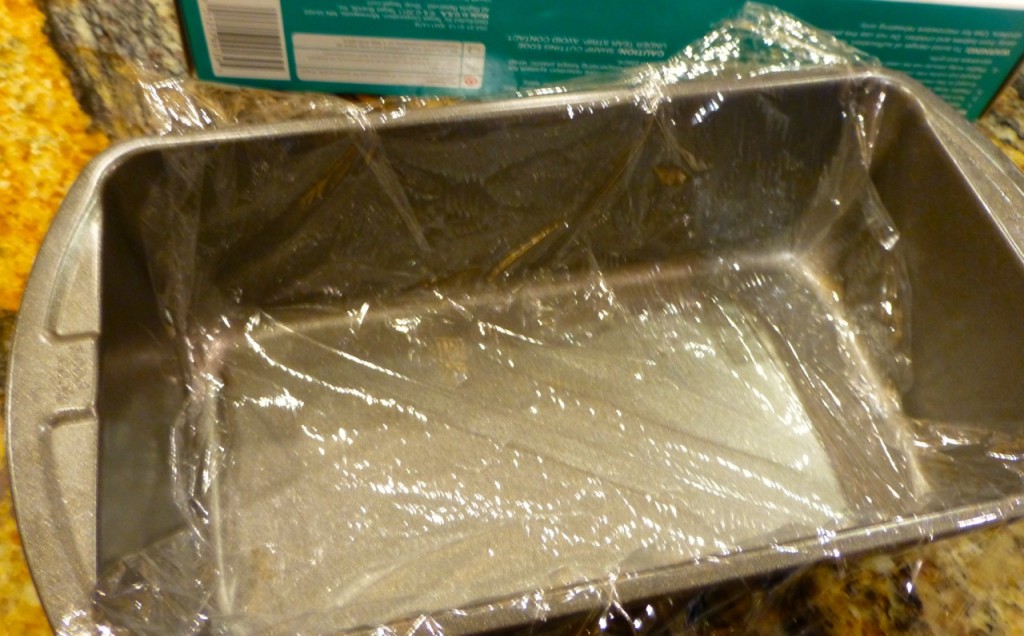
  8. LIne a 9″x5″ loaf pan with plastic so that some of the plastic hangs over all 4 sides
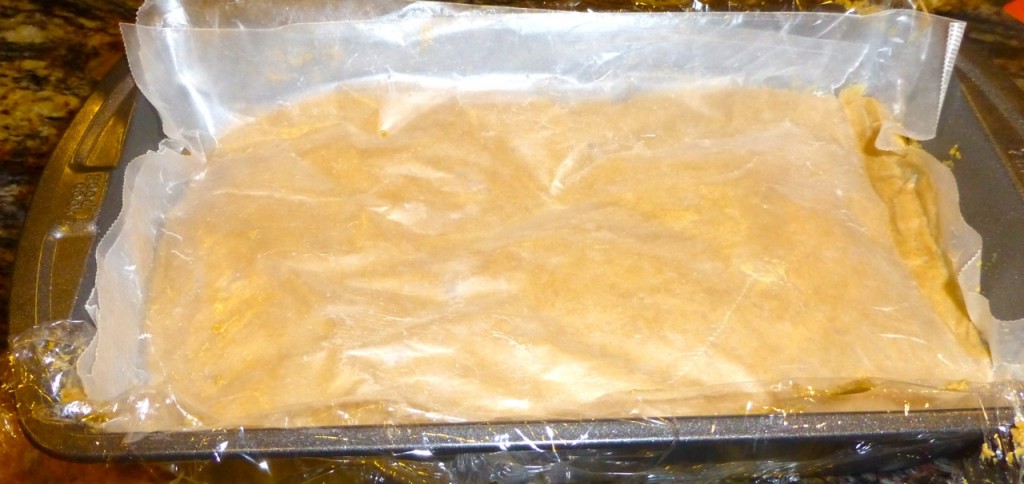
  9. Transfer the dough into the bottom of this pan and pack it down into the bottom of the pan (I used wax paper on the top then pressed my hand down on it)
  10. Try to make the dough as level as possible
  11. Cover the dough with the plastic overhangs
  12. Freeze the dough until its very firm, preferably overnight
  13. When ready to use, unwrap and remove the dough from the pan
  14. Slice the dough into thin slices, no more than 1/8″ thick (just eyeball it)
  15. Line a cookie sheet with parchment paper and place the slices of dough on it being careful not to place them too close to each other
  16. Bake at 350 degrees until the edges turn dark brown, about 12 minutes. For softer cookies, bake for approximately 10 minutes. Keep in mind that every oven is different, eh?

That’s it! So simple, so good, so yummy, so … well, you get the point.

Ingredients
Ingredients
Add dry ingredients together
Add dry ingredients together then sift
Combine dry and wet ingredients
Line a pan with plastic wrap
Add dough to pan and press it firmly down
Add mixture to pan and press it firmly down
Bake at 350 degrees
Bake at 350 degrees for 10-12 minutes

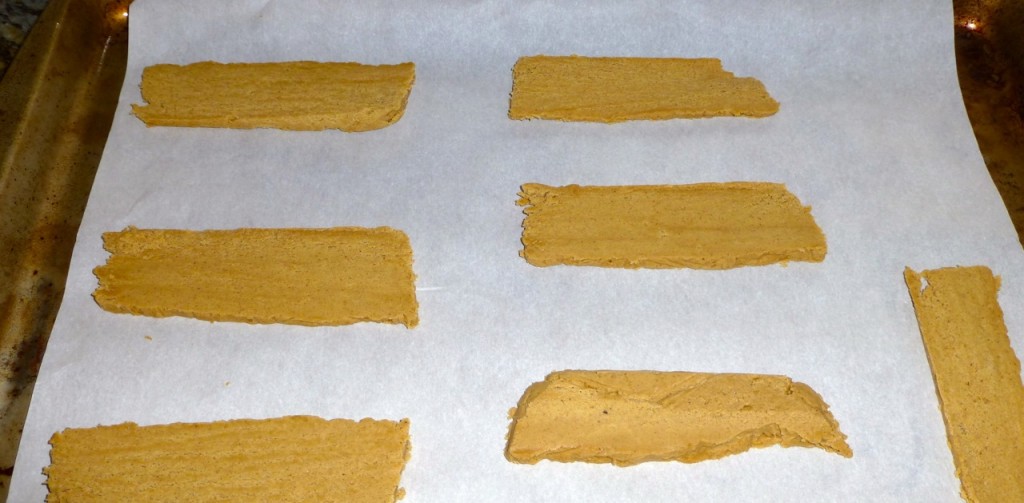
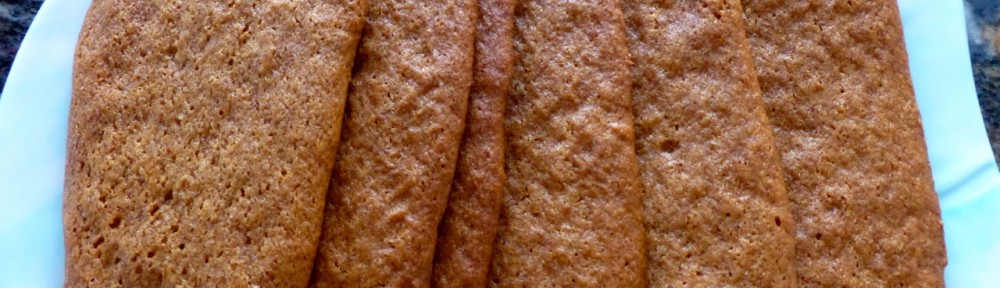
(Notice that some slices came out a wee bit thicker than others. Aim for perfection when slicing but don’t stress if you miss the mark. They’re only cookies, after all.

Gingersnaps
Gingersnaps

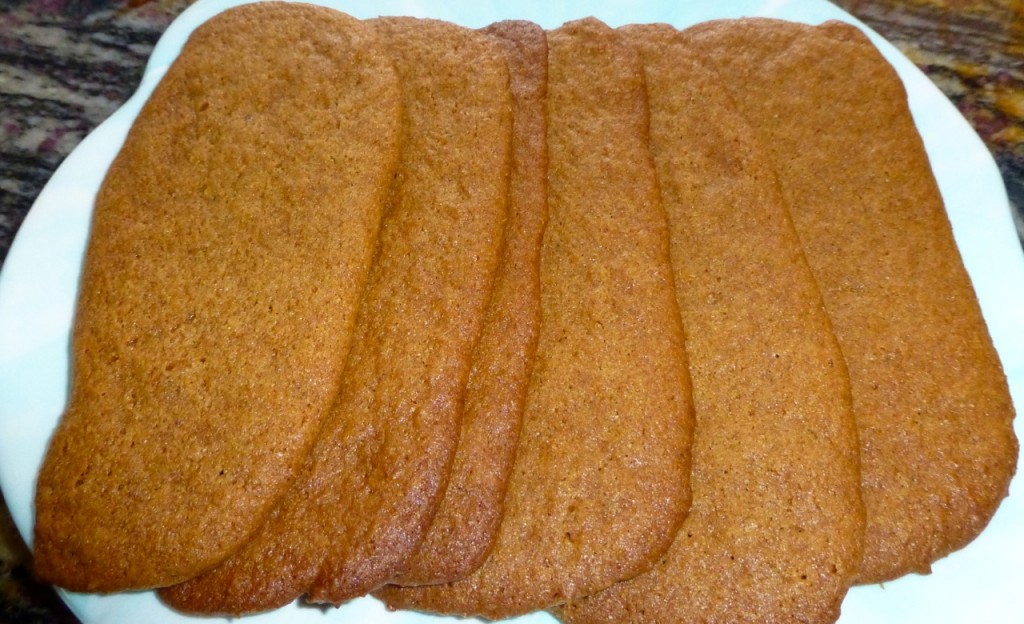
Fresh out of the oven, small glass of milk in hand … delicious!

Enjoy! Enjoy! Enjoy!

(Note: Not sure exactly where this recipe came from as many “stories” abound. I do know that they were served at the Chez Panisse restaurant at one time.)


Frittata

This butternut squash, mushroom, kale and sausage frittata came out pretty good except for “cook” error which you’ll see at the end of the post. (no peeking!)

The frittata was quite filling and I absolutely love the taste of the squash in it which gave it a hint of sweetness. Very very good!

Ingredients

  • 2 large sausages, I used the chicken ones from Trader Joe’s that don’t have the pork casing
  • 1 tablespoon oil
  • 2 cups butternut squash, cut into bite sized pieces
  • 1 tablespoon oil
  • 1 onion, diced
  • 4 ounces mushrooms, sliced
  • 1 cup kale, torn into bit sized pieces
  • 8 eggs
  • 1/2 cup milk or cream
  • 1 cup gruyere, shredded
  • salt and pepper to taste

Directions

  1. Cook the sausage over medium-high heat in a pan, remove the sausage, set aside and reuse the pan for number 2 below.
  2. Add 1 tablespoon of oil and the butternut squash to the pan and cook it until its tender, about 7-10 minutes, then set this aside in a bowl.
  3. Add 1 tablespoon of oil to the pan again then add the onion and mushrooms and cook until the onions are tender and the mushrooms are browned, about 5 minutes.
  4. Add the kale to the above mixture and saute until wilted, about 3-4 minutes.
  5. Mix everything in a large bowl, pour it back into the pan and cook over medium heat until the eggs are almost set, about 7-10 minutes.
  6. Transfer the pan to a preheated 400F oven and bake until the eggs have set, about 10 minutes.
Ingredients
Ingredients
After preparation, mix all ingredients in a bowl
Allow the mixture to “almost set” before putting it in the oven
Butternut Squash, Mushroom, Kale and Sausage Frittata

Below is the “cook error” that I referred to. I allowed the frittata to “set” on the stovetop a little too long and the bottom got a wee bit burnt. Lucky for us it was still edible and didn’t taste burnt.

P1010806

This recipe calls for the frittata to be cooked in an oven proof fry pan before transferring it to the oven.

You can also put the frittata in a casserole dish and bake it that way. In this case, the eggs will have to bake more than the 10 minutes so keep an eye for when they are “set.”

Note: Special thanks to a fellow blogger who I follow, Closet Cooking, for this recipe.


Turkey Barley Soup

Winter’s approach means soup time! Served with warm bread and a crisp salad, I could live on soup all winter.

This soup was tweaked just a tad because it assumed you had leftover turkey from Thanksgiving and since we didn’t have to cook for Thanksgiving we had no leftovers.

If you have leftover turkey, great! Otherwise, I have a workaround for you to try. Oh — I highly recommend getting a meat thermometer so that you know when to take the meat out of the oven without it being overcooked and tough. My sister-in-law gave me one a few years back that has worked great. Click here to see one that’s similar.

Oneida Digital Probe Thermometer

Okay then — onward and upward!

First, let’s work on getting some turkey ready for this soup. I bought 2 large turkey thighs and baked them for an hour and a half at 350° Fahrenheit. I used my thermometer and made sure that the inside temperature was no less than 165 before I took it out of the oven.

Uncooked Turkey Thighs

Here they are all baked and pretty looking …

Baked Turkey Thighs

I let the thighs cool for a bit and literally tore the meat off of it with my hands. How’s that for heading back to caveman, uh, woman, days? The meat pulled off pretty easy and I tore it into small pieces.

Okay then! Now onward to the soup!

Ingredients

  • 3 Tbsp olive oil
  • 1 large onion, chopped finely
  • 3 garlic cloves, minced
  • Salt and black pepper, to taste
  • 1 teaspoon ground turmeric
  • 1/2 teaspoon ground cumin
  • 1/2 teaspoon ground ginger
  • Juice of 1/2 a lemon (original recipe calls for a full lemon but that was too much so add a little at a time and taste it as you go along)
  • Strips of lemon zest, from one lemon (make them large so you can take them out later)
  • 6 cups turkey or chicken stock (I used chicken) plus the drippings from the baked turkey
  •  1/2 cup to 1 cup barley (more barley will yield a thicker soup)
  • 2 cups chopped turkey
  • 1/4 cup chopped parsley or 2 tablespoons dried
Directions
  1. Heat the olive oil over medium-high heat in a heavy pot.
  2. Add the onion and cook until the onion is translucent, about 3 minutes.
  3. Stir in the chopped garlic and cook another minute.
  4. Mix in the turmeric, cumin, ground ginger and salt (to your taste).
  5. Add the lemon juice, turkey stock and the strips of lemon zest.
  6. Bring to a simmer then add the barley.
  7. Simmer gently until the barley is cooked, about 20-30 minutes.
  8. When the barley is cooked through, add the chopped turkey and the parsley plus the salt and pepper (to your taste).
  9. Cook gently until the turkey is warmed through, about 5 minutes.
  10. Remove the lemon zest strips before serving.
This soup was very good (although I should have used less lemon than the original recipe called for). It’s nice ‘n thick also (for those people — like my husband — who don’t like pureed type soups).
Ingredients
Add onion, garlic, turmeric, cumin, ground ginger and salt then stir all.
I used a reamer to get the juice out of the lemon.
Reamer
And a zester to get the lemon strips.
Lemon Zester
Chop or hand “rip” the turkey into small pieces
Cook soup through til turkey is warm
 Ahhh … now, this is one good soup!
Turkey Barley Soup
 Get yourself some fresh bread and it’s really all you need. I didn’t serve a salad with this soup as it was substantial enough with the barley and turkey.

Enjoy!

[amazon_link id=”B00004OCJO” target=”_blank” container=”” container_class=”” ]OXO Good Grips Lemon Zester[/amazon_link]
[amazon_link id=”B006CFQ9FC” target=”_blank” container=”” container_class=”” ]Fox Run Lemon Reamer, Wooden[/amazon_link]

[amazon_link id=”B00004XSC5″ target=”_blank” container=”” container_class=”” ]Taylor 1470 Digital Cooking Thermometer/Timer[/amazon_link]


Special thanks to simplyrecipes for this soup.


Cranberry, Chocolate and Oatmeal Cookies

I was going to be really really ambitious in December and make a different cookie recipe a day. Well, I made my first batch of cookies, fell in love with them and then determined that perhaps a cookie recipe a day would be a little bit too much. (laughing)

I’ve shared these cookies with my neighbors and will have to continue to share any more cookies I make or I’ll be really rollie pollie by the time Christmas comes around.

This is also a special recipe because in the middle of it the directions were unclear and I sent a quick note to the blogger and she responded within 5 minutes. It was amazing!

So — here it goes. The original recipe uses fresh cranberries but says you can use dried ones so I chose the dried. They were scrumptious!

Ingredients

  • 1 cup all purpose flour
  • 1/2 teaspoon baking soda
  • 1/2 teaspoon cinnamon
  • 1/4 teaspoon salt
  • 10 tablespoons (1 1/4 sticks) unsalted butter at room temperature
  • 1/2 cup sugar
  • 1/2 cup (packed) golden brown sugar
  • 1 large egg at room temperature
  • 1 teaspoon vanilla extract
  • 1 cup old-fashioned oats
  • 1/2 cup semisweet chocolate chips
  • 1 milk chocolate bar, broken into small chunks (such as Nestles – for drizzling)
  • 1/2 cup dried cranberries
  • 2 ounces milk chocolate chips

Directions

  1. Preheat oven to 350°F.
  2. Line a large baking sheet with parchment paper.
  3. Whisk flour, baking soda, cinnamon, and salt in a medium bowl to blend it all together.
  4. Using an electric mixer, beat butter and both sugars in a large bowl until smooth.
  5. Beat in egg and vanilla.
  6. Add flour mixture and oats to the mixer ingredients then stir until blended.
  7. Stir in all chocolate chips (semi-sweet and milk chocolate) and cranberries.
  8. Drop batter by rounded tablespoonfuls onto prepared baking sheet, 2 inches apart.
  9. Bake cookies until edges are light brown, about 16 minutes.
  10. Cool on baking sheet about 5 minutes then transfer to a rack to allow to cool completely.
  11. Put the pieces of the milk chocolate bar in a small pot and melt through.
  12. Using a small spoon, drizzle melted chocolate over cookies in zigzag pattern then let stand until the chocolate on the cookies sets, about 1 hour.
  13. These cookies can be made 2 days ahead of time and stored in an airtight container at room temperature.
That’s it! I thought the cookies might taste too cranberry-ish but that was not the case. More cranberries could have actually been added.
Ingredients

Lots of ingredients but trust me — this recipe is worth it.

Cookie Dough
Drop by tablespoon onto a parchment-lined cookie sheet
Cranberry, Chocolate & Oatmeal Cookies

And then there’s the chocolate drizzle … I didn’t worry about it being “pretty” because I had already tasted a cookie when it came out of the oven so I knew they would be good with or without the chocolate.

Drizzle melted chocolate over cookies

Special special thanks to my fellow blogger at thewickednoodle. Click here to see the recipe I tested and tried.

Absolutely delicious!


Potato Salad

Yes, potato salad in late autumn. One of the problems with shopping at Costco is that you have to buy a lot of things in bulk and we bought hamburger patties so I decided to make potato salad to go with it.

This recipe surprised me because it uses red vine vinegar and I had never seen anyone use that ingredient in potato salad before.

It came out exceptionally well and I learned a few things too.

Ingredients

  • 2 pounds Yukon Potatoes or New Potatoes (I used Yukon)
  • 2 Tablespoons Red Wine Vinegar
  • 1 teaspoon Kosher Salt (or 1/2 Teaspoon Table Salt)
  • ½ teaspoons Ground Black Pepper
  • 3 whole Boiled Eggs, Diced
  • 3 Scallions, Sliced Thin
  • 1 stalk Celery, Diced
  • ¼ cup Sweet Pickle (not Relish), Diced
  • ½ cup Mayonnaise
  • 2 Tablespoons Dijon Mustard

Directions

  1. Clean potatoes then place them (whole) in a 5- to 6-quart pot.
  2. Cover with water and bring to a boil. Put a lid on the pot then simmer stirring once or twice to ensure even cooking until a thin-bladed knife inserted into the potato can be removed with no resistance, 25 to 30 minutes for medium potatoes and 15 to 20 minutes for smaller potatoes.
  3. Drain the potatoes then rinse them under cold water and drain again.
  4. While the potatoes are still warm, cut them into 3/4-inch cubes with a serrated knife.
  5.  Layer them in a medium bowl and sprinkle with the red wine vinegar, salt and pepper as you go along.
  6. Refrigerate the potatoes while preparing the remaining ingredients.
  7. Mix the remaining ingredients with the potatoes and refrigerate until ready to serve.

That’s it! Pretty simple. I still consider myself a “basic” cook so one thing I didn’t know that I learned was that I could boil potatoes whole. Whoduhthunkit????

Ingredients (except the potatoes and below)

Boil the potatoes whole
Red Wine Vinegar – (not included in picture above)

.Be careful not to burn yourself when you cut the potatoes. Let them cool a bit.

Cut the cooked potatoes into 3/4 inch cubes
Layer the potatoes in a bowl
Potato Salad

Since I like mustard, I probably should have added a little bit more to the salad.

 This recipe is courtesy of Tasty Kitchen

Vegan Banana Bread

I found another moist banana bread that is really good and is also vegan. (If you don’t care whether you use dairy or not, see the other recipe I posted by clicking here.)

This recipe was easy to make. I didn’t have “real” maple syrup so I substituted the “fake” syrup and it turned out just fine.

Ingredients

  • 2 cups all-purpose flour
  • 3/4 cups white granulated sugar
  • 1/2 cup dark brown sugar, packed
  • 3/4 teaspoon baking soda
  • 3/4 teaspoon salt
  • 3/4 teaspoon cinnamon
  • 1/2 cup plain soy milk or almond milk (I used almond)
  • 1 teaspoon apple cider vinegar
  • 2 cups mashed banana, from about 4 large very ripe bananas
  • 1/4 cup canola or vegetable oil
  • 2 teaspoons maple syrup
  • 1 teaspoon vanilla extract
  • Walnuts (optional, but I did not use them)

Directions

  1. Preheat the oven to 350 F. Lightly oil a 9″x5″ loaf pan and set aside.
  2.  In a medium-sized mixing bowl, sift together the flour, sugars, baking soda, salt and cinnamon.
  3. In a large mixing bowl, whisk together the soy or almond milk and the cider vinegar and let stand for 2 minutes.
  4. Add the mashed banana, oil, maple syrup, and vanilla extract, whisking until well combined.
  5. Add the dry ingredients to the wet ones, mixing until just combined (do not overmix!).
  6.  Fold in the walnuts (if using) and pour the batter into the prepared loaf pan.
  7. Bake for about 1 hour, or until a toothpick inserted into the center comes out clean.
  8. Allow the bread to cool on a wire cooling rack for 20 minutes before serving.

That’s it! It took my loaf 70 minutes to bake instead of the 1 hour so check your bread around the 55 minute mark to see how its doing.

Another change I made was using 2 frozen bananas (in addition to the 2 ripe ones I had). I nuked them in the microwave for 30 seconds and added them (along with the juice) to the two other bananas then mashed them together.

Ingredients
More Ingredients

I know, the de-frosted frozen bananas look a little weird but I have found that when I use them (and the juices that they make) the banana bread comes out quite moist. I also like chunks of banana in my bread so I don’t mush them to death.

Mash the defrosted and ripe bananas together
Pour the mixture into a loaf pan
Vegan Banana Bread

One piece or ??? We all had two pieces which were delicious. Especially when the bread is warm.

Slice of Vegan Banana Bread

Hope you enjoy it!

Note: The original recipe came from dairyfreecooking.


Spinach Salad with Almonds, Fuji Apple and Figs

I’m finding that the simpler the salad the more tasty it is. This salad is chockful of vitamins and tastes delicious. I did not have white balsamic vinegar (again) so used regular balsamic vinegar. I must go buy some as more and more recipes seem to call for it.

Note: Make sure you lightly coat the salad with the vinaigrette and keep the rest on the side so that people who don’t like a lot of vinaigrette don’t gag on it.

Ingredients

  • 1/4 cup olive oil
  • 2 tablespoons balsamic vinegar
  • 1/2 teaspoon sugar
  • Salt & pepper
  • 5 cups fresh baby spinach, washed
  • 1 cup toasted slivered almonds
  • 1/2 cup sliced or chopped figs
  • 1 Fuji apple, peeled, cored and cut into bit size pieces

Directions

  1. In a small bowl, combine the oil, vinegar, sugar, salt and pepper to your taste then set aside.
  2. In a large bowl, combine the spinach, almonds, figs and the apple. Add the vinaigrette a little at a time, toss the salad and taste it until the vinaigrette reaches the “right” consistency for you.

That’s it! Pretty simple, eh? The figs can be replaced with cranberries or any other dried fruit but they gave the salad a tad bit of sweetness which I liked. The almonds crunchiness  worked wonderfully with the spinach. Potato chip lovers — make a salad and use almonds for a healthier snack. Better yet, make this salad.

Ingredients
Spinach Salad with Almonds, Fuji Apple and Figs

We had a little bit leftover and the next day I finished it off and it still tasted as good.

This recipe was found in one of my favorite books 1000 Vegan Recipes.

[amazon_link id=”B009CVA2GA” target=”_blank” container=”” container_class=”” ]1,000 Vegan Recipes [ 1,000 VEGAN RECIPES BY Robertson, Robin ( Author ) Oct-01-2009[/amazon_link]

Cranberry Carrot Salad with Citrus Walnut Vinaigrette

This simple yet delicious salad took no time at all to make. I always toss my salads with a touch of vinaigrette then serve the rest on the side as most of the time the amount of vinaigrette that’s called for drenches the salad instead of lightly coating it.

Ingredients

  • 1 pound shredded carrots
  • 1 cup sweetened dried cranberries
  • 1/2 cup toasted walnut pieces
  • 2 tablespoons fresh lemon juice
  • 3 tablespoons walnut oil
  • 1/2 teaspoon sugar
  • 1/4 teaspoons salt
  • 1/8 teaspoon freshly ground black pepper

Directions

  1. In a large bowl, combine the carrot, cranberries and walnuts then set this aside.
  2. In a small bowl, whisk together the lemon juice, walnut oil, sugar, salt and pepper.
  3. Combine the dry and wet ingredients.
  4. Lightly coat the dressing over the salad, toss gently to combine, then serve.

That’s it! Pretty simply, eh?

Ingredients
Shred the carrots
Cranberry Carrot Salad with Citrus Walnut Vinaigrette

I found this recipe in one of my favorite vegan cookbooks called 1000 Vegan Recipes.

[amazon_link id=”B009CVA2GA” target=”_blank” container=”” container_class=”” ]1,000 Vegan Recipes [ 1,000 VEGAN RECIPES BY Robertson, Robin ( Author ) Oct-01-2009[/amazon_link]

A Cooking Tip

There are many times when I have to boil potatoes and I normally follow the same course of events:

  • Fill the pot with water
  • Add the potatoes
  • Watch the pot to make sure the water doesn’t boil over onto the stovetop
  • Boil the potatoes until a fork pricked through one of the larger pieces goes through easily

Sound familiar? This past weekend, I learned something new as I watched my sister make potato salad. She followed the same basic steps except she wasn’t watching her pot to make sure the water didn’t boil over. So, I did.

It suddenly dawned on me that she had a wooden spoon lying across the pot. I guess that’s a good place to put the spoon so you don’t have to use a spoon rest.

Boiling Pot

My sister thought it curious that I was sitting watching the pot and informed me that I didn’t have to watch it as the water wasn’t going to boil over. What? I asked.

“The water is not going to boil over because the wooden spoon won’t allow it to,” she said.

Yeah, right, I thought. So I continued watching. And continued watching. And continued watching. And the water did not boil over.

Pretty interesting, eh? Or am I the only one who didn’t know about this cooking tip?

Are there any other tips any of you know of that seem “unbelievable” but work perfectly?

[amazon_link id=”B0000CFROE” target=”_blank” container=”” container_class=”” ]RSVP Stainless Steel Double Spoon Rest.  7"[/amazon_link]

Aristo’s Greek & Mediterranean Restaurant

My husband and I have passed the Aristo’s restaurant quite a few times but figured it was not “authentic” Greek food so we always kept driving by. But, I was in the mood for Greek food one day and decided to look at the menu online (which looks scrumptious) so off we headed to dinner.

Aristo’s Greek & Mediterranean Restaurant

The lighting inside was dim (romantic?) as the host led us to our table. I’m not positive but I believe the staff is from Greece. Service was fantastic here as they took our orders immediately and made sure that things went smoothly — from appetizer to soup to dinner. Both our waiter and another gentleman (perhaps the owner?) checked with us to make sure there was no lapse in service.

We ordered an appetizer called Saganaki which is a lightly battered Kasseri cheese (my favorite cheese! if you haven’t tried it you should) flamed table side with rum and lemon juice. I was expecting a little piece of cheese but I was wrong as we received quite a large portion.

Saganaki
Saganaki

Then we had a wonderful green lentil soup which tasted better than the one I make at home (and I make a pretty good one).

Green Lentil Soup

And there was still dinner to be had. I had the Gyro Plate which is similar to a gyro sandwich except you don’t have the bread (although they gave you bread on the side). The onions were sweet tasting and everything was cooked to perfection.

Gyro Plate

My husband had the New York Steak which he downed quickly, meaning it’s good!

The restaurant has quite a few vegetarian options also.

My brain said “Have the baklava” but my stomach told me “You’re full.” I decided to listen to my stomach today. Kudos for me!

What a great place to go to for authentic Greek food. Check out their website below. It’s not the best looking website but it does its job.

http://www.aristosmn.com/